Packing school lunches doesn’t have to be a struggle, especially when your recipe toolbox includes easy, delicious options that kids love and parents feel good about. Here are ten creative ideas featured on to inspire weekly lunch packing.

Kid Approved Lunch Box Ideas
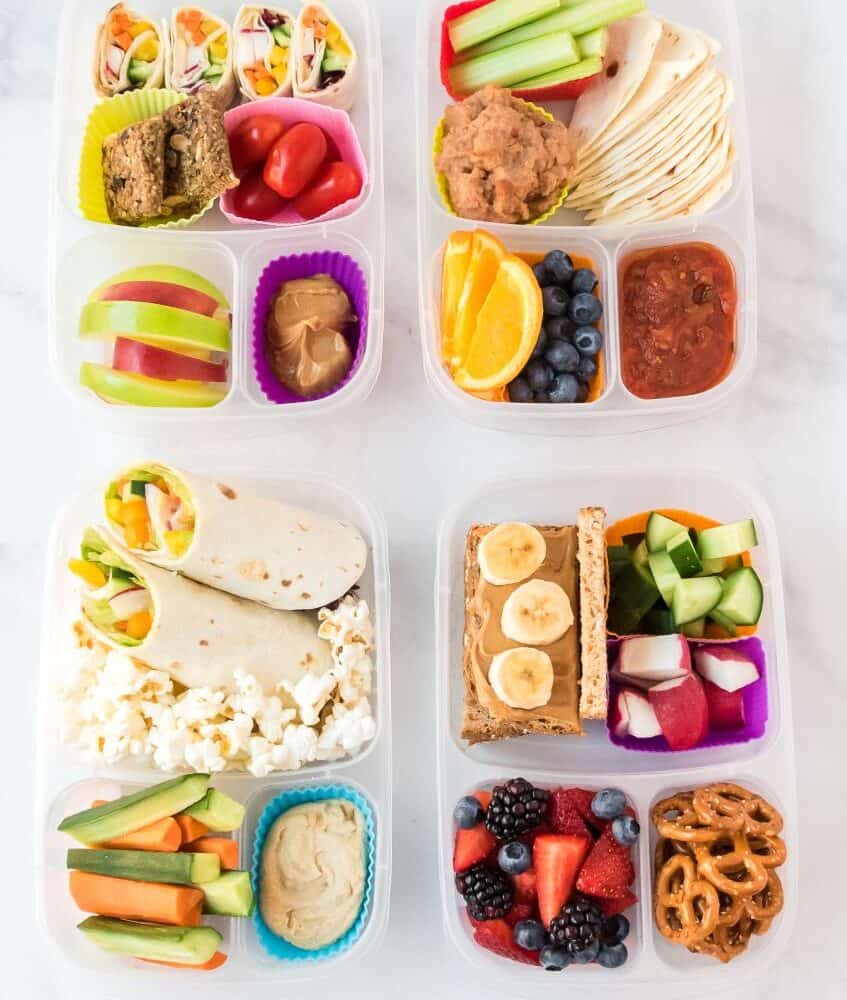
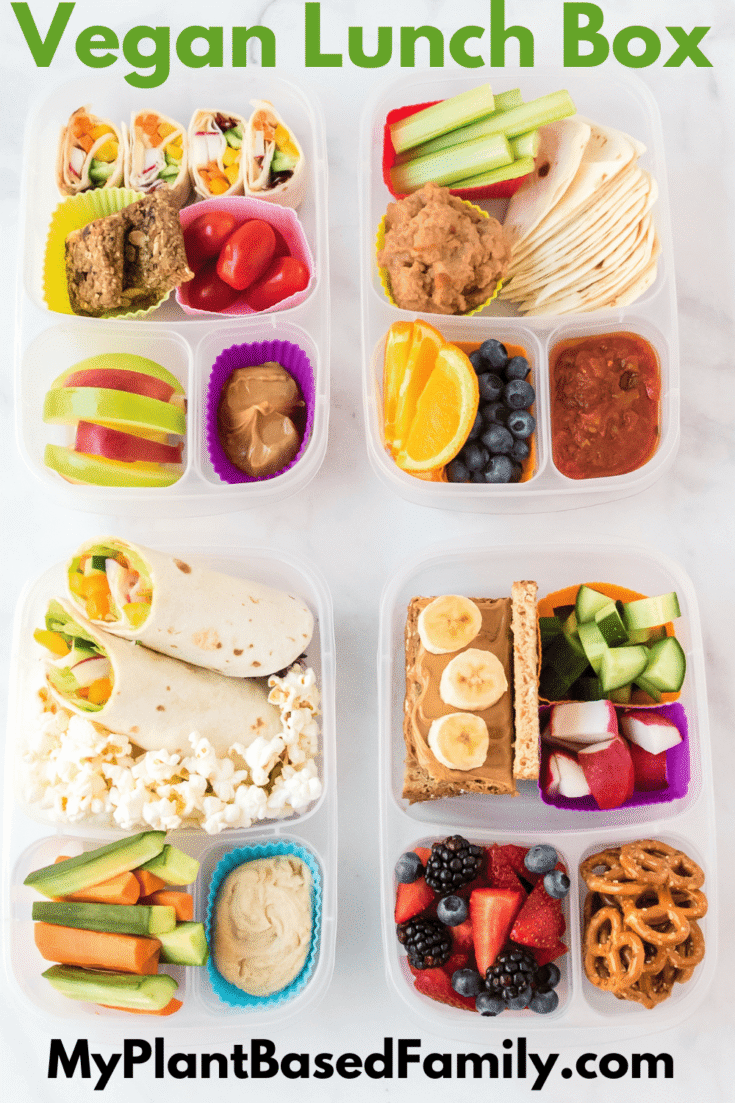
With these lunch box recipe ideas for kids, packing nutritious, plant-based lunches becomes both manageable and enjoyable. Whether it’s the cheesy comfort of a black bean quesadilla, the veggie rainbow of pinwheels, or the creative build-your-own burrito, every meal offers flavor, fun, and flexibility.
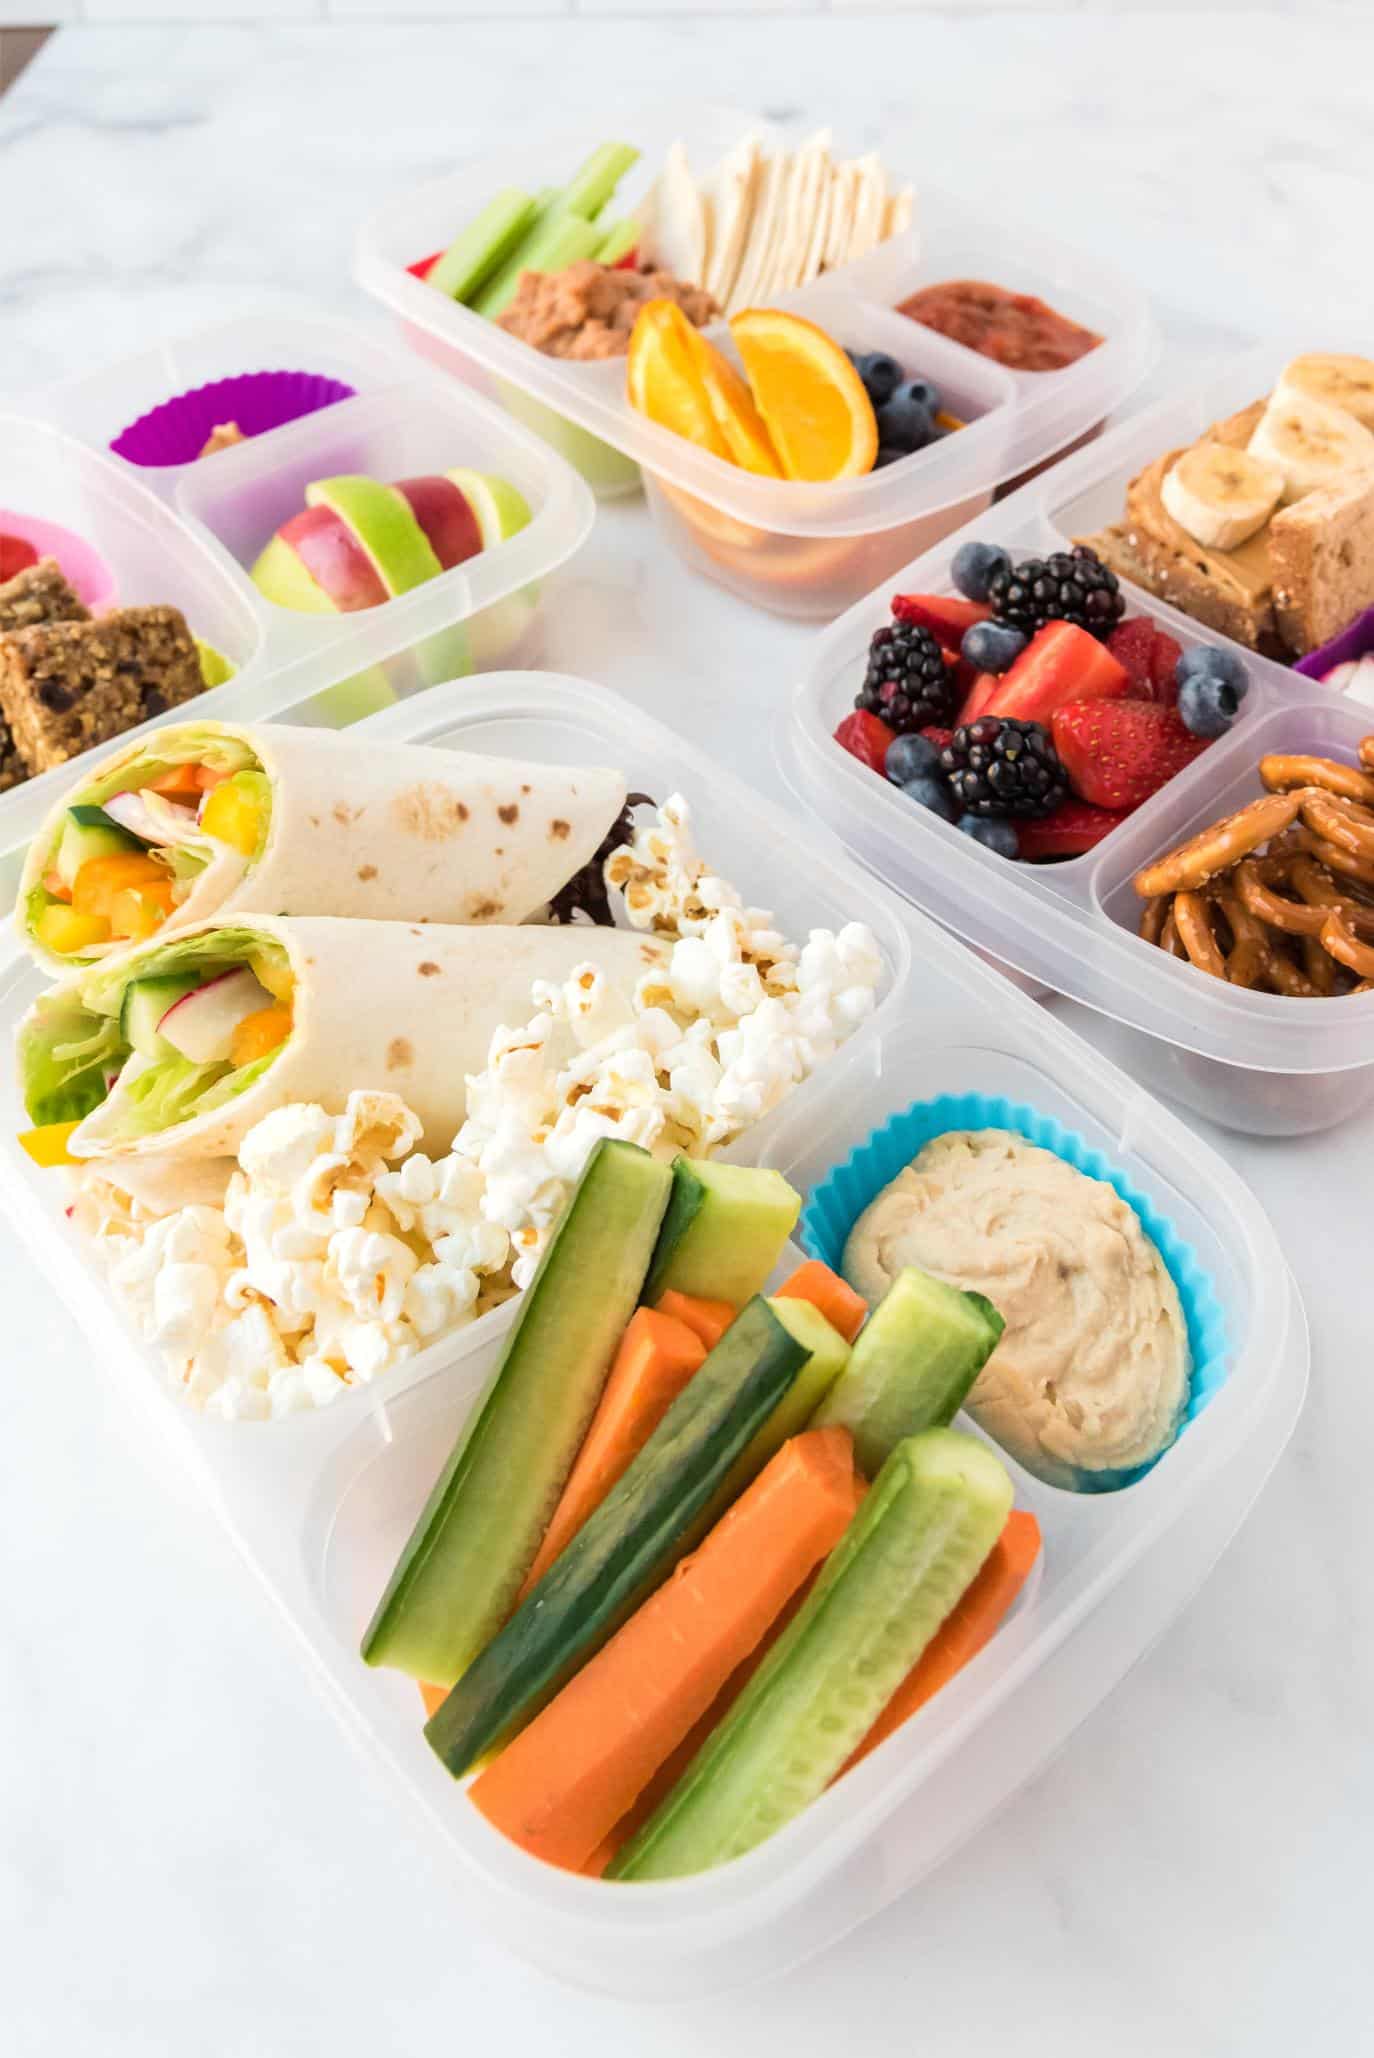
Kid-Approved & Portable: Options like quesadillas, pinwheels, tostadas, and wraps are easy to hold, fun to eat, and lunchbox-ready.
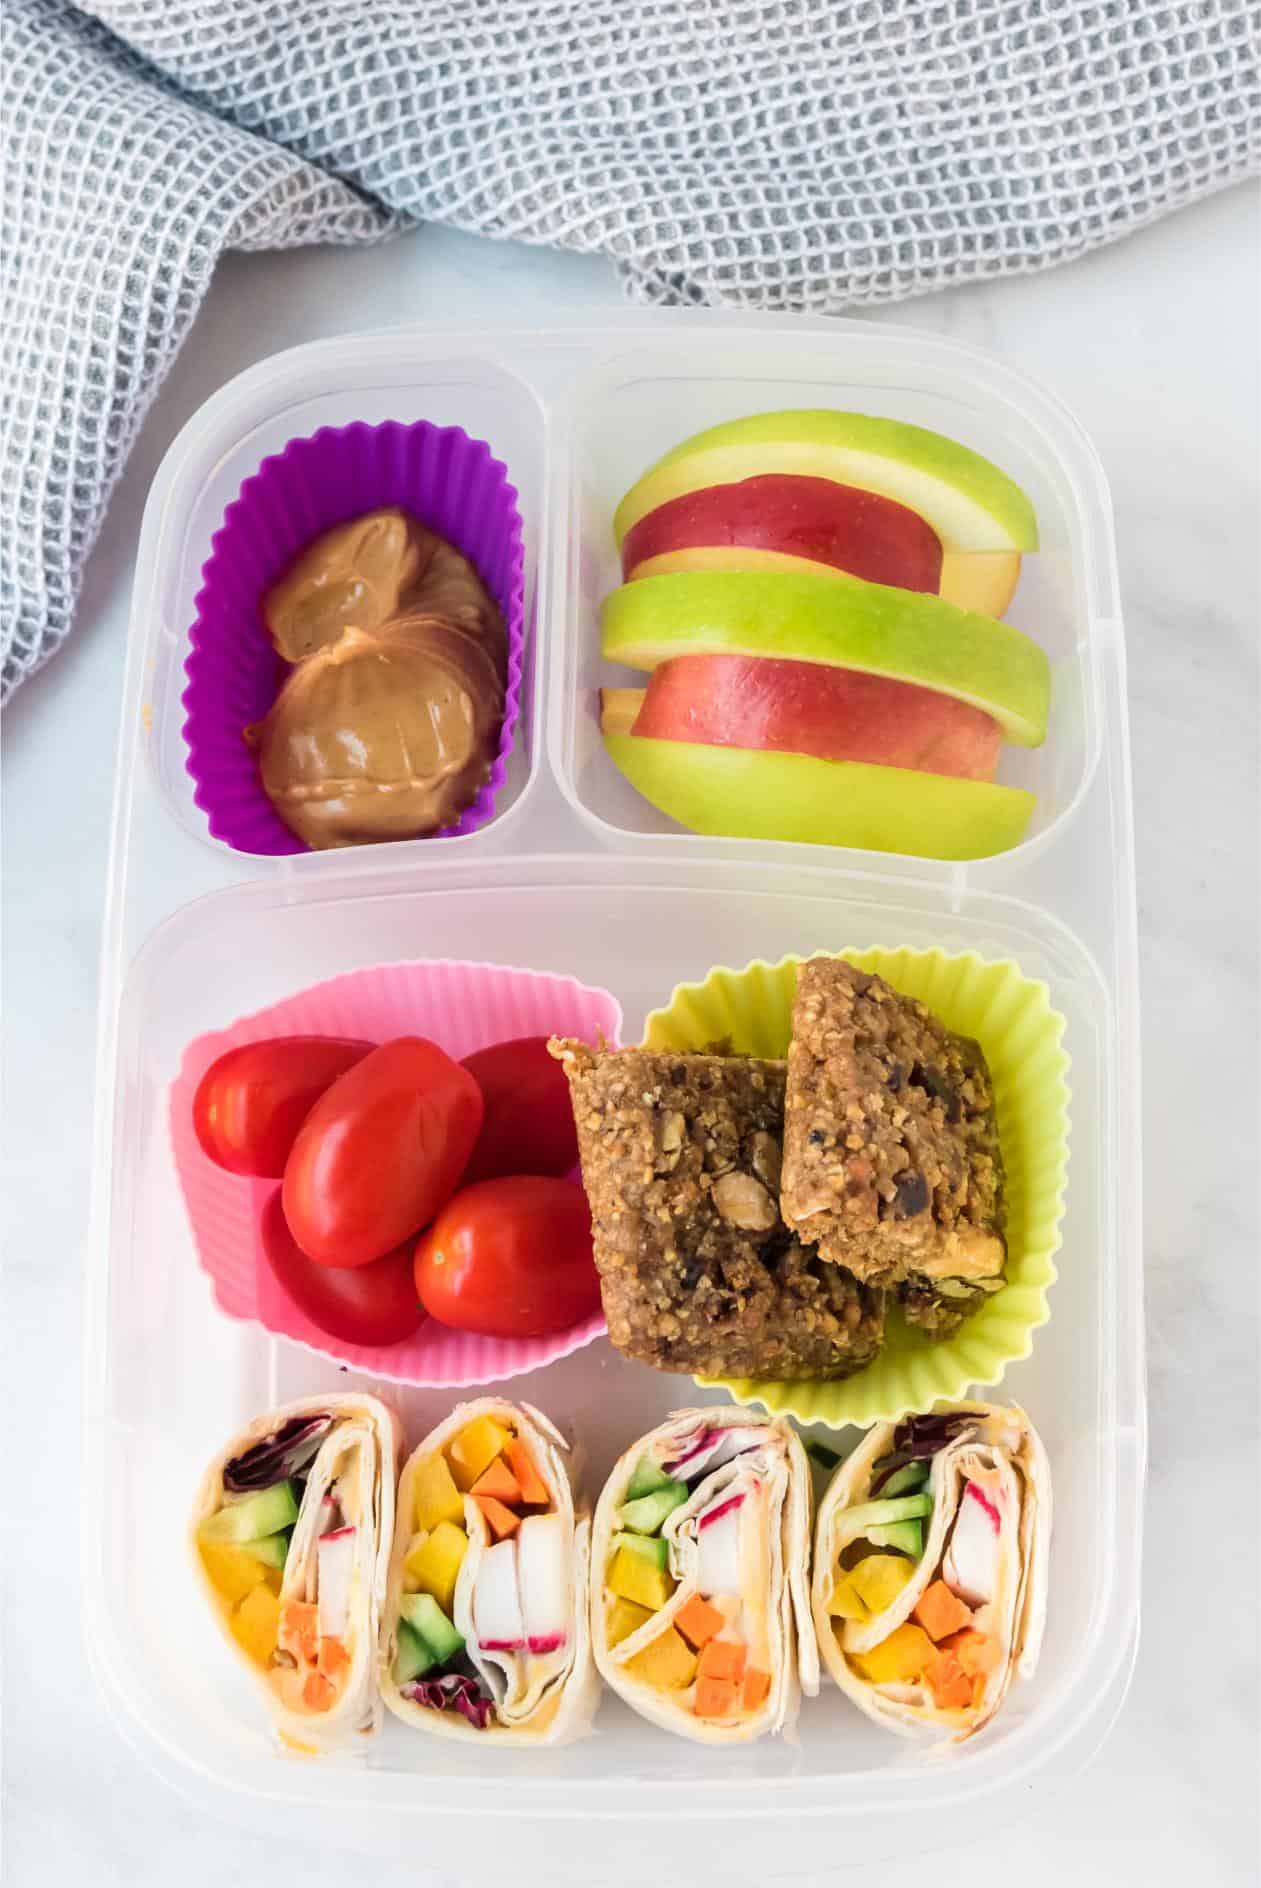
Nutrient-Packed: Combos with beans, legumes, whole grains, and vegetables give a balance of protein, fiber, and energy.
Customizable & Inclusive: Plant-based, many are gluten-free or allergy-aware—plus flexible to suit preferences.
Easy Prep: Many dishes hold up through the morning—salads, wraps, and bento-style mixes stay fresh with an ice pack.
10 Lunch Box Recipes for Kids
With these lunch box recipes for kids, packing nutritious, plant-based lunches becomes both manageable and enjoyable. Whether it’s the cheesy comfort of a black bean quesadilla, the veggie rainbow of pinwheels, or the creative build-your-own burrito, every meal offers flavor, fun, and flexibility.

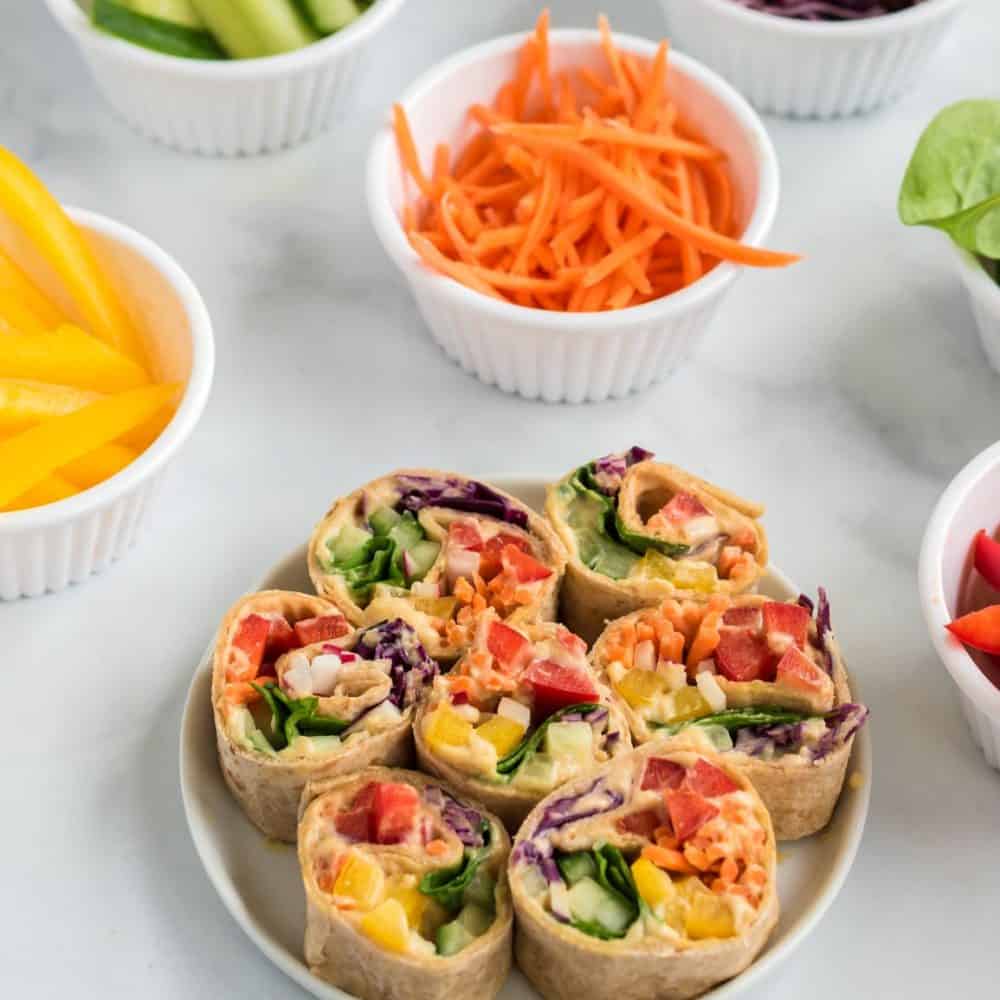
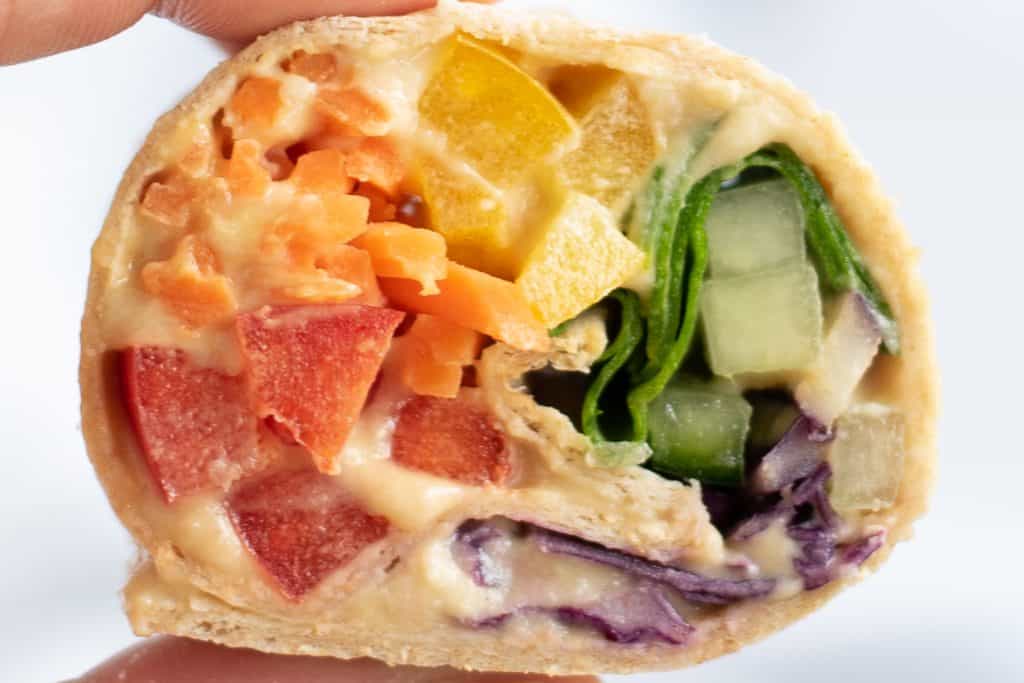
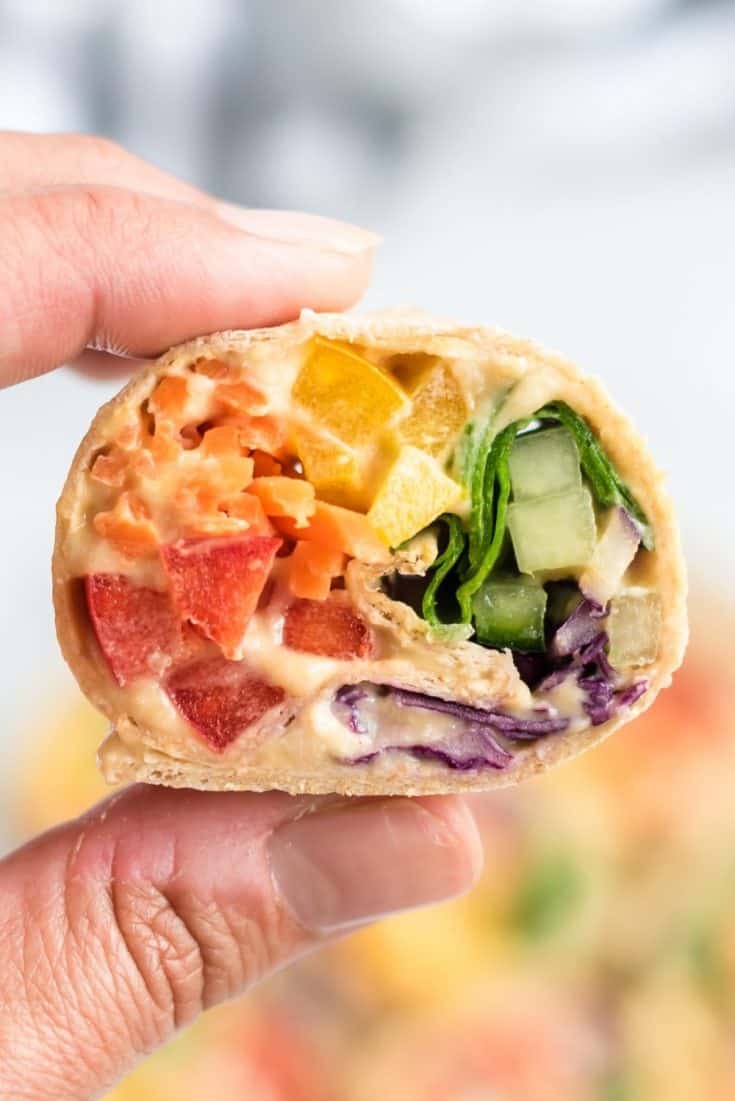
Bright, colorful, and fun to eat. Hummus spread on a tortilla, layered with vibrant veggies, rolled up and sliced into bite-sized pinwheels. A perfect sneak-in veggie fix!
Turn lunch into an interactive experience. Pack deconstructed ingredients like oil-free refried beans (Instant Pot style) and tortilla chips, and let kids build their own mini burritos or dip away.
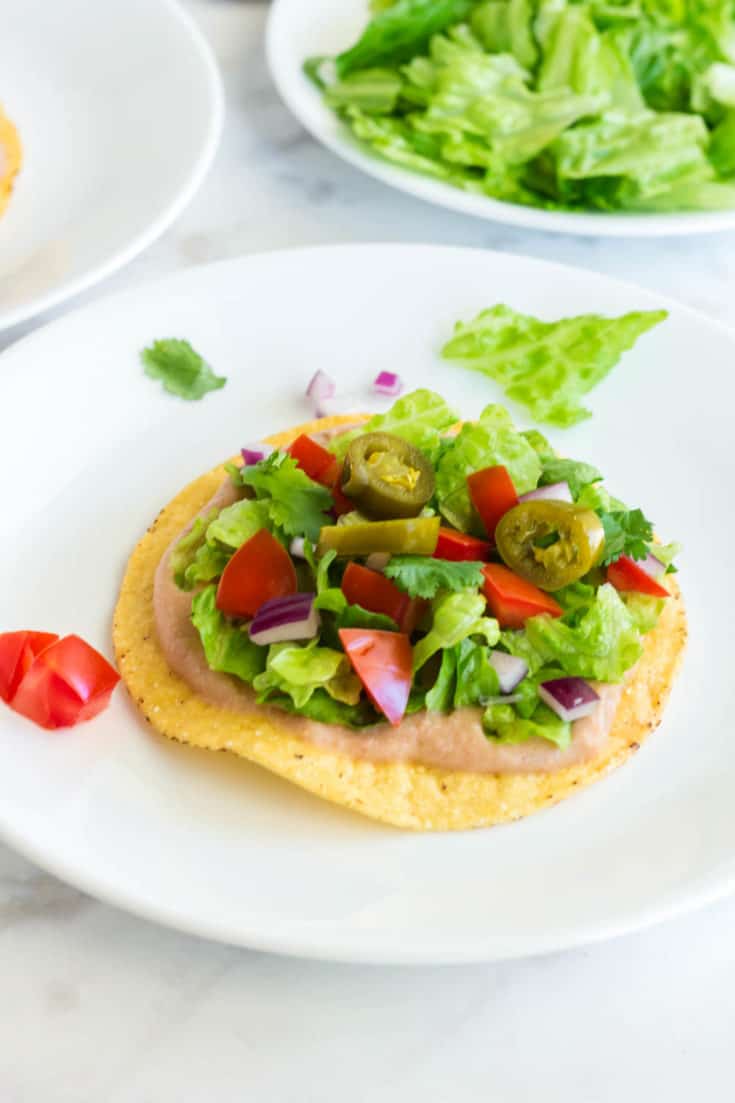
A crunchy corn tortilla base topped with beans, lettuce, tomato, and optional salsa. It's versatile, hands-on, and kid-friendly.

A vibrant, protein-packed salad with quinoa, chickpeas, fresh veggies, and zesty dressing. Nutritious, easy to prep, and holds up well for school lunches.
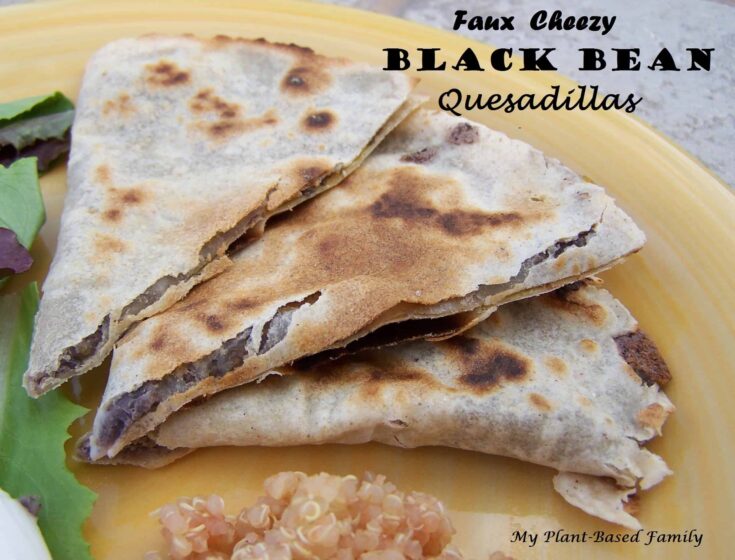
A vegan twist on a classic favorite with black beans and creamy dairy-free "cheese" nestled in a gluten-free tortilla. Toast till golden and slice into triangles for easy lunch box dipping.

Kid-friendly pasta tossed with crisp veggies and a tangy plant-based Greek dressing. Easy to make ahead and delicious cold or at room temperature.
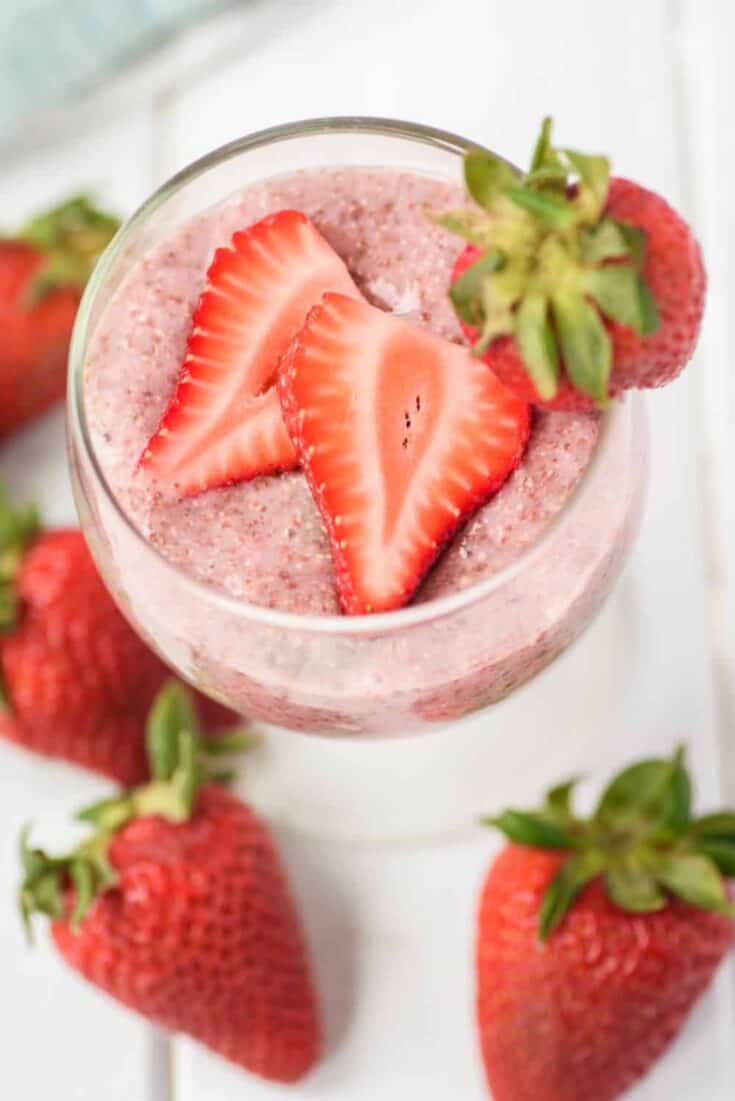
A refreshing, nutritious snack option. Creamy chia pudding made with plant-based milk and strawberries. It’s perfect as a sweet addition to a lunch box.

With a base of oats, they are a nutritious option for satisfying cravings and boosting energy levels throughout the day.

A basic burrito is easy to throw together, but it comes with big flavor and happy kids.

With only a few ingredients, you can blend up a healthier hummus that little fingers love to dip in. Add a side of cut up veggies, and you're all set.
Bonus: Smart Lunch Box Side Ideas for Kids
Round out the main dishes with tasty, easy-to-pack sides that kids love:
| Salty | Sweet |
|---|---|
| Pretzels (GF or regular) | Raisins |
| Tortilla chips (for dipping beans) | Apple Slices |
| Rice cakes | Dried fruit |
| Crackers | Granola (bars or bites) |
| Popcorn | Fresh Fruit |
These sides complement any of the main dishes above, offering variety and ease.
More Plant Based Recipes
If you love these lunch ideas, you’ll love these recipes for breakfast and dinner too:
- Chocolate Chip Breakfast Cookies
- Vegetable Udon Stir Fry
- Oatmeal Cups
- Vegan Lettuce Wraps
- Vegetable Spaghetti
No products found.