• Skip to primary navigation
  • Skip to main content
  • Skip to primary sidebar
  • Skip to footer

My Plant-Based Family

Eating Whole Food, Plant-Based Diet recipes, On a Budget.

  • Plant-Based Recipes
    • Breakfast
    • Main Dish
    • Instant Pot
    • Daniel Fast Recipes
    • Side Dishes
    • Bread and Muffins
    • Salad and Wraps
    • Soup, Stews, and Chili
    • Sauces, Dips, and Salad Dressings
    • Desserts
    • Crock Pot
    • Mexican Food
  • Videos
  • Resources
    • Getting Started
    • Books
      • The Plant-Based Diet Starter Guide
      • The Plant-Based Holiday Meal Plan & Cookbook
  • Meal Plans
    • Meal Plans 2020
    • Meal Plans 2019
    • Meal Plans 2017
    • Meal Plans 2016
    • Meal Plans 2015
    • Meal Plans 2014
    • Meal Plans 2013
  • About Us
    • Our Family
    • Contact Me
    • Our Food Philosophy
    • Disclosure Policy
      • Privacy Policy
  • Daniel Fast Recipes

Dairy Free

Banana Pudding Ice Cream

June 9, 2016 by Holly Yzquierdo 2 Comments

Banana Pudding Ice Cream has all of the flavor of traditional banana pudding but it's dairy-free!

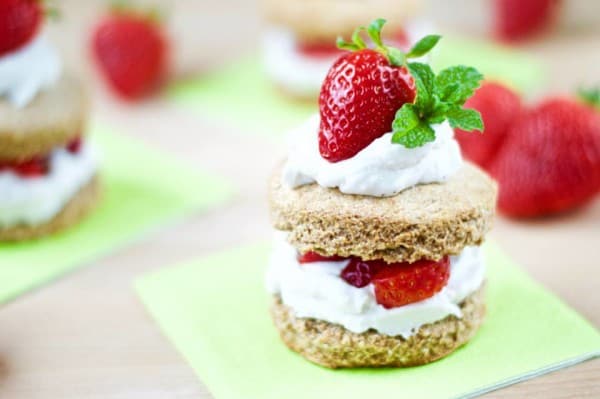
I grew up in the south and certain flavors remind me of my childhood. Banana pudding is one of those flavors. I wanted to recreate that flavor in a frozen treat, Banana Pudding Ice Cream was born.

There are a lot of vegan ice cream recipes out there. They aren’t very hard to make and many of them use frozen bananas. You may have heard them called “nice cream.” If you haven’t tried it you are missing out!

Banana Pudding Ice Cream has all of the flavor of traditional banana pudding but it's dairy-free!

For my recipe I wanted to keep it simple but add something to give it that banana pudding flavor. I accomplished that by using Enjoy Life Vanilla Cookies.

Disclaimer: These cookies are not vegan, they contain honey. I didn’t even realize that until I went to write this recipe out. I should have known because it’s right there on the box. We’ve used these cookies for a long time because they are one of the few delicious cookies that are free of the top 8 allergens and safe for people with food allergies. You can use a different cookie like these Snackimals that aren’t safe for food allergies or Enjoy Life Sugar Crisps that are top 8 free.

Banana Pudding Ice Cream has all of the flavor of traditional banana pudding but it's dairy-free!

I’m not one to eat many frozen treats. I’m just not an ice cream type of person but it’s been so hot here in Arizona that I really wanted to start making more ice creams and popsicles for my family. I love that I can control the ingredients and avoid artificial sweeteners and food dyes by spending just a few minutes creating them.

The sweetness from the bananas and the cookies were more than enough for this treat. I didn’t add any other sweetener, just a little vanilla and plant-based milk.

I always have frozen bananas in my freezer because I like putting them in smoothies. If you plan to make this ice cream you can peel the bananas, cut them into pieces then freeze. I usually freeze bananas whole but then I have to peel them and they are much harder to work with that way.

While you don’t need any “special tools” you will need either a food process or a blender. I use this food processor that I bought years ago. You could even use a blender but you might have to use more liquid and stop more often to push the ice cream off the sides. I’m going to try using my Blendtec Twister Jar next!

Banana Pudding Ice Cream has all of the flavor of traditional banana pudding but it's dairy-free!

Banana Pudding Ice Cream

If you love banana pudding you absolutely must give this Banana Pudding Ice Cream a try.

Ingredients

  • 4 Bananas, Frozen and cut into chunks
  • ¼ cup plant milk
  • 1 tsp vanilla
  • 6 vanilla cookies

Instructions

  1. Put frozen banana chunks into a food processor and pulse for 2 minutes.
  2. Pour in half the plant milk and the vanilla and pulse again.
  3. Use a silicon spatula to push the frozen banana ice cream around and separate it from the sides.
  4. Add more milk and pulse until smooth, using the spatula when needed.
  5. Break cookies into big chunks and put half in the food processor and pulse into the ice cream.
  6. Stir the half of cookies into the ice cream.
  7. Serve or pour into a freezer safe container and freeze until ready to serve.

Banana Pudding Ice Cream

Banana Pudding Ice Cream has all of the flavor of traditional banana pudding but it's dairy-free!

Banana Pudding Ice Cream has all of the flavor of traditional banana pudding but it's dairy-free!

Ingredients

  • 4 Bananas, Frozen and cut into chunks
  • ¼ cup plant milk
  • 1 tsp vanilla
  • 6 vanilla cookies

Instructions

  1. Put frozen banana chunks into a food processor and pulse for 2 minutes.
  2. Pour in half the plant milk and the vanilla and pulse again.
  3. Use a silicon spatula to push the frozen banana ice cream around and separate it from the sides.
  4. Add more milk and pulse until smooth, using the spatula when needed.
  5. Break cookies into big chunks and put half in the food processor and pulse into the ice cream.
  6. Stir the half of cookies into the ice cream.
  7. Serve or pour into a freezer safe container and freeze until ready to serve.

Did you make this recipe?

We'd love to see it! Tag us and use #MyPlantBasedFamily!

© Heather Mayes

Filed Under: Dessert, Recipes Tagged With: Dairy Free, Recipes

Healthy Vegan Baking

April 29, 2016 by Holly Yzquierdo 1 Comment

I’ve shared recently how I gave up on baking for a while. I felt like I would spend hours in the kitchen trying to make something allergy-friendly and healthy only to fail. I’ve finally gotten over my fear of failure and you can too!

Lucie at WIN-WIN Foods has created a Healthy Vegan Baking ecourse that will teach anyone how to create healthy, delicious treats.

Healthy Vegan Baking eCourse

Allergy-Friendly

If you are like me and avoid dairy and eggs this ecourse will show you how to bake everything from cake, sweet breads, cookies, cream pies, heck…even tiramisu. Plus all of the lovely fillings and frostings.

The best part, these are all healthy, you don’t have to feel guilty about making them.

The eCourse also covers oil-free, gluten-free and soy-free options.

Healthy Vegan Baking eCouse

Healthy Vegan Baking eCourse Content

When you sign up for the 7 week ecourse you’ll get a new module each week. The modules include:

  1. Intro to Healthy Vegan Baking (and how not to get overwhelmed)
  2. Baking with Unrefined Flours (including gluten-free options)
  3. Healthy Fats and Low Fat Baking (including oil-free options)
  4. All about Egg Alternatives and A Little About Non-Dairy Milks
  5. Banishing Sugar and Finding the Best Alternatives (including natural calorie-free options)
  6. Decorating Desserts Naturally (icings, frostings, colorings and other decoration options)
  7. Putting All the Knowledge Together and Troubleshooting

Plus you get AMAZING recipes!!! You will also get live Q&A sessions each week and a private Facebook group. 

Healthy Vegan Baking eCourse

Still undecided?

This course is for you if you:

  • Struggle to bake delicious but healthy treats.
  • Have a lot of food allergens to avoid.
  • Used to be a great baker but can’t get the hang of plant-based baking.
  • Can spend 1-2 hours per week learning how to bake.

For me, this ecourse is a gold mine! Every subject is covered. Don’t wait too long, enrollment closes on May 8th. What a great Mother’s Day Gift!

This page contains affiliate links.

Filed Under: How to Tagged With: Dairy Free, Plant Based Diet, Vegan

Creamy Vegan Brown Gravy

March 25, 2016 by Holly Yzquierdo 23 Comments

Vegan brown gravy is a delicious and versatile sauce that can take your plant-based meals to the next level. With its rich, savory flavor and smooth, creamy texture, it’s the perfect topping for mashed potatoes, stuffing, roasted veggies, and more.

Traditional gravy recipes often rely on animal fat, broth, or meat drippings for their depth of flavor, but vegan brown gravy uses plant-based alternatives to achieve the same richness without animal products. Not only does this make it an ideal choice for vegans, but it also caters to those with dietary restrictions, like dairy allergies.

The beauty of vegan brown gravy is in its versatility; once you master the basics, you can adjust it to suit your taste or meal. With just a few tweaks, you can create a lighter, more herbaceous gravy for summer meals or a deeply savory one for holiday feasts.

What makes vegan brown gravy so irresistible? It’s all about the rich and savory flavors that come together to create a velvety-smooth sauce that’s perfect for drizzling over potatoes, tofu, vegetables, or whatever else you fancy. Whether you’re hosting a holiday feast, preparing a cozy Sunday dinner, or simply craving some comfort food on a chilly evening, this gravy is sure to hit the spot.

This sauce tastes a lot like regular savory brown gravy but it’s gluten-free, dairy-free and cholesterol-free. The pepper gives this a little spice that your kids may not love (like mine). Feel free to leave it out.

Ways to Customize Creamy Brown Gravy

This creamy gravy/sauce can be used in many ways. Use it as the “soup” or “glue” for a casserole, pour it over pasta, top a baked potato, pour it over veggies or any other way your heart desires. Here are some simple recipe variations to try depending on your use for the brown gravy:

  1. For a richer and creamier gravy, add a splash of coconut cream.
  2. Experiment with different herbs and spices to customize the flavor of your gravy. Fresh herbs like rosemary, sage, or parsley can add a burst of freshness, while ground spices like smoked paprika or cayenne pepper can add depth and complexity.
  3. If you prefer a smoother gravy, you can use an immersion blender or transfer the gravy to a blender and blend until smooth before serving.
  4. Feel free to adjust the consistency of the gravy by adding veggie broth or more rice milk if it’s too thick, or simmering it longer if it’s too thin.

Serving Suggestions

Vegan brown gravy is wonderfully versatile and can be paired with many dishes. Here are some ideas:

  • Mashed Potatoes: A classic combination that never fails. Vegan brown gravy over fluffy mashed potatoes is a staple side dish for holiday dinners and cozy meals.
  • Stuffing and Roasted Vegetables: Drizzle your gravy over stuffing or roasted carrots, parsnips, and Brussels sprouts for a comforting plate.
  • Vegan Meatloaf: Enhance a slice of lentil or nut-based loaf with a generous helping of gravy for a satisfying main course.
  • Savory Bowls: Use vegan brown gravy as a sauce for savory bowls with grains, roasted veggies, and tempeh or tofu.
  • Shepherd’s Pie: Add a layer of vegan brown gravy to the base before adding mashed potatoes on top. It adds extra flavor and moisture to the dish.

How to Make Creamy Vegan Brown Gravy

Ingredients

  • 2 Tbsp nutritional yeast
  • 2 Tbsp brown rice flour (other flours may be substituted)
  • ¼ tsp garlic powder
  • ½ tsp onion powder
  • ¼ tsp white pepper (black pepper may be used)
  • 1 dash of sweet (not smoked) paprika (may be omitted)
  • 1 Tbsp Braggs Amino Acids (tamari or soy sauce can be used but it is NOT gluten-free)
  • 1 ½ cup Rice Milk

If you aren’t familiar with Bragg Liquid Aminos,  nutritional yeast or brown rice flour, don’t get nervous! Bragg Liquid Aminos taste similar to soy sauce but is gluten-free. Nutritional yeast is something that most vegans use to get a cheesy or savory flavor. Brown rice flour is a gluten-free flour that I often use in sauces. Try them! most people love them, and you’ll find they aren’t intimidating at all.

If you still aren’t convinced about the brown rice you can also make this with corn starch. The taste is the same but the consistency varies slightly. It’s still delicious. I’ve also made it with wheat flour.

Instructions

Step 1 – Toast Dry Ingredients

In a skillet, add the dry ingredients and cook for a few minutes to toast the dry mixture on medium heat.

Step 2 – Add Liquids

Once you start to smell the dry mix toasting, add the rice milk and Braggs. Stir regularly with a whisk.

Step 3 – Stir

After the gravy starts to thicken switch to a silicone spatula and stir gently so it does not stick to the bottom of the pan. Continue cooking until it reaches a perfect gravy consistency.

Step 4 – Serve

Serve while warm, if gravy gets too dry add a little rice milk

Storage and Reheating Tips

If you make a big batch, you can store leftover vegan brown gravy in an airtight container in the fridge for up to 5 days. It also freezes well, so consider freezing single servings to reheat later.

To reheat, warm it slowly on the stove, adding a bit of vegetable broth or water if it’s too thick. Whisking it as it heats helps maintain the smooth texture.

Vegan brown gravy is the perfect addition to any plant-based meal, adding a rich, savory flavor that satisfies cravings for classic comfort food. Whether it’s for a holiday feast or a cozy dinner, vegan brown gravy is sure to impress both vegans and non-vegans alike!

More Plant Based Sauces

If you like this recipe, you’ll love these plant based sauces too:

  • Homemade BBQ Sauce
  • Spicy Vegan Ranch
  • Raspberry Vinaigrette Salad Dressing
  • Creamy Italian Dressing (Oil-Free)
  • Homemade Vegan Ranch
Yield: 4 Servings

Creamy Brown Gravy

Creamy Brown Gravy

Rich, creamy vegan brown gravy made with plant-based ingredients. Perfect for mashed potatoes, stuffing, or any comfort dish in need of flavor!

Cook Time 10 minutes
Total Time 10 minutes

Ingredients

  • 2 Tbsp nutritional yeast
  • 2 Tbsp brown rice flour (other flours may be substituted)
  • ¼ tsp garlic powder
  • ½ tsp onion powder
  • ¼ tsp white pepper (black pepper may be used)
  • 1 dash of sweet (not smoked) paprika (may be omitted)
  • 1 Tbsp Braggs Amino Acids (tamari or soy sauce can be used but it is NOT gluten-free)
  • 1 ½ cup Rice Milk

Instructions

  1. In a skillet, add the dry ingredients and cook for a few minutes to toast the dry mixture on medium heat.
  2. Once you start to smell the dry mix toasting, add the rice milk and Braggs. Stir regularly with a whisk.
  3. After the gravy starts to thicken switch to a silicone spatula and stir gently so it does not stick to the bottom of the pan.
  4. Continue cooking until it reaches a perfect gravy consistency.
  5. Serve while warm, if gravy gets too dry add a little rice milk.

Notes

  • Feel free to leave out the pepper if desired
  • Corn starch can be used instead of brown rice flour

Did you make this recipe?

We'd love to see it! Tag us and use #MyPlantBasedFamily!

© Heather Mayes

Filed Under: Recipes, Sauces, Dips, and Salad Dressings Tagged With: Dairy Free, gluten free, Plant Based Diet, Recipes, Vegan

Smoothie Bowl

February 1, 2016 by Holly Yzquierdo 40 Comments

Smoothie Bowl Plant-Based Gluten-free

If you are looking for something a little out of the ordinary I invite you to try a Smoothie Bowl.

I know, I’m not really a smoothie drinker but sometimes smoothies are an easy dessert or meal on the go. A smoothie bowl is even more fun! You family will be delighted at this gluten-free vegan treat that is made from fruit and a little bit of plant-based milk.

Smoothie Bowl Plant-Based Gluten-free

This bowl reminds me of when I was a kid. We’d regularly have ice cream as a dessert. I would usually add milk to mine and make it more of a milk shake consistency but still eat in from a bowl.

This Smoothie Bowl is very sweet, thanks to the strawberry and banana but the extra added fruit help me feel like I’m having something with a little more substance.

How to Make a Smoothie Bowl

Ingredients

  • 4 ounces plant-based milk
  • 1 banana
  • 6 frozen strawberries

Toppings

  • 1 banana
  • 6 fresh strawberries
  • ½ cup fresh or frozen blueberries
  • 1 tsp. hemp seeds (optional)
  • 1 Tbsp. raw pepitas (optional)

Instructions

  1. Pour plant-based milk into a high-powered blender.
  2. Add the banana and frozen strawberries.
  3. Blend in blender until smooth and pour into bowls.
  4. Top with fresh sliced banana and strawberries, blueberries and seeds.

You can change up your Smoothie Bowl to cater to your cravings. Who’s to say you can’t add some Enjoy Life Chocolate Chips on top of your Smoothie Bowl.

Smoothie Bowl

Sweets For Your Sweeties

I’ve partnered with some of my favorite gluten-free bloggers to offer you an incredible round-up and giveaway. All of these recipes are gluten-free but may contained ingredients that are not plant-based.

Sweets for Sweeties Gluten-free Recipes Collage 600

15 Sweets for Your Sweeties – Gluten-free recipes to share with your loved ones for Valentine’s Day or anytime. Listed in the order they appear in the photo, left to right, row by row:

  • Gluten Free Vegan Chocolate Peanut Butter Sandwich Cookies from Sarah Bakes Gluten free
  • Gluten Free Raspberry Chocolate Truffle Brownie Bombs from Flippin’ Delicious
  • Royalty Cookies from Gluten-Free Palate
  • Gluten-Free Dye-Free Red Velvet Cupcakes from gfJules
  • Chocolate Love Cakes from My Gluten-free Kitchen
  • Gluten-Free Sweet Tortilla Pizza from Allergy Free Alaska
  • Cookies and Cream Truffles from Vegetarian Mamma
  • Chocolate Truffles from Learning to Eat Allergy Free
  • Double Chocolate Cookie Cups from Making it Milk Free
  • Smoothie Bowl from My Plant-Based Family
  • Gluten Free Cookie Dough Brownie Cake (Vegan) from Petite Allergy Treats
  • Chewy Chocolate Chip Cookie Dough Bites from Iowa Girl Eats
  • Gluten Free Chocolate Chip Cookie Pizza from Faithfully Gluten Free
  • Ooey Gooey Red Velvet Cookies from Gluten Free Frenzy
  • The Ultimate Chocolate Chip Cookie from Only Taste Matters

This is a wonderful (and delicious) collection of recipes! Make sure you visit them and add them to your “I’ve got to make this” list.

Yield: 1 Bowl

Smoothie Bowl

Smoothie Bowl

Get your daily fruit and satisfy that sweet tooth with a smoothie bowl.

Prep Time 3 minutes
Cook Time 3 minutes
Additional Time 3 minutes
Total Time 3 minutes

Ingredients

  • 4 ounces plant-based milk
  • 1 banana
  • 6 frozen strawberries
  • 1 banana to top
  • 6 fresh strawberries to top
  • ½ cup fresh or frozen blueberries to top
  • 1 tsp. hemp seeds to top (optional)
  • 1 Tbsp. raw pepitas to top (optional)

Instructions

  1. Pour plant-based milk into a high-powered blender.
  2. Add the banana and frozen strawberries.
  3. Blend in blender until smooth and pour into bowls.
  4. Top with fresh sliced banana and strawberries, blueberries and seeds.

Notes

You can change up your Smoothie Bowl to cater to your cravings. Who’s to say you can’t add some Enjoy Life Chocolate Chips on top of your Smoothie Bowl.

Did you make this recipe?

We'd love to see it! Tag us and use #MyPlantBasedFamily!

© Heather Mayes

Filed Under: Breakfast, Dessert, Recipes Tagged With: Dairy Free, Plant Based Diet, Vegan

Broccoli Potato Soup

January 16, 2016 by Holly Yzquierdo 21 Comments

Broccoli Potato Soup

Soup has a way of making you feel better. It doesn’t matter what kind of soup it is, but homemade is the best. This Plant-Based Broccoli Potato Soup is one of my all time favorites!

Broccoli and Potato Soup

I never loved soup until we transitioned to a plant-based diet. After that, I couldn’t get enough soup.


I think one of the reasons was that although tasty, a lot of soups contained meat and dairy and were not refreshing. They were greasy, heavy or gave me a stomach ache. This never happens with plant-based soups.

Broccoli Potato Soup

This page contains affiliate links.

If you take a look at the ingredients you’ll see why! There is no dairy yet the soup is total comfort food.

I recommend this soup to anyone who is new to cooking because it’s so easy. You basically just cut up veggies. Having a decent knife and cutting board is important but that is all. If you have an Instant Pot you can use it, but it’s really easy to make on the stove. (This recipe was updated and Instant Pot instructions were added.)

Speaking of Instant Pot, I love mine! Here are 10 reasons I decided to buy and Instant Pot!

If you don’t have an Instant Pot, a big soup pot will work perfectly. Plus, you’ll enjoy the glorious smell of it simmering on your stove.

Broccoli Potato Soup

Broccoli Potato Soup

broccoli potato soup

Broccoli Potato Soup

 Broccoli Potato Soup

Broccoli Potato Soup

Instant Pot Broccoli Potato Soup

This simple soup is best for people who don't want to be overwhelmed with strong flavors. The veggies bring the flavor!

Prep Time 10 minutes
Cook Time 45 minutes
Total Time 55 minutes

Ingredients

  • 1 1/2 to 2 pounds potatoes + enough water to cover potatoes
  • 1/2 a onion, diced
  • 1 stick celery, sliced
  • 1 carrot, sliced
  • 1 bay leaf
  • 1 crown of broccoli, chopped
  • salt and pepper to taste
  • 1/2 tsp garlic powder
  • 1 Tbsp nutritional yeast
  • 1/4 cup plant milk

Instructions

  1. Scrub and chop potatoes. Place them in a pan of water and bring to a boil. You can also use vegetable broth for a heartier flavor.
  2. Add diced onion, carrot and the bay leaf (you will remove the bay leaf before serving).
  3. Once carrots and potatoes are almost tender add broccoli and spices.
  4. Simmer for 5-10 minutes.
  5. The soup is ready to eat as is. For a more savory soup add 1/4 cup of plant milk and 1 Tbsp of nutritional yeast.

Notes

If you'd like strong flavors. I recommend adding my Dry Veggie Broth Mix or more spices like garlic, onion, and nutritional yeast.

Did you make this recipe?

We'd love to see it! Tag us and use #MyPlantBasedFamily!

© Holly Yzquierdo
Category: Soup

Instant Pot Instructions

If you are making this Broccoli Potato Soup in the Instant Pot, you’ll add all the ingredients to your pot. Then you will close and seal the lid. Cook on manual for 10 minutes, with a natural pressure release. If you have an newer Instant Pot, it won’t say manual, there will be a button that says Pressure Cook.

When possible, I will allow my pot to sit undisturbed so the flavors have a chance to blend together. This will also give the pot time to naturally release pressure.

Broccoli Potato Soup

Another great thing about this soup is that it is very inexpensive to make. We almost always have the ingredients on hand so it’s a no brainer.

Yield: 4+

Instant Pot Broccoli Potato Soup

Instant Pot Broccoli Potato Soup

Instant Pot Broccoli Potato Soup is an easy and delicious soup your family will love. This soup is big on veggies!

Prep Time 10 minutes
Cook Time 10 minutes
Additional Time 10 minutes
Total Time 30 minutes

Ingredients

  • 1 1/2 to 2 pounds potatoes + enough water or veggie broth to cover potatoes
  • 1/2 a onion, diced
  • 1 stick celery, sliced
  • 1 carrot, sliced
  • 1 bay leaf
  • 1 crown of broccoli, chopped
  • salt and pepper to taste
  • 1/2 tsp garlic powder
  • 1 Tbsp nutritional yeast (more if desired)
  • 1/4 cup plant milk

Instructions

  1. Chop veggies and add them to your Instant Pot.
  2. Cover with water or veggie broth, then add spices.
  3. Close and seal the lid. Cook on Manual (Pressure Cook) for 10 minutes. The pot may take 20-30 minutes to come to pressure before cooking begins.
  4. Once done cooking, allow pressure to release naturally. This may take 15 minutes or so. Carefully open the pot.
  5. Remove the bay leaf. Add salt or other spices if desired.

Notes

This soup has a mild flavor. It's perfect for kids who don't like "spicy" foods but enjoy veggies. For a richer flavor, add my Dry Veggie Broth Mix or more nutritional yeast.

Did you make this recipe?

We'd love to see it! Tag us and use #MyPlantBasedFamily!

© Holly Yzquierdo
Category: Instant Pot
Broccoli Potato Soup

If you like this, check out my Crock Pot Potato Soup too!

Photos by Melodee Fiske. 

Filed Under: Daniel Fast Recipes, Instant Pot, Recipes, Soups, Stews, & Chili Tagged With: Dairy Free, Plant Based Diet, Vegan

Last Minute Party Food

December 31, 2015 by Holly Yzquierdo 2 Comments

It’s New Year’s Eve! It’s also my birthday. Happy Birthday to me!

My kids are running around excited about eating cake for dinner, so not going to happen. One insists I need a Spider Man cake, the other a Star Wars cake. My 7 year old said it should be half and half. I asked, “Do you think your mommy wants a Spider Man Star Wars cake.” He said, “yes, that is perfect, then you can think of both of your sons.” And that my friends is motherhood in a nut shell.

Last Minute Party Foods

New Year’s Eve

Since it is New Year’s Eve and I’m no where close to prepared I wanted to share some last minute food ideas.

My ideal party food is appetizers and desserts. I like fun dips and finger foods. Take a little time in the grocery store then whip up this spread in about half an hour. [Read more…] about Last Minute Party Food

Filed Under: Holiday Cooking Tagged With: Dairy Free, party food, Plant Based Diet, Vegan

« Previous Page
Next Page »

Primary Sidebar

Footer

Find it here!

Amazon Affiliate Disclosure

Holly Yzquierdo of My Plant-Based Family is a participant in the Amazon Services LLC Associates Program, an affiliate advertising program designed to provide a means for sites to earn advertising fees by advertising and linking to amazon.com.

Disclosures

Unauthorized use and/or duplication of any part of this website or content without express and written permission from Holly Yzquierdo is prohibited. Excerpts and links may be used, provided that full credit is given to Holly Yzquierdo and MyPlantBasedFamily.com with links to the original content.

More information on our Privacy Policy and other Disclosures are available.

Copyright © 2025 · Wellness Pro on Genesis Framework · WordPress · Log in