• Skip to primary navigation
  • Skip to main content
  • Skip to primary sidebar
  • Skip to footer

My Plant-Based Family

Eating Whole Food, Plant-Based Diet recipes, On a Budget.

  • Plant-Based Recipes
    • Breakfast
    • Main Dish
    • Instant Pot
    • Daniel Fast Recipes
    • Side Dishes
    • Bread and Muffins
    • Salad and Wraps
    • Soup, Stews, and Chili
    • Sauces, Dips, and Salad Dressings
    • Desserts
    • Crock Pot
    • Mexican Food
  • Videos
  • Resources
    • Getting Started
    • Books
      • The Plant-Based Diet Starter Guide
      • The Plant-Based Holiday Meal Plan & Cookbook
  • Meal Plans
    • Meal Plans 2020
    • Meal Plans 2019
    • Meal Plans 2017
    • Meal Plans 2016
    • Meal Plans 2015
    • Meal Plans 2014
    • Meal Plans 2013
  • About Us
    • Our Family
    • Contact Me
    • Our Food Philosophy
    • Disclosure Policy
      • Privacy Policy
  • Daniel Fast Recipes

Blog

Flavor Packed Moroccan Chickpeas

February 5, 2023 by Holly Yzquierdo Leave a Comment

Moroccan Chickpeas

Morocco is known for bright, bold flavors, and these plant-based Moroccan Chickpeas bring just that. It’s a versatile dish that can be eaten alone or served with a variety of bases to make it a complete meal – perfect for meal planning!

Do they Eat Chickpeas in Morocco?

Yes, Moroccans eat chickpeas. The Arabic word for chickpea is hommos. It is often cooked in couscous or added to Hariri soup.

In America, chickpeas are most commonly eaten when blended to make hummus. They offer a creamy middle and mild taste that takes on any flavor added.

Meal Planning with Moroccan Chickpeas

I like to make a batch of Moroccan chickpeas on Sunday with a plan to eat them throughout the week in various ways. Here are a few ways things it can be served over to make a meal for lunch or dinner:
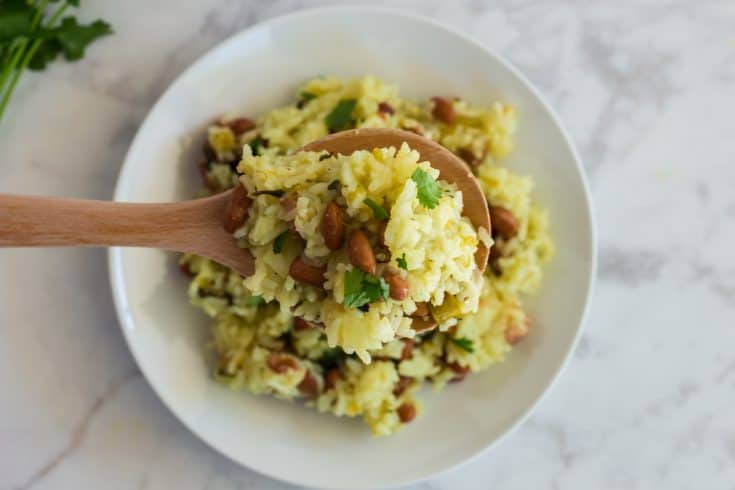
  • Rice
  • Quinoa
  • Roasted Potatoes
  • Sweet Potato
  • Squash
  • Tortillas
  • Crusty Bread

With a plan made in advance, go ahead and cook the potatoes and rice to have on-hand as well. Feel free to grab a fork and eat them alone as a satisfying snack or side dish too!

Flavor Options

Chickpeas will take on any flavor you add to the dish. That means there are lots of ways to switch up the taste to your liking. If spicy food is your jam, add chili flakes or more cayenne pepper.

For a sweet twist, throw in a handful of raisins. Fresh garlic and ginger can bring comfort. Experiment to find what you and your family like best.

With so many flavor combinations and a variety of bases to choose from, this dish will never get boring.

How to Make Moroccan Chickpeas

Ingredients

  • 1/2 cup Veggie Broth
  • 1 Yellow Onion (medium, diced)
  • 1 cup Chickpeas (1/2 can drained and rinsed)
  • 1 1/2 tsps Salt
  • 1 tbsp Turmeric
  • 1/2 tsp Cinnamon
  • 1/2 tsp Cardamom
  • 1/4 tsp Cayenne Pepper
  • 1 can Petite Diced Tomatoes (15 ounce can, drained)
  • 1/2 cup Parsley
  • 1/3 cup Pitted Dates (finely chopped)

Step 1 – Cook on Stovetop

Add the broth and onion to a pot over medium heat. Cook for about 3 minutes until the onions begin to soften. Add the chickpeas, salt, turmeric, cinnamon, cardamom and cayenne pepper. Continue to cook for 3 more minutes.

Step 2 – Add Tomatoes

Add the tomatoes, parsley and dates to the pot and stir to combine. Reduce the heat to medium-low and cover the pot with a lid. Cook for 10 minutes, stirring occasionally.

Step 3 – Serve

Divide between bowls, or serve over rice. Enjoy!

Serving Size

One serving size is equal to approximately one cup of stew.

Serving Alternatives

There are lots of ways to serve Moroccan chickpeas. Eat them alone or serve it over rice, quinoa, roasted potatoes, sweet potato, squash, tortillas or crusty bread. Yum!

Add More Flavor

Change up the flavor to keep this recipe fresh and exciting. Add fresh garlic, ginger, chili flakes and/or raisins to your liking.

Storage

Any leftover Moroccan chickpeas can be refrigerated in an airtight container for up to four days.

More Plant-Based Meal Recipes

If you enjoyed this recipe, check out these other delicious dinner ideas:

  • Vegan Pad Thai in Less Than 30 Minutes
  • Instant Pot Mexican Quinoa
  • Vegan Bolognese Pasta with Lentils
  • Vegetable Spaghetti
  • Plant-Based Instant Pot Goulash
Yield: 4 Servings

Moroccan Chickpeas

Moroccan Chickpeas

Create a nutrition packed bowl of chickpeas with flavors from Morocco. This recipe is great eaten alone or served over rice, quinoa, vegetables, tortilla, etc.

Prep Time 4 minutes
Cook Time 16 minutes
Total Time 20 minutes

Ingredients

  • 1/2 cup Veggie Broth
  • 1 Yellow Onion (medium, diced)
  • 1 cup Chickpeas (1/2 can drained and rinsed)
  • 1 1/2 tsps Salt
  • 1 tbsp Turmeric
  • 1/2 tsp Cinnamon
  • 1/2 tsp Cardamom
  • 1/4 tsp Cayenne Pepper
  • 1 can Petite Diced Tomatoes (15 ounce can, drained)
  • 1/2 cup Parsley
  • 1/3 cup Pitted Dates (finely chopped)

Instructions

  1. Add broth and onion to a pot over medium heat. Cook for about 3 minutes until the onions begin to soften. Add the chickpeas, salt, turmeric, cinnamon, cardamom and cayenne pepper. Continue to cook for 3 more minutes.
  2. Add the tomatoes, parsley and dates to the pot and stir to combine. Reduce the heat to a medium-low and cover the pot with a lid. Cook for 10 minutes, stirring occasionally.
  3. Divide between bowls, or serve over rice, etc. Enjoy!

Notes

  • Leftovers: Refrigerate in an airtight container for up to 4 days.
  • Serving Size: One serving is equal to approximately 1 cup of stew.
  • More Flavor: Add fresh garlic, ginger, chili flakes and/or raisins.
  • Serve it With: Rice, quinoa, roasted potatoes, sweet potato, squash, tortillas or crusty bread.

Did you make this recipe?

We'd love to see it! Tag us and use #MyPlantBasedFamily!

© Holly Yzquierdo

Filed Under: Daniel Fast Recipes, Main Dish Recipes, Recipes

Baked Oatmeal Bars with Fruit

February 5, 2023 by Holly Yzquierdo 1 Comment

This plant-based baked oatmeal recipe has everything you could ever want without eggs, dairy, oil, added sugar or banana. It’s the perfect breakfast!

You know I love to meal prep on Sundays, and baked oatmeal bars are on the list often. I make a batch using any kind of fruit and nuts I have on hand. Then cut it into bars for an easy grab-and-go breakfast or snack throughout the week.

Perfect Baked Oatmeal without Banana

I don’t have anything against banana, but my husband has a banana intolerance. You definitely don’t have to put banana in these baked oatmeal bars. The recipe shown uses apple, peach and blueberries. That just happens to be the fruit I had on-hand that day.

Any fruit or berry will work! Feel free to use all one fruit or mix and match. Just make sure it adds up to 2 cups.

Apple is always safe, and it’s a crowd pleaser. I would love to try a strawberry baked oatmeal too. I’m writing a mental note to make that when fresh strawberries are in season. You can also use frozen fruit. Simply let it thaw and drain any excess liquid first.

Do you have to put Eggs in Baked Oatmeal?

Eggs are typically used in baked oatmeal as a binder to hold all the other ingredients together. A binder is necessary, but it doesn’t have to be eggs. It is simple to make a vegan baked oatmeal using flaxseed eggs instead.

Egg Substitute in Baked Oatmeal

Create flax eggs for your plant-based baked oatmeal bars using ground flax seeds and water. Mix them up first, so they have time to set up. The flax is sticky enough to keep all the oats, fruit and nuts in bar form without using chicken eggs. Everything stays moist, yet easy to pick up and eat.

Do you have to Soak Oats Before Baking?

The short answer is no. To make oatmeal bars, you want the oats to retain their shape and some crunch. This helps keep the bars together and creates a more satisfying bite. Soaking oats in advance of baking would give the bars a soft and creamy texture.

How to Make Fruit and Nut Baked Oatmeal Bars

Ingredients

  • 4 Flax Eggs (4 Tbsp ground flax seeds plus 12 Tbsp water)
  • 1 cup Applesauce
  • 1 tsp Vanilla
  • 1/2 tsp Salt
  • 1/2 cup Maple Syrup (Daste Paste works too.)
  • 1 tsp Cinnamon (or Pumpkin Pie Spice)
  • 2 cups Fruit (I use 1 Apple, 1 Peach and Blueberries)
  • 1 tsp Baking Soda
  • 3 1/2 cups Rolled Oats
  • 1 cup Rice Milk
  • 1/3 cup Nuts (optional. Choose your favorite – pecans, walnuts, almonds.)
  • 2 Tbsp Pumpkin Seeds (optional. Hemp seeds also work.)

Step 1 – Preheat

Begin by preheating your oven to 350 degrees.

Step 2 – Make Flax Eggs

Mix the grounds flax seeds and water to make flax eggs. Then move them aside, so they have time to set up.

Step 3 – Mix

In a large mixing bowl, add the applesauce, vanilla, salt, maple syrup and cinnamon.

Step 4 – Add Fruit

Next, prepare your fruit. Core, peel and dice the apple and peach. Berries can be left whole. The total fruit should equal 2 cups.

Step 5 – Combine

Now pour the flax eggs, that have hopefully set up, and baking soda. Give it all a good stir.

Step 6 – Add Oats

Add the oats and stir again.

Step 7 – Plant-Based Milk

Then add your rice milk or any plant-based milk you prefer. Stir the mixture once more, and let it rest while preparing the pan.

Step 8 – Prepare Pan

Grab a 9×13 pan. Non-stick pans can be used as-is. If food tends to stick to your pan, line it with parchment paper or spray with a small amount of cooking spray. Rub the spray around with a paper towel to remove excess while retaining the nonstick property.

Step 9 – Add Nuts and Seeds (Optional)

If using nuts and seeds, you can either stir them into the mixture at this point or sprinkle them on top after it is poured into the pan.

Step 10 – Bake

Pour the oatmeal mixture into the pan and bake for 45 minutes. It should be slightly brown. Allow to cool slightly before eating.

Storage

Oatmeal bars can be stored in the refrigerator in an air tight container. I like to cut them into a size for an easy grab-and-go snack or breakfast.

Fruit Options

Apples are perfect for this recipe. You can use them for the whole 2 cups if desired. I prefer to add more variety by combining apples with other fruit I have on hand. Blueberries are a favorite.

Frozen Fruit

You can use frozen fruit in oatmeal bars. Let it thaw and drain any excess liquid before using.

More Plant-Based Oatmeal Recipes

If you enjoyed this recipe, check out these other great ways to eat oatmeal:

  • Oatmeal Cups
  • Apple Cinnamon Baked Oatmeal
  • Banana Nut Oatmeal (Instant Pot or Stove Top)
  • Apple Oatmeal Muffins
Yield: 12

Baked Oatmeal with Fruit

Baked Oatmeal with Fruit

Mix and match fruit in this baked oatmeal. Then cut it into bars for a delicious and nutritious breakfast or snack.

Prep Time 15 minutes
Cook Time 45 minutes
Total Time 1 hour

Ingredients

  • 4 Flax Eggs (4 Tbsp ground flax seeds plus 12 Tbsp water)
  • 1 cup Applesauce
  • 1 tsp Vanilla
  • 1/2 tsp Salt
  • 1/2 cup Maple Syrup (Daste Paste works too.)
  • 1 tsp Cinnamon (or Pumpkin Pie Spice)
  • 2 cups Fruit (I use 1 Apple, 1 Peach and Blueberries)
  • 1 tsp Baking Soda
  • 3 1/2 cups Rolled Oats
  • 1 cup Rice Milk
  • 1/3 cup Nuts (optional. Choose your favorite - pecans, walnuts, almonds.)
  • 2 Tbsp Pumpkin Seeds (optional. Hemp seeds also work.)

Instructions

      1. Preheat oven to 350 degrees.
      2. Mix up your flax eggs and set them aside to give them time to set.
      3. Grab your favorite big mixing bowl and add applesauce, vanilla, salt, maple syrup and cinnamon.
      4. Core, peel and dice your fruit. If using a combination of fruit, the total fruit should equal 2 cups. Blueberries can be left whole.
      5. Pour in your flax eggs that have hopefully set up and your baking soda. Give it all a good stir.
      6. Add your oats and stir again.
      7. Add your rice milk or whatever kind of plant-based milk you prefer. Stir it all again and let it rest while you get your pan ready.
      8. Use a 9x13 pan.
      9. If your food tends to stick in your pan, you can use parchment paper or a small amount of cooking spray to rub it around. If your pan is nonstick, you don't have to do anything special.
      10. If using optional nuts and seeds, you can stir them in or sprinkle them on top after you pour it into the pan.
      11. Pour the oatmeal into your pan and smooth it out. Bake for 45 minutes. It should be slightly brown. You can cook an extra 5-10 minutes if needed. Allow to cool slightly before eating.

Notes

  • Storage: Store in a refrigerator in an air tight container.
  • Nuts & Seeds: Nuts and seeds are optional. You can substitute any type of nuts and seeds you like.
  • Choosing Fruit: Apple is perfect in this. You can use it for the whole 2 cups if desired. We like to add more variety by combining apples with other fruit we already have. Blueberries are perfect too.
  • Frozen Fruit: Frozen fruit can be used. I recommend letting it thaw and allow the extra liquid to drain a bit before using.

Did you make this recipe?

We'd love to see it! Tag us and use #MyPlantBasedFamily!

© Heather Mayes

Filed Under: Breakfast, Recipes

Instant Pot Rice and Beans with Green Chilies

May 11, 2021 by Holly Yzquierdo 8 Comments

Instant Pot Green Chili Rice

It’s no secret that I love my Instant Pot, and I love rice and beans. I’m adding a punch of flavor with this easy Instant Pot Rice and Beans with Green Chilies. You can make it yourself in just 3 simple steps!

Instant Pot Green Chili Rice

Rice and beans is a versatile dish that can be eaten alone, as a side dish, in a taco or burrito. How about a burrito bowl?

This is a great recipe to make at the beginning of the week, and it’s simple to reinvent it for various meals. Rice and beans are always budget friendly too. Everyone loves that.

Instant Pot Green Chili Rice

This page contains affiliate links.

Can You Cook Rice and Beans Together in an Instant Pot?

The short answer is that yes, you can cook rice and beans together in an Instant Pot, but I have an easier way. Use beans that are already cooked and quick cooking rice!

If you want to cook the dry beans and brown rice together at the same time, I recommend you try my other Instant Pot Black Beans and Rice recipe instead.

In this recipe, I cook the jasmine rice in the Instant Pot, then add canned beans that are fully cooked. They just need to be heated up by folding them into the cooked rice. It’s a real time saver!

I love using this trick on busy week nights or when making several recipes at one time to prepare for the week.

Instant Pot Green Chili Rice

What are Green Chilies?

They an be purchased fresh, but this recipe calls for the canned version which are inexpensive and convenient (and delicious). Green chilies add flavor to many types of recipes from appetizers to soups, to main dishes and sauces. You may as well keep them stocked in your pantry.

Are Green Chilies Hot?

It depends. Sometimes I buy peppers that are mild, then the next week they may be incredibly hot. That’s one of the reasons I prefer to use the canned. I get a more consistent flavor.

Additionally, you can purchase canned green chilies in hot or mild flavors. Either will work just fine in my Instant Pot Rice and Beans with Green Chilies. It all depends on how much spice you and your family prefer.

Substitute for Green Chilies

If you don’t have canned green chilies on hand, there are several substitute options including different types of fresh peppers and spices.

  • Anaheim Pepper
  • Jalapeno
  • Serrano

If you substitute any of those fresh peppers in place of the canned green chilis the flavor profile will be very different and likely spicier. Buy peppers that you and your family like.

To keep the flavor mild, remove the seeds from fresh peppers. If you want to kick up the spice, include the seeds and season as desired.

Instant Pot Green Chili Rice

How to Make Instant Pot Rice and Beans with Green Chilies

Ingredients

  • 1/2 White Onion (diced)
  • 2 cloves Garlic (minced)
  • 4 ozs Canned Diced Green Chilies
  • 1 cup Jasmine Rice
  • 2 cups Veggie Broth (or water with Veggie Broth Mix)
  • 1 tsp Salt (optional)
  • 1/2 cup Cilantro (chopped, divided)
  • 1 can Pinto Beans (15 oz can, drained and rinsed)
  • 1 Lime

Step 1 – Sauté

Prepare your onions and garlic. Then push Sauté on your Instant Pot, and add the onions and garlic to the pot.

Stir regularly. If the onions and garlic begin to stick, pour a couple of tablespoons of water into the pot and give it a stir.

Sauté for 3 minutes or until the onions and garlic are translucent.

Step 2 – Pressure Cook

Next, add the canned green chilies, rice, broth (or water), salt and half the cilantro.

Secure the lid. Then press Manual or Pressure Cook, and set your Instant Pot for 5 minutes.

Step 3 – Release Pressure

Once cooking is complete, allow the pressure to release naturally for about 5 minutes. Then manually release the pressure until it is safe to open the Instant Pot.

Add the drained and rinsed pinto beans, slice and squeeze the lime over the rice, and add the remaining fresh cilantro.

Stir well to mix everything together, then serve and enjoy.

No Pinto Beans?

Don’t worry if you don’t have any pinto beans in the pantry. You can replace them with black beans, lentils, white beans, or any other bean you prefer!

Make it Spicy

Want to kick up the spice? Add fresh jalapenos before pressuring cooking, or place them on top as a garnish before serving.

I like adding a green chili tomatillo salsa just before eating.

Storage

Store any leftover rice and beans with green chilies in an airtight container. Be sure to eat them within a week. Add it to a tortilla for a great burrito!

More Instant Pot Recipes

If you enjoyed this recipe, check out my other favorites to make in an Instant Pot:

  • Instant Pot Mexican Rice
  • Instant Pot Black Beans and Rice
  • Instant Pot Refried Beans
  • Instant Pot Mexican Quinoa
  • Instant Pot Black Bean Chili
Yield: 4 Servings

Instant Pot Rice and Beans with Green Chilies

Instant Pot Green Chili Rice

Kick up your standard rice and beans with this quick and easy Instant Pot version.

Prep Time 5 minutes
Cook Time 30 minutes
Total Time 35 minutes

Ingredients

  • 1/2 White Onion (diced)
  • 2 cloves Garlic (minced)
  • 4 ozs Canned Diced Green Chilies
  • 1 cup Jasmine Rice
  • 2 cups Veggie Broth (or water with veggie broth mix)
  • 1 tsp Salt (optional)
  • 1/2 cup Cilantro (chopped, divided)
  • 1 can Pinto Beans (15 ounce can, drained and rinsed)
  • 1 Lime

Instructions

  1. Prepare your onions and garlic. Push Sauté on your Instant Pot, then add your onions and garlic to the pot. Stir regularly. If they begin to stick, pour a couple of tablespoons of water in the pot, and give it a stir. Sauté for 3 minutes or until veggies are translucent.
  2. Add canned green chilies, rice, broth (or water), salt and half the chopped cilantro. Press Manual or Pressure Cook and set your Instant Pot for 5 minutes.
  3. Once cooking is complete, allow pressure to release for about 5 minutes, then manually release pressure. Add the drained and rinsed pinto beans, slice and squeeze the lime over the rice, and add the remaining fresh cilantro. Stir well to mix everything together, then serve.

Notes

  • Storage: Store leftovers in an airtight container for about a week.
  • No Pinto Beans: Black beans, lentils, white beans, or any bean you prefer can be used instead of pinto beans.
  • Other Serving Suggestions: Add this mixture to a tortilla for a great burrito.
  • Spice it Up: Add fresh jalapenos when cooking, or on top as a garnish. You can also add green chili tomatillo salsa just before eating.

Recommended Products

As an Amazon Associate and member of other affiliate programs, I earn from qualifying purchases.

  • Instant Pot 
    Instant Pot 

Did you make this recipe?

We'd love to see it! Tag us and use #MyPlantBasedFamily!

© Holly Yzquierdo
Category: Instant Pot

No products found.

Filed Under: Instant Pot, Main Dish Recipes, Mexican Food, Recipes

Vegan Pad Thai in Less Than 30 Minutes

April 30, 2021 by Holly Yzquierdo 2 Comments

Put dinner on the table that is packed with a rainbow of vegetables in under 30 minutes. This Vegan Pad Thai recipe tastes even better the next day too!

Vegan Pad Thai

Homemade Pad Thai can be intimidating with its complex flavors and long list of ingredients, but I have some time-saving tips to cook this dish in a jiffy.

For starters, you don’t have to use all fresh vegetables. Frozen is totally fine here if you want to skip washing and chopping.

Wok or Pan?

Grab a pan with a lid! A wok provides a large surface area for food to cook at various temperatures. That’s great for developing flavors over time, but I have homework to supervise and bedtime routines to enforce.

When you make Pad Thai in a pan, you can cover it with a lid to expedite the cooking process. It will bring your veggies to tender-crisp in no time!

Vegan Pad Thai Sauce

Traditional Pad Thai sauce includes a handful of various sauces and spices. In my speedy, vegan version, I simply combine Peanut Butter and Tamari (or Braggs Liquid Aminos) for the sauce.

If you don’t do Peanut Butter, feel free to substitute with Sunflower Seed Butter.

It takes a few minutes to combine the two, but it can be done while the noodles and veggies are cooking.

Sometimes I add more Tamari at the end for taste and hot sauce for an added kick. You won’t miss any Pad Thai flavors with this method!

Is Pad Thai Gluten Free?

Yes, my version of a Vegan Pad Thai is gluten free. The Brown Rice Noodles and Tamari are free of gluten, but make sure you choose any substitutions carefully to meet your dietary needs.

I also have tips for making this soy-free or adding vegan protein. Check out the dietary notes following the recipe for ways to make a Pad Thai that is uniquely yours.

Vegan Pad Thai Recipe

Ingredients

  • 1 box Brown Rice Pad Thai Noodles (package sizes vary, I’ve used 8 oz to 14 oz)
  • 1 White Onion (1 cup diced)
  • 2 cloves Garlic (or 1 tbsp minced)
  • 1/4 cup Water (as needed for water sauté)
  • 2 Carrot (sliced)
  • 1 Red Bell Pepper (diced)
  • 1 Yellow Bell Pepper (diced)
  • 1 cup Broccoli (chopped into florets)
  • 1 cup Shredded Red Cabbage
  • 1/2 cup Frozen Shelled Edamame
  • 1 Lime (sliced into wedges)
  • 1/4 cup Peanut Butter
  • 1/4 cup Tamari (or Braggs Liquid Aminos)
  • 1 tsp Hot Sauce (optional)

Step 1 – Cook Noodles

Cook the Brown Rice Pad Thai Noodles according to package directions.

Step 2 – Sauté Onions and Garlic

Add diced onions and garlic to a hot skillet. Cook for a few minutes until onions start to turn translucent. Add small amounts of water as needed to water sauté. Cover with a lid.

Step 3 – Cook Carrots and Peppers

Pour carrots and bell peppers into the skillet with the onions and garlic. Stir occasionally and add water if they start to stick. Cook for 4-5 minutes. Cover with a lid.

Step 4 – Add More Veggies

Add the rest of the veggies and stir. If needed, pour in a little more water. Cover with a lid. Cook for 3-4 minutes until all veggies are the desired texture.

Step 5 – Mix Sauce Together

In a small bowl, mix together tamari and peanut butter until well mixed. It takes a few minutes of stirring. Set aside.

Step 6 – Drain Noodles

Once the noodles are done, drain the water and return them to the original pan. Pour the sauce in and stir it into the noodles. Sometimes I’ll add extra tamari too.

Step 7 – Add Noodles to Veggies

Pour saucy noodles into the tender-crisp veggies and mix well. Add hot sauce if desired.

Dietary Notes

Gluten-Free: Tamari and Brown Rice Noodles are already gluten-free, but make sure any substitutes you use are also gluten-free if needed.

Soy-Free: Substitute coconut aminos for the soy sauce to make this dish soy-free.

Peanut-Free: Substitute sunflower seed butter for the peanut butter to make this dish peanut free.

Veggies: Fresh or frozen veggies can be used. I always keep a bag of stir fry vegies in the freezer, so I can make this quickly.

Protein: If you’d like more protein, add a can of chickpeas (drained and rinsed) when you add the noodles. You can also add baked or sautéed tofu.

More Plant-Based Dinner Ideas

  • Vegan Sushi Bowl
  • Plant-Based Taco Bar
  • Vegetable Spaghetti
  • Vegan Bolognese Pasta with Lentils
  • Vegan Burgers
Yield: 4-6 Servings

Vegan Pad Thai

Vegan Pad Thai

This vegan version of Pad Thai cooks up in less than 30 minutes, making it perfect for weeknight dinners. It tastes even better the next day too.

Cook Time 25 minutes
Total Time 25 minutes

Ingredients

  • 1 Box Brown Rice Pad Thai Noodles
  • 1 White Onion (1 cup diced)
  • 2 cloves Garlic (or 1 tbsp minced garlic)
  • 1/4 cup Water (as needed for water sauté)
  • 2 Carrot (sliced)
  • 1 Red Bell Pepper (diced)
  • 1 Yellow Bell Pepper (diced)
  • 1 cup Broccoli (chopped into florets)
  • 1 cup Shredded Red Cabbage
  • 1/2 cup Frozen Shelled Edamame
  • 1 Lime (sliced into wedges)
  • 1/4 cup Peanut Butter
  • 1/4 cup Tamari (or Braggs Liquid Aminos)
  • 1 tsp Hot Sauce (optional)

Instructions

  1. Cook Brown Rice Pad Thai noodles according to package directions.
  2. Add diced onions and garlic to a hot skillet. Cook for a few minutes until onions start to turn translucent. Add small amounts of water as needed to water sauté. Cover with a lid.
  3. Pour carrots and bell peppers into the skillet with the onions and garlic, stir occasionally and add water if they start to stick. Cook for 4-5 minutes. Cover with a lid.
  4. Add the rest of the veggies and stir. If needed, pour in a little more water. Cover with a lid. Cook for 3-4 minutes until all the veggies are the desired texture.
  5. In a small bowl, mix together tamari and peanut butter until well mixed. It takes a few minutes of stirring. Set aside.
  6. Once noodles are done, drain the water and return to original pan. Pour the sauce in and stir it into the noodles. Sometimes I'll add extra tamari too.
  7. Pour saucy noodles into the tender-crisp veggies and mix well. Add hot sauce if desired.

Notes

  • Gluten-Free: Tamari and Brown Rice Noodles are already gluten-free, but make sure any substitutes are also gluten-free if needed.
  • If Brown Rice Pad Thai Noodles aren't available, Stir Fry Noodles are a good substitute.
  • Package sizes vary, I've used 8 ounce packages and 14 ounce packages of noodles with similar results.
  • Soy-Free: Substitute coconut aminos for the soy sauce to make this dish soy-free.
  • Peanut-Free: Substitute sunflower seed butter for the peanut butter to make this dish peanut-free.
  • Veggies: Fresh or frozen veggies can be used. I always keep a bag of stir fry veggies in the freezer so I can make this quickly.
  • More Protein: Add a can of chickpeas (drained and rinsed) when you add the noodles. You can also add baked or sautéed tofu.

Recommended Products

As an Amazon Associate and member of other affiliate programs, I earn from qualifying purchases.

  • Annie Chun's Brown Rice Noodles, Pad Thai
    Annie Chun's Brown Rice Noodles, Pad Thai
  • San-J Organic Gluten Free Soy Sauce Tamari 
    San-J Organic Gluten Free Soy Sauce Tamari 

Did you make this recipe?

We'd love to see it! Tag us and use #MyPlantBasedFamily!

© Holly Yzquierdo
Category: Recipes

Filed Under: Main Dish Recipes, Recipes

Black Bean Corn Salad with Avocado

April 29, 2021 by Holly Yzquierdo 132 Comments

No cook, fresh, healthy, delicious and easy – This black bean corn salad with avocado checks all the boxes!

I make this salad that also doubles as a dip while I’m doing meal prep for the week. There is no cooking involved when using canned beans and corn.

It is meant to be served cold, but Jim always heats his up. I keep it in the refrigerator to grab for a quick lunch or snack.

Spoon the bean mixture over greens for a fresh salad. It’s much faster than starting a salad from scratch. It also works well over baked potatoes, or scooped up with tortilla chips.

There are many variations of black bean and corn salad, from the ingredients to the name. Sometimes it referred to as black bean and corn salsa or black bean and corn dip.

Want it spicy? Add a jalapeno. Don’t have fresh tomatoes? Grab a can. Don’t like avocado? Leave it out.

Since there is no cooking involved, feel free to experiment with the flavors to make it exactly as you’d like.

Black Bean Salad Recipe

Ingredients

  • 1 can Black Beans (15 ounces, drained and rinsed)
  • 1 can Corn (15 ounces, drained and rinsed)
  • 2 cups Tomatoes (diced)
  • 1/4 cup Red Onion (chopped)
  • 2 cloves Garlic (or 1 tbsp minced garlic)
  • 1 Avocado (diced)
  • 1 Jalapeno Pepper (diced, optional)
  • 2 Lime (juiced)
  • 1/2 tsp Chili Powder
  • 1/4 tsp Cumin
  • 1/8 tsp Salt (if using)
  • 1 head Romain Hearts (or other mixed greens)

Step 1 – Combine Beans and Veggies

In a large mixing bowl, combine the drained and rinsed black beans and corns with the diced tomatoes, pepper, onion, garlic and avocado.

Step 2 – Add Spices

Add the lime juice, chili powder, cumin, and salt. Stir.

Step 3 – Chill and Serve

Store in an air tight container and serve chilled over a bed of greens. You can also serve it over a baked potato or with tortilla chips.

Variations

If you don’t like it spice, omit the jalapeno. Want more spice? Add hot sauce. The addition of cilantro is a great flavor twist too.

Don’t have black beans in your pantry? Replace those with cooked lentils or chickpeas instead.

Storing Leftovers

Keep refrigerated in an air tight container for up to three days. One serving is approximately one cup.

More Black Bean Recipes

  • Black Bean Mango Salad
  • Sweet Potato and Black Bean Bowl
  • Instant Pot Black Beans and Rice
  • Cilantro-Lime Infused Quinoa with Black Beans
  • Chipotle Black Bean Chili
Yield: 4 servings

Black Bean Corn Salad with Avocado

Black Bean Corn Salad with Avocado

Make a fresh, no cook salad that doubles as a salsa.

Prep Time 15 minutes
Cook Time 15 minutes
Total Time 30 minutes

Ingredients

  • 1 can Black Beans (15 ounces, drained and rinsed)
  • 1 can Corn (15 ounces, drained and rinsed)
  • 2 cups Tomatoes (diced)
  • 1/4 cup Red Onion (chopped)
  • 2 cloves Garlic (or 1 tbsp minced garlic)
  • 1 Avocado (diced)
  • 1 Jalapeno Pepper (diced, optional)
  • 2 Lime (juiced)
  • 1/2 tsp Chili Powder
  • 1/4 tsp Cumin
  • 1/8 tsp Salt (if using)
  • 1 Head Romain Hearts (or other mixed greens)

Instructions

  1. In a large bowl combine the drained and rinsed black beans and corn with the diced tomatoes, pepper, onion, garlic and avocado.
  2. Add the lime juice, chili powder, cumin, and salt. Stir.
  3. Store in an air tight bowl and serve chilled over a bed of greens.

Notes

  • Leftovers: Refrigerate in an air tight container for up to three days.
  • Serving Size: One serving is approximately 1 cup.
  • More Flavor: Add cilantro or hot sauce for more flavor.
  • No Black Beans: Use cooked lentils or chickpeas instead.

Did you make this recipe?

We'd love to see it! Tag us and use #MyPlantBasedFamily!

© Holly Yzquierdo

Filed Under: Main Dish Recipes, Mexican Food, Recipes, Salads & Wraps, Sauces, Dips, and Salad Dressings, Side Dishes

Vegan Sushi Bowl

April 28, 2021 by Holly Yzquierdo Leave a Comment

Can you eat sushi on a plant-based diet? Yes, but I have an even better idea – sushi bowls!

When you roll sushi, you are limited by what will fit into a sushi roll. When you make a sushi bowl, you can add as much as you want! Just cut up Nori to get that seafood flavor.

Nori Seaweed Sheets

Nori is a seaweed that is grown, cleaned and processed in natural sea water. It is considered a super food because it packs a hefty amount of vitamins, minerals and amino acid.

Traditional sushi rolls are typically made with nori seaweed sheets. They hold all the rice and added ingredients together.

For a sushi bowl, cut up the nori sheets into bite-sized strips with scissors. Its addition is what takes the dish from a rice bowl to a sushi bowl. Nori also adds texture, along with a salty-sweet flavor.

Is Nori Seaweed Vegan?

Yes! Nori seaweed sheets are vegan. The seaweed is a plant derived from red algae that grows in the seas of Japan and China.

It is processed much like paper where the seaweed is first dried. Then water is added back, and the nori is dried again in thin sheets for packaging.

Easy Vegan Sushi Recipe

Rolling sushi takes practice and can be time consuming. I have several tricks to make vegan sushi bowls quick and easy.

The basis of any sushi is rice. You know I love my Instant Pot, so this one is a no-brainer. Letting the pressure cooker take care of the rice frees up time to prepare the veggies.

All the veggies in this dish are raw. It couldn’t be easier. Just cut them up, and they are ready to go in the sushi bowl.

This is a fun recipe to make for a family or crowd because each person can build their own bowl. Place each veggie in it’s own container, buffet style, so everyone can see what is available and choose what they want. You can’t go wrong!

How to Make Vegan Sushi Bowls

Ingredients

  • 1 cup Brown Rice (or rice of your choice)
  • 2 cups Water
  • 2 tsps Rice Wine Vinegar
  • 1 tbsp Cane Sugar (optional)
  • 1 Cucumber (diced)
  • 1 Avocado (diced)
  • 1 Carrot (cut into matchsticks)
  • 4 Nori Sheets
  • 1/4 cup Tamari
  • 1 Red Bell Pepper
  • 1/4 cup Cilantro
  • 1 Mango (diced)
  • 1/2 cup Frozen Shelled Edamame (defrost to serve)
  • 1/2 cup Shredded Red Cabbage

Step 1 – Pressure Cook Rice

Add rice and water to your Instant Pot. Seal and cook on manual (pressure cook) for 22 minutes.

Allow pressure to release naturally when done. Stir in rice wine vinegar and sugar, then set aside.

Step 2 – Prepare Veggies

Prepare all the veggies by dicing and placing in bowls (buffet style). Use scissors to cut Nori into strips.

Step 3 – Assemble Bowls

Scoop the rice into bowls and top with your favorite prepared veggies. Pour Tamari over the bowl, or serve it on the side. Enjoy.

Notes

You can use any rice you prefer. Brown rice is a great whole grain option, but Jasmin Rice is delicious too.

We use Tamari or Braggs Liquid Aminos because they are gluten-free. You can use soy sauce or other sauces you prefer.

Storing Leftovers

Store any leftover veggies individually in air tight containers. You can make a bowl in the morning and take it to work for lunch, but I wouldn’t let it sit longer than that with everything together.

More Plant-Based Bowl Recipes

  • Sweet Potato and Black Bean Bowl
  • Plant-Based Mediterranean Bowl
  • Smoothie Bowl
Yield: 4 servings

Vegan Sushi Bowl

Vegan Sushi Bowl

All the flavors of sushi in a plant-based bowl.

Cook Time 35 minutes
Total Time 35 minutes

Ingredients

  • 1 cup Brown Rice (or rice of your choice)
  • 2 cups Water
  • 2 tsps Rice Wine Vinegar
  • 1 tblsp Cane Sugar (optional)
  • 1 Cucumber (diced)
  • 1 Avocado (diced)
  • 1 Carrot (cut into matchsticks)
  • 4 Nori Sheets
  • 1/4 cup Tamari
  • 1 Red Bell Pepper
  • 1/4 cup Cilantro
  • 1 Mango (diced)
  • 1/2 cup Frozen Shelled Edamame (defrost to serve)
  • 1/2 cup Shredded Red Cabbage

Instructions

  1. Add rice and water to your Instant Pot. Seal and cook on manual (pressure cook) for 22 minutes. Allow pressure to release naturally when done. Stir in rice wine vinegar and sugar, then set aside.
  2. Prepare all the veggies by dicing and place in bowls (buffet style). Use scissors to cut Nori into strips.
  3. Scoop the rice into bowls, top with your favorite prepared veggies. Pour Tamari over bowl or serve on the side. Enjoy.

Notes

  • Rice: You can use any rice you prefer. Brown rice is a great whole grain option, but jasmin rice is delicious too.
  • Leftovers: Store leftover veggies individually in air tight containers. You could make a bowl in the morning and take it to work for lunch, but I wouldn't let it sit longer than that with everything together.
  • Sauce: We use Tamari or Braggs Liquid Aminos because they are gluten-free. You can use soy sauce or other sauces you prefer.

Did you make this recipe?

We'd love to see it! Tag us and use #MyPlantBasedFamily!

© Holly Yzquierdo
Category: Instant Pot

Filed Under: Main Dish Recipes, Recipes

« Previous Page
Next Page »

Primary Sidebar

Footer

Find it here!

Amazon Affiliate Disclosure

Holly Yzquierdo of My Plant-Based Family is a participant in the Amazon Services LLC Associates Program, an affiliate advertising program designed to provide a means for sites to earn advertising fees by advertising and linking to amazon.com.

Disclosures

Unauthorized use and/or duplication of any part of this website or content without express and written permission from Holly Yzquierdo is prohibited. Excerpts and links may be used, provided that full credit is given to Holly Yzquierdo and MyPlantBasedFamily.com with links to the original content.

More information on our Privacy Policy and other Disclosures are available.

Copyright © 2026 · Wellness Pro on Genesis Framework · WordPress · Log in