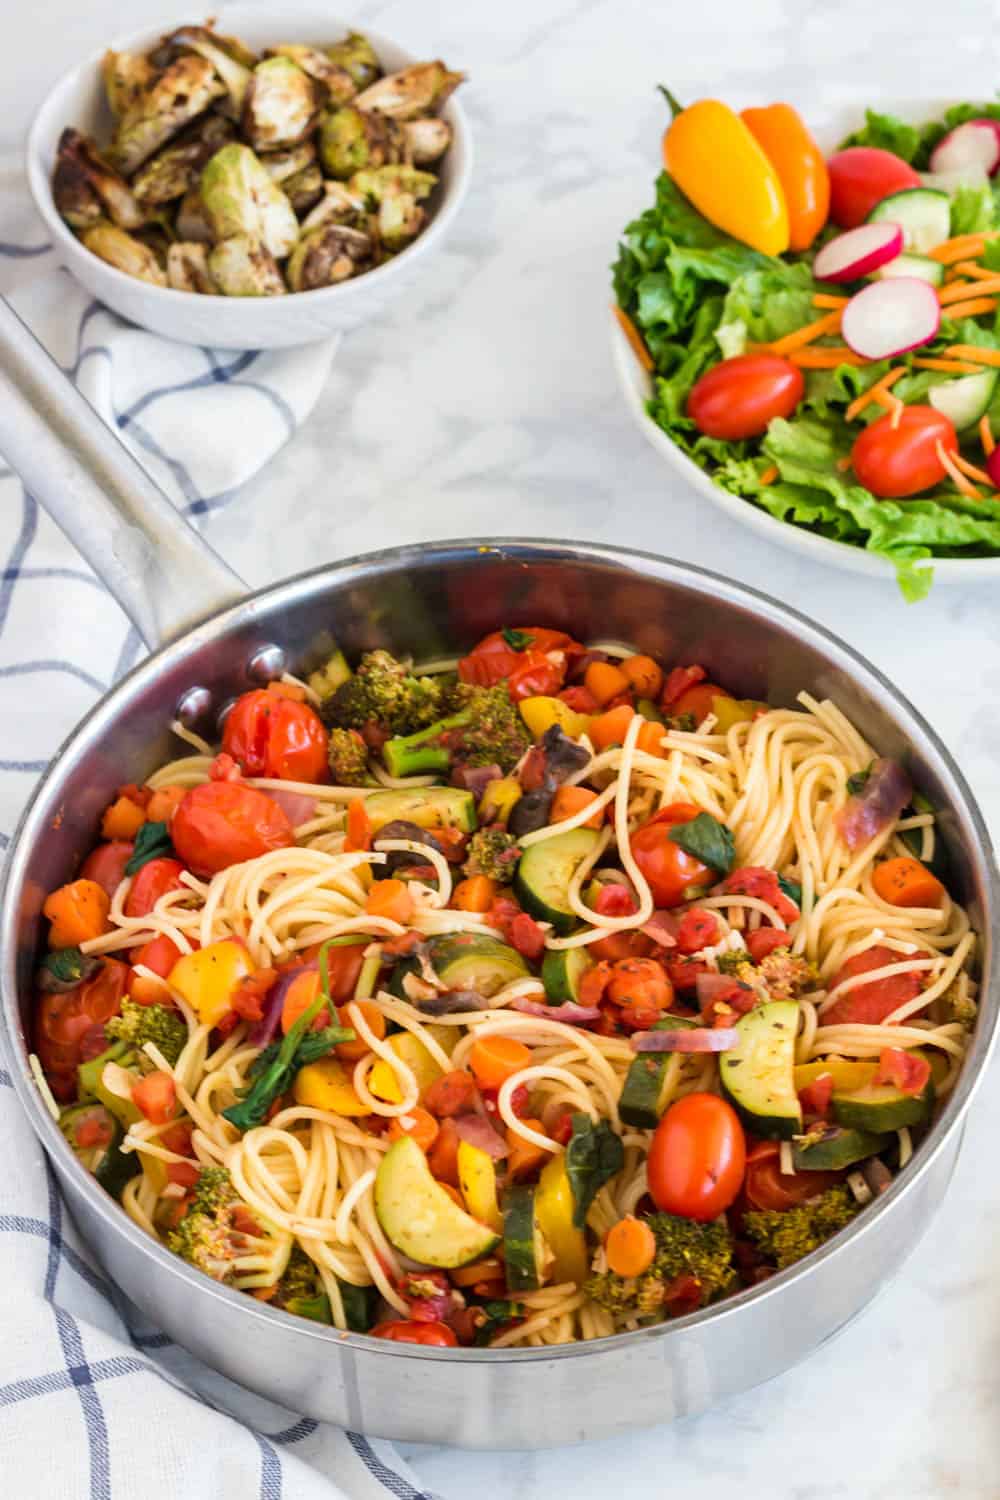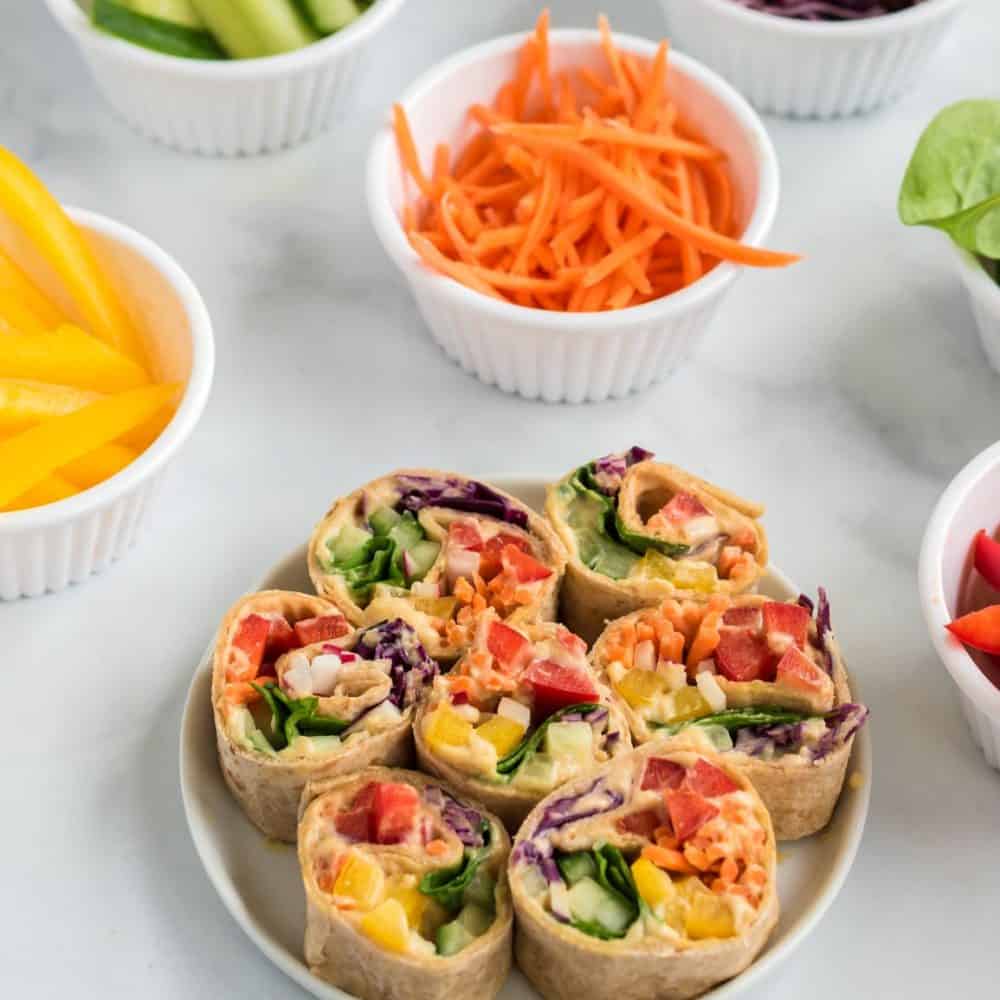
These fresh and colorful Rainbow Veggie Pinwheels are a delicious no-cook meal. Choose your favorite veggies or let everyone make their own for a fun snack or meal. Vegan Pinwheels are a fun appetizer too.

The best part, in my opinion, of these Veggie Pinwheels is that you can get a lot of veggie variety in a couple of bites. The second best part is that everyone can make their own so you get your favorite veggies!

Vegan Pinwheels: So Many Veggies
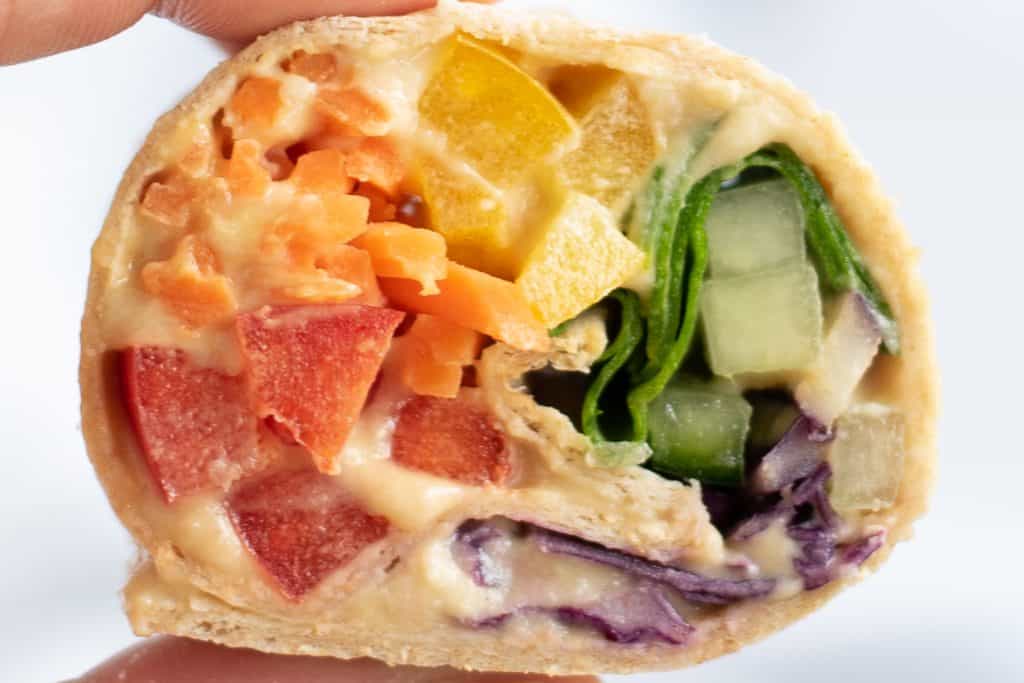
You can use any veggies you like to make these Rainbow Veggie Pinwheels, but I like to use all the colors of the rainbow!
My favorite veggies to include are:
- Red Bell Pepper
- Carrots
- Yellow Bell Pepper
- Baby Spinach
- Purple Cabbage
I like to have other options for my kids becuase they don’t love bell peppers the way I do. Other veggie favorites include:
- Tomatoes (with seeds removed so they don’t get too wet)
- Sweet Peppers
- Cucumbers
- Avocados
- Radishes
These are the complete opposite of the meat and cheese versions I made a decade ago. I called those tortilla roll ups and they were a staple for potlucks and after school snacks. These are a much better alternative, full of fiber and actually good for you!
Veggie Pinwheels with Hummus
Cream cheese is the traditional filling in pinwheels, but we use hummus! My Oil-free Hummus is perfect because it’s easy to make with only a few ingredients and tastes great! Or try my Oil-Free Cilantro Jalapeno Hummus for a little more kick!

Keep Pinwheels from Getting Soggy
The only problem with with making pinwheels ahead of time is they can get soggy. It’s the high water content of veggies. Some veggies will increase the chances of them getting soggy more than others. There are a few options to decrease the chance of your pinwheels getting soggy.
Prep the Veggies but Assemble Pinwheel Later
You can have all your veggies washed, cut and stored separately. Then when it’s time to eat, simply smooth hummus over your tortilla and arrange your veggies. Roll up your pinwheel and slice them up for easy snacking. This is the best option!
Assemble Pinwheel but Don’t Cut
Another option is to assemble your pinwheel but don’t slice it. Instead, wrap it in a paper towel and carefully store it in a container. Then when you are ready to eat, slice and enjoy.
Cutting Pinwheels Ahead of Time
If you have to cut your pinwheels ahead of time because they are going in a lunch box or to a potluck, wait as long as you can before cutting them. If you can cut them right before you leave, you’ll have a better chance of them not being soggy. I would probably wrap them in a paper towel if possible to help absorb moisture in the container.
Vegan Pinwheels are perfect for taking to parties or get-togethers. Everyone loves finger food! You can make them more colorful by using different colored tortillas. Green, red/orange and blue are easy to find.
If you are gluten-free, choose gluten-free tortillas instead of wheat.
Rainbow Veggie Pinwheels

Ingredients
- 4 large wheat tortillas
- 1 cup hummus
- 1 red bell pepper, sliced thin
- 2 carrots, shredded or matchsticks
- 1 yellow bell pepper, sliced thin
- 1/2 cup baby spinach leaves
- 1/2 cup purple cabbage, sliced thin or shredded
Instructions
- Spread about ¼ cup hummus over each tortilla. Leave room on the edge.
- Arrange the veggies on the hummus covered tortillas (in the order of the rainbow).
- Roll up each tortilla tightly.
- Cut crosswise into pinwheels and serve.
Notes
See posts for additional notes.
You can also save this vegan pinwheel recipe for later by adding it to your favorite Pinterest board.