• Skip to primary navigation
  • Skip to main content
  • Skip to primary sidebar
  • Skip to footer

My Plant-Based Family

Eating Whole Food, Plant-Based Diet recipes, On a Budget.

  • Plant-Based Recipes
    • Breakfast
    • Main Dish
    • Instant Pot
    • Daniel Fast Recipes
    • Side Dishes
    • Bread and Muffins
    • Salad and Wraps
    • Soup, Stews, and Chili
    • Sauces, Dips, and Salad Dressings
    • Desserts
    • Crock Pot
    • Mexican Food
  • Videos
  • Resources
    • Getting Started
    • Books
      • The Plant-Based Diet Starter Guide
      • The Plant-Based Holiday Meal Plan & Cookbook
  • Meal Plans
    • Meal Plans 2020
    • Meal Plans 2019
    • Meal Plans 2017
    • Meal Plans 2016
    • Meal Plans 2015
    • Meal Plans 2014
    • Meal Plans 2013
  • About Us
    • Our Family
    • Contact Me
    • Our Food Philosophy
    • Disclosure Policy
      • Privacy Policy
  • Daniel Fast Recipes

gluten free

Breakfast Cookies

June 1, 2016 by Holly Yzquierdo 27 Comments

Plant-Based Gluten-Free Breakfast Cookies that are allergy-friendly and delicious. These cookies are a great choice for breakfast on the go.

Yep, we are having cookies for breakfast. These aren’t ordinary cookies, they are Breakfast Cookies and full of fiber and healthy ingredients.

I specifically made these Breakfast Cookies with my preferences in mind. So often, moms will put others needs ahead of their own but when it comes to eating healthy it’s important to take care of yourself.

Plant-Based Gluten-Free Breakfast Cookies that are allergy-friendly and delicious. These cookies are a great choice for breakfast on the go.

This page contains affiliate links. That means if you purchase something using one of these links I’ll make a small percentage that helps pay to run this site but it won’t cost you any extra. Thank you for supporting My Plant-Based Family.

Breakfast Cookies aren’t a new idea. People have been making them for years. I wanted my Breakfast Cookies to contain ingredients that I would put in my oatmeal. I’m not looking for a junk food breakfast here. On the contrary, I’m looking for a plant-based, whole food breakfast that is also allergy-friendly and portable for breakfast on the go. 

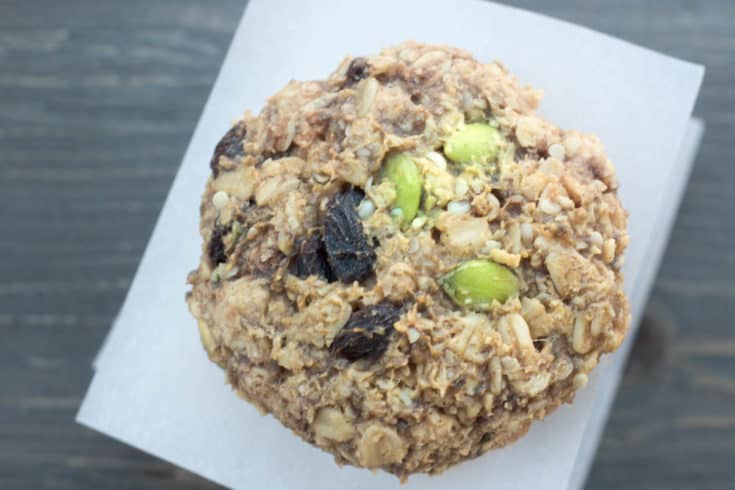
This Breakfast Cookie recipe contains my three favorite seeds, raw pepitas, hemp hearts and chia seeds. I love seeds! They are a great source of healthy fats, protein, and fiber. One of the things I love about these cookies is that even though they have seeds the seeds aren’t super noticeable when you’re eating them.

I make a gel with water and the chia seeds. After I let it sit to congeal I toss the raisins in the water too. It may seem strange but our raisins get so dry. We buy them in bulk and after a while, they get really dry and a little on the hard side. That doesn’t bother my family but I like my raisins to be a little more plump. I usually soak my raisins in warm water for a few minutes before using them. If you are using golden raisins they probably don’t need to be soaked.

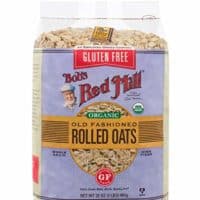
To keep it allergy-friendly I use gluten-free oats and a peanut butter alternative. You could use peanut butter or some other nut butter if you prefer. The oats give it substance and the nut/seed butter gives it flavor and acts as the other binder.

You may notice slight vanilla and cinnamon flavors as well. I skipped the chocolate for two reasons. First, I’m going to be eating these on the go and I don’t want little chocolate chips falling out and melting in my car or on my clothes in the super hot Arizona sun. Second, if I ate chocolate for breakfast it would be hard for me not to indulge in sweets all day.

These Breakfast Cookies just have a touch of sweetness but taste much less sweet than your standard store-bought granola bar. I’ve been relying on those a lot lately and I’m trying to get away from it. They are delicious but the “good” ones are pretty expensive for every day.

Plant-Based Gluten-Free Breakfast Cookies that are allergy-friendly and delicious. These cookies are a great choice for breakfast on the go.

Breakfast Cookies

I recommend you enjoy these Breakfast Cookies with a cup of coffee. If you decide to share with your kids they may want a cup of plant-based milk.

Yield: 12

Breakfast Cookies

Breakfast Cookies

These Breakfast Cookies are perfect for breakfast or snack on the go! These lightly sweetened cookies are full of healthy ingredients your family will love. 

Prep Time 10 minutes
Cook Time 10 minutes
Total Time 20 minutes

Ingredients

  • ½ cup warm water
  • 2 tsp chia seeds
  • ¼ cup raisins
  • 1 cup gluten-free rolled oats
  • 1 cup gluten-free rolled oats pulsed in a blender
  • ½ cup peanut butter alternative
  • ¼ cup maple syrup
  • 1 Tbsp raw pepitas
  • 1 Tbsp hemp hearts
  • 1 tsp cinnamon
  • 1 tsp vanilla

Instructions

  1. Preheat oven to 350 degrees. Line a cookie sheet with parchment paper.
  2. Pour 2 tsp chia seeds into warm water and give a gentle stir. Add in raisins if they are dry. Let sit at least 5 minutes.
  3. In a large bowl add the rolled oats and the pulsed rolled oats.
  4. Dump the Soy Nut Butter into the oats and stir well. I have best results "stabbing" the clumps with a wooden spoon.
  5. Pour in the chia seed/raisin water and maple syrup then stir well to incorporate everything.
  6. Sprinkle the remaining seeds, cinnamon and vanilla in the bowl then stir a final time.
  7. Use a spoon to scoop out a ball of dough slightly larger that a ping pong ball. Use wet hands to roll it into a ball then flatten it into a disk. The dough will not spread so the size will be the same after baking. You should have about 12 cookies.
  8. Bake for 10 minutes and allow to cool before eating. Store in air tight container and enjoy within 3-4 days.

Notes

You can substitute your favorite ingredients. Choose cranberries instead of raisins, pick your favorite nut or seen butter, and change up the spices to suit your preferences.

Recommended Products

As an Amazon Associate and member of other affiliate programs, I earn from qualifying purchases.

  • Organic Chia Seeds 
    Organic Chia Seeds 
  • Manitoba Harvest Organic Hemp Hearts 
    Manitoba Harvest Organic Hemp Hearts 
  • Anthony's Organic Pumpkin Seeds
    Anthony's Organic Pumpkin Seeds
  • Bob's Red Mill Gluten Free Organic Old Fashioned Rolled Oats
    Bob's Red Mill Gluten Free Organic Old Fashioned Rolled Oats

Did you make this recipe?

We'd love to see it! Tag us and use #MyPlantBasedFamily!

Category: Breakfast
This page contains affiliate links.

Filed Under: Breakfast, Recipes Tagged With: gluten free, Plant Based Diet, Recipes

Strawberry Banana Muffins

April 28, 2016 by Holly Yzquierdo 15 Comments

Strawberry Banana Muffins gluten-free and plant-based

My youngest son has been picky about breakfast lately. He isn’t interested in anything quick or easy, except fruit. Muffins are just about the only thing he will happily eat, especially these Strawberry Banana Muffins.

Strawberry Banana Muffins gluten-free and plant-based

A while ago I gave up on gluten-free baking. It was hard and it wouldn’t always turn out the way I wanted. After speaking with some expert bakers at last years Food Allergy Bloggers Conference I worked up the nerve to start again. Except this time I decided to stick to gluten-free all purpose baking mixes. After all, I don’t need to reinvent the wheel.

Strawberry Banana Muffins gluten-free and plant-based

If you struggle with gluten-free baking too I recommend getting an all purpose mix and giving it another try. Update: It’s been a few years since I created this recipe. Now I always use Bob’s Red Mill Gluten-Free 1 to 1 Baking Flour.

These muffins are perfect this time of year when strawberries are in season but you can also use frozen strawberries. To use frozen strawberries just run them under cold water to defrost them and let them sit and drain (I used a small strainer) while I mixed up the rest of the ingredients.

Gluten-Free Strawberry Banana Muffins

Ingredients

  • 2 bananas (plus more listed below)
  • ½ cup sugar
  • 1 tsp vanilla
  • ½ cup plant-based milk
  • 1 tsp baking soda
  • ¼ tsp salt
  • 1¾ cup gluten-free all purpose flour baking mix
  • 2 cups diced strawberries
  • ½ cup diced bananas

Instructions

  1. Preheat the oven to 350 degrees. Prepare your muffin pan by using a spray oil or parchment liners.
  2. In a large bowl, mash 2 bananas, then add in sugar, vanilla and plant-based milk. Mix well.
  3. Add in baking soda, salt and gluten-free flour blend and stir to combine.
  4. Fold in half a diced banana and the diced strawberries.
  5. Scoop in equal parts into the muffin tin.
  6. Bake for 30 minutes. Check for doneness and bake for 5-10 more minutes if needed.
  7. Allow to cool before serving.
Strawberry Banana Muffins gluten-free

Because of the strawberries these muffins will be really soft, and somewhat gooey on the inside. The strawberries “cook down” and leave hollow spots. They taste delicious and get this, they even freeze well.

Strawberry Banana Muffins gluten-free and gluten-free

They aren’t the cleanest but if you don’t mind licking your fingers you won’t mind. I wouldn’t eat them in the car on the way to work though.

If you missed my Cinnamon Swirl Banana Bread I think you should try it! Check out my bread and muffin page for more great recipes.

Yield: 12 Servings

Strawberry Banana Muffins

Strawberry Banana Muffins gluten-free

Gluten-free strawberry banana muffins made with fresh or frozen strawberries

Prep Time 10 minutes
Cook Time 30 minutes
Total Time 40 minutes

Ingredients

  • 2 bananas (plus more listed below)
  • ½ cup sugar
  • 1 tsp vanilla
  • ½ cup plant-based milk
  • 1 tsp baking soda
  • ¼ tsp salt
  • 1¾ cup gluten-free all purpose flour baking mix
  • 2 cups diced strawberries
  • ½ cup diced bananas

Instructions

  1. Preheat the oven to 350 degrees. Prepare your muffin pan by using a spray oil or parchment liners.
  2. In a large bowl, mash 2 bananas, then add in sugar, vanilla and plant-based milk. Mix well.
  3. Add in baking soda, salt and gluten-free flour blend and stir to combine.
  4. Fold in half a diced banana and the diced strawberries.
  5. Scoop in equal parts into the muffin tin.
  6. Bake for 30 minutes. Check for doneness and bake for 5-10 more minutes if needed.
  7. Allow to cool before serving.

Notes

To use frozen strawberries just run them under cold water to defrost them and let them sit and drain (I used a small strainer) while I mixed up the rest of the ingredients.

Did you make this recipe?

We'd love to see it! Tag us and use #MyPlantBasedFamily!

© Heather Mayes

Filed Under: Bread & Muffin Recipes, Breakfast, Recipes Tagged With: gluten free, Plant Based Diet, Recipes, Vegan

Cinnamon Swirl Banana Bread

April 24, 2016 by Holly Yzquierdo 13 Comments

Gluten-Free, Vegan Banana Bread that is perfect for brunch, snack or to share with friends.

One of our family’s all time favorite recipes is Banana Bread. Our old family recipe is delicious but it is made with wheat. I have a gluten-free banana bread recipe but it wasn’t as close to the original as I wanted (maybe because it was refined sugar-free).

Gluten-Free, Vegan Banana Bread that is perfect for brunch, snack or to share with friends.

I found Jewel’s all purpose gluten-free mix and tried my regular recipe. It’s a cup for cup mix but I decreased the flour by 1/2 a cup compared to my original recipe, everything else stayed the same. I wanted to change it up a bit so I went for a cinnamon swirl.

The great thing about this recipe is it always impresses. Enjoy it at brunch, breakfast, dessert and potlucks.

How to Make Cinnamon Swirl Banana Bread

Ingredients

  • 1 cup apple sauce
  • ½ cup sugar
  • 3 ripe bananas
  • ¼ cup plant-based milk
  • 1 tsp vanilla
  • 1 tsp baking soda
  • ¼ tsp salt
  • 1½ cup Jewel’s gluten-free all purpose baking mix
  • 1 tablespoon cinnamon

Instructions

  1. Preheat oven to 350 degrees and prepare a bundt pan with non-stick spray.
  2. In a large bowl mix apple sauce and sugar.
  3. Add bananas and smash with a fork.
  4. Pour in plant-based milk and vanilla and stir.
  5. Sprinkle baking soda and salt then dump in Jewel’s gluten-free all purpose flour mix.
  6. Stir everything together then scoop out about 1 cup into another bowl. Add one tablespoon of cinnamon to the bowl and stir.
  7. Pour the regular batter into the bundt pan. Then add spoonfuls of the cinnamon batter on top Swirl gently.
  8. Bake at 350 for 40 minutes or until done.
  9. Allow to cool completely before serving.

We love making banana bread in bundt pans because they are so pretty and the whole in the middle helps them cook more evenly. You can make these into muffins, just cook for 15-20 minutes instead.

gluten-free vegan banana bread

If you try this recipe with a different cup for cup mix let me know which one’s work for you.

See more recipes like this on my Breads and Muffins Page.

Yield: 12 Servings

Cinnamon Swirl Banana Bread

gluten-free vegan banana bread

Gluten-free banana bread with a cinnamon twist.

Prep Time 10 minutes
Cook Time 40 minutes
Total Time 50 minutes

Ingredients

  • 1 cup apple sauce
  • ½ cup sugar
  • 3 ripe bananas
  • ¼ cup plant-based milk
  • 1 tsp vanilla
  • 1 tsp baking soda
  • ¼ tsp salt
  • 1½ cup Jewel's gluten-free all purpose baking mix
  • 1 tablespoon cinnamon

Instructions

  1. Preheat oven to 350 degrees and prepare a bundt pan with non-stick spray.
  2. In a large bowl mix apple sauce and sugar.
  3. Add bananas and smash with a fork.
  4. Pour in plant-based milk and vanilla and stir.
  5. Sprinkle baking soda and salt then dump in Jewel's gluten-free all purpose flour mix.
  6. Stir everything together then scoop out about 1 cup into another bowl. Add one tablespoon of cinnamon to the bowl and stir.
  7. Pour the regular batter into the bundt pan. Then add spoonfuls of the cinnamon batter on top Swirl gently.
  8. Bake at 350 for 40 minutes or until done.
  9. Allow to cool completely before serving.

Notes

You can make these into muffins, just cook for 15-20 minutes instead.

Did you make this recipe?

We'd love to see it! Tag us and use #MyPlantBasedFamily!

© Heather Mayes

Filed Under: Bread & Muffin Recipes, Dessert, Recipes Tagged With: gluten free, Plant Based Diet, Vegan

Creamy Vegan Brown Gravy

March 25, 2016 by Holly Yzquierdo 23 Comments

Vegan brown gravy is a delicious and versatile sauce that can take your plant-based meals to the next level. With its rich, savory flavor and smooth, creamy texture, it’s the perfect topping for mashed potatoes, stuffing, roasted veggies, and more.

Traditional gravy recipes often rely on animal fat, broth, or meat drippings for their depth of flavor, but vegan brown gravy uses plant-based alternatives to achieve the same richness without animal products. Not only does this make it an ideal choice for vegans, but it also caters to those with dietary restrictions, like dairy allergies.

The beauty of vegan brown gravy is in its versatility; once you master the basics, you can adjust it to suit your taste or meal. With just a few tweaks, you can create a lighter, more herbaceous gravy for summer meals or a deeply savory one for holiday feasts.

What makes vegan brown gravy so irresistible? It’s all about the rich and savory flavors that come together to create a velvety-smooth sauce that’s perfect for drizzling over potatoes, tofu, vegetables, or whatever else you fancy. Whether you’re hosting a holiday feast, preparing a cozy Sunday dinner, or simply craving some comfort food on a chilly evening, this gravy is sure to hit the spot.

This sauce tastes a lot like regular savory brown gravy but it’s gluten-free, dairy-free and cholesterol-free. The pepper gives this a little spice that your kids may not love (like mine). Feel free to leave it out.

Ways to Customize Creamy Brown Gravy

This creamy gravy/sauce can be used in many ways. Use it as the “soup” or “glue” for a casserole, pour it over pasta, top a baked potato, pour it over veggies or any other way your heart desires. Here are some simple recipe variations to try depending on your use for the brown gravy:

  1. For a richer and creamier gravy, add a splash of coconut cream.
  2. Experiment with different herbs and spices to customize the flavor of your gravy. Fresh herbs like rosemary, sage, or parsley can add a burst of freshness, while ground spices like smoked paprika or cayenne pepper can add depth and complexity.
  3. If you prefer a smoother gravy, you can use an immersion blender or transfer the gravy to a blender and blend until smooth before serving.
  4. Feel free to adjust the consistency of the gravy by adding veggie broth or more rice milk if it’s too thick, or simmering it longer if it’s too thin.

Serving Suggestions

Vegan brown gravy is wonderfully versatile and can be paired with many dishes. Here are some ideas:

  • Mashed Potatoes: A classic combination that never fails. Vegan brown gravy over fluffy mashed potatoes is a staple side dish for holiday dinners and cozy meals.
  • Stuffing and Roasted Vegetables: Drizzle your gravy over stuffing or roasted carrots, parsnips, and Brussels sprouts for a comforting plate.
  • Vegan Meatloaf: Enhance a slice of lentil or nut-based loaf with a generous helping of gravy for a satisfying main course.
  • Savory Bowls: Use vegan brown gravy as a sauce for savory bowls with grains, roasted veggies, and tempeh or tofu.
  • Shepherd’s Pie: Add a layer of vegan brown gravy to the base before adding mashed potatoes on top. It adds extra flavor and moisture to the dish.

How to Make Creamy Vegan Brown Gravy

Ingredients

  • 2 Tbsp nutritional yeast
  • 2 Tbsp brown rice flour (other flours may be substituted)
  • ¼ tsp garlic powder
  • ½ tsp onion powder
  • ¼ tsp white pepper (black pepper may be used)
  • 1 dash of sweet (not smoked) paprika (may be omitted)
  • 1 Tbsp Braggs Amino Acids (tamari or soy sauce can be used but it is NOT gluten-free)
  • 1 ½ cup Rice Milk

If you aren’t familiar with Bragg Liquid Aminos,  nutritional yeast or brown rice flour, don’t get nervous! Bragg Liquid Aminos taste similar to soy sauce but is gluten-free. Nutritional yeast is something that most vegans use to get a cheesy or savory flavor. Brown rice flour is a gluten-free flour that I often use in sauces. Try them! most people love them, and you’ll find they aren’t intimidating at all.

If you still aren’t convinced about the brown rice you can also make this with corn starch. The taste is the same but the consistency varies slightly. It’s still delicious. I’ve also made it with wheat flour.

Instructions

Step 1 – Toast Dry Ingredients

In a skillet, add the dry ingredients and cook for a few minutes to toast the dry mixture on medium heat.

Step 2 – Add Liquids

Once you start to smell the dry mix toasting, add the rice milk and Braggs. Stir regularly with a whisk.

Step 3 – Stir

After the gravy starts to thicken switch to a silicone spatula and stir gently so it does not stick to the bottom of the pan. Continue cooking until it reaches a perfect gravy consistency.

Step 4 – Serve

Serve while warm, if gravy gets too dry add a little rice milk

Storage and Reheating Tips

If you make a big batch, you can store leftover vegan brown gravy in an airtight container in the fridge for up to 5 days. It also freezes well, so consider freezing single servings to reheat later.

To reheat, warm it slowly on the stove, adding a bit of vegetable broth or water if it’s too thick. Whisking it as it heats helps maintain the smooth texture.

Vegan brown gravy is the perfect addition to any plant-based meal, adding a rich, savory flavor that satisfies cravings for classic comfort food. Whether it’s for a holiday feast or a cozy dinner, vegan brown gravy is sure to impress both vegans and non-vegans alike!

More Plant Based Sauces

If you like this recipe, you’ll love these plant based sauces too:

  • Homemade BBQ Sauce
  • Spicy Vegan Ranch
  • Raspberry Vinaigrette Salad Dressing
  • Creamy Italian Dressing (Oil-Free)
  • Homemade Vegan Ranch
Yield: 4 Servings

Creamy Brown Gravy

Creamy Brown Gravy

Rich, creamy vegan brown gravy made with plant-based ingredients. Perfect for mashed potatoes, stuffing, or any comfort dish in need of flavor!

Cook Time 10 minutes
Total Time 10 minutes

Ingredients

  • 2 Tbsp nutritional yeast
  • 2 Tbsp brown rice flour (other flours may be substituted)
  • ¼ tsp garlic powder
  • ½ tsp onion powder
  • ¼ tsp white pepper (black pepper may be used)
  • 1 dash of sweet (not smoked) paprika (may be omitted)
  • 1 Tbsp Braggs Amino Acids (tamari or soy sauce can be used but it is NOT gluten-free)
  • 1 ½ cup Rice Milk

Instructions

  1. In a skillet, add the dry ingredients and cook for a few minutes to toast the dry mixture on medium heat.
  2. Once you start to smell the dry mix toasting, add the rice milk and Braggs. Stir regularly with a whisk.
  3. After the gravy starts to thicken switch to a silicone spatula and stir gently so it does not stick to the bottom of the pan.
  4. Continue cooking until it reaches a perfect gravy consistency.
  5. Serve while warm, if gravy gets too dry add a little rice milk.

Notes

  • Feel free to leave out the pepper if desired
  • Corn starch can be used instead of brown rice flour

Did you make this recipe?

We'd love to see it! Tag us and use #MyPlantBasedFamily!

© Heather Mayes

Filed Under: Recipes, Sauces, Dips, and Salad Dressings Tagged With: Dairy Free, gluten free, Plant Based Diet, Recipes, Vegan

Plant-Based Recipes for Game Day

February 4, 2016 by Holly Yzquierdo Leave a Comment

Plant-Based Recipes for Game Day (Gluten-Free)

I don’t care about football. I’ll admit it. I do care about food and friends and that is the important part of game day and the Super Bowl for me. Plant-Based recipes for game day is a must because I spend all my time chatting by the food.

I try to have a nice mix of healthy and not-so-healthy. I’m not talking complete junk but I’m not eating salad. I like to divide my favorite party snacks into two categories: sweet and savory.

I hope this list of recipes inspires your Super Bowl menu!

Sweet Plant-Based Recipes

Gluten-Free, vegan brownie

I love Brownies and these are perfect for any occasion.

Chocolate Fruit Dip

Chocolate Fruit Dip made from So Delicious yogurt is perfect for dipping fruit.

Chocolate No Bake Bites

Chocolate No-bake Bites are very addictive. You’ve been warned.

Savory Plant-Based Recipes

Jalapeno Hummus is plant-based and oil-free recipe will win over any critic.

Jalapeno Hummus is perfect for dipping veggies but chips are great too. See my other dips, I especially love the Spinach Artichoke Dip.

pizza mushrooms 600x400

Pizza Stuffed Mushrooms are a healthier version of pizza. You can eat all of them guilt-free, but sharing is nice too.

Chickpea Nuggets are vegan, gluten-free, and a fun kid food. They are easy to make and delicious.

Chickpea Nuggets are a fun finger food and you can also put them on slide buns.

BBQ Cauliflower Bites

It may be my barbecue sauce addition talking but we can’t forget BBQ Cauliflower Bites.

Whatever you end up eating on game day (and no matter who wins) remember the important part is having fun with friends.

Filed Under: Holiday Cooking Tagged With: gluten free, Plant Based Diet, Vegan

Ultimate Oatmeal Guide

January 22, 2016 by Holly Yzquierdo 18 Comments

Everything you need to know about oatmeal

Breakfast maybe the most important meal of the day but it’s also the most chaotic. Please tell me I’m not the only one who struggles to eat healthy in the midst of a busy morning.

We have some quick and easy breakfast items like frozen waffles and cereal but we don’t feel as satisfied after eating them. Maybe because they are processed foods and not whole foods. I want a hot, filling breakfast.

My go to breakfast is Oatmeal.

Everything you need to know about oatmeal

You may be thinking, “oatmeal takes too long” or “it’s too complicated.” I want to share my tricks for easy, delicious oatmeal that everyone in your house will love.

OATS: The Basics

There are a lot of different types of oats you can buy. You can find them in pretty much any store that sells groceries. If you have a gluten sensitivity you need to buy certified gluten-free oats. They are more expensive but it is necessary. If gluten isn’t an issue you will be able to buy any oats you like.

I typically stick to three types of oats — Quick Oats, Rolled Oats and Steel Cut Oats.

Quick Oats

Quick oats cook quickly and easily. They are oats they have been rolled, cut into small pieces and steamed to precook them.

If you eat quick oats you may feel hungry sooner than when you enjoy the less processed oats mentioned below.

Avoid the instant oatmeal packages. These often come in flavors like apple cinnamon or maple and brown sugar. Unless you buy some special healthy version they are likely full of junk. Oatmeal is easy to make, you don’t need these packages.

Rolled Oats

Rolled oats are rolled flat and slightly precooked by steaming, the result is a fairly quick cooking oatmeal. Rolled oats are often used in granola and baking as well.

Steel Cut Oats

Steel cut oats are oat groats that have been cut into pieces. I think they look like little rocks, they do not look like the instant or rolled oats. These take a longer time to cook.

Cooking Oatmeal

When I was a kid I only knew of microwave instant oatmeal. Yes, we bought the little packages — I loved them. Looking back they were healthier than the Count Chocula I normally ate.

Even as an adult I bought the packages for a while until I realized how expensive they were. Buying the large container (you know the one that makes a good drum) was much less expensive. Even my kids, the older kids that are now adults, could make their own oatmeal in the microwave.

Before the microwaves critics speak up let me say that I think eating healthy food that has been microwaved is better than eating unhealthy food. For some people and schedules, a microwave makes the difference between a healthy breakfast and a fast food drive-thru breakfast. If you don’t approve of microwaves that is ok, you don’t have to use one.

Microwave

Quick oats and rolled oats can be cooked easily in the microwave. Oatmeal rises when it is cooking so I recommend using a much larger bowl than needed and keeping an eye on it. If you don’t, you will need extra time to wash out your microwave.

Use 1 cup of quick or rolled oats and 1 3/4 cup of water and microwave on high for 1 1/2 to 2 minutes for quick oats or 2 to 3 minutes for rolled oats. Remove them from microwave carefully and stir. If they don’t seem done you can microwave them for a little longer, in 30 second intervals until done.

Stove Top

On mornings when I have more time I cook oats on the stove. Use the same measurements as above but bring water to boil, then add oats and a dash of salt if desired. After you pour the oats in reduce heat to a simmer. Quick oats will need to cook for about 1-5 minutes, rolled oats for about 5-10 minutes.

Keep your eye on the oats as they are cooking and stir regularly.

Steel Cut Oats can also be cooked on the stove. These require a much longer cooking time of about 20-30 minutes.

Crock Pot

Some people cook steel cut oats in the Crock Pot as well. This requires a bit more water because of the longer cooking time.

Instant Pot

I prefer cooking my Steel Cut Oats in my Instant Pot. Though it does take a while for the Instant Pot to come to pressure and to release pressure the cook time is only 3 minutes (on manual) for a total time of about 30 minutes. Even though that isn’t quick, once you start it you can walk away and not worry about stirring or burning anything.

oatmeal guide

Un-Recipes for Oatmeal

I often share oatmeal in my meal plans but I don’t always link to a recipe. The reason is that I don’t follow actual recipes for my oatmeal. I just stick to my favorite add-ins!

For me, I like to incorporate 3 different type of things into my oatmeal: Something Sweet, Fruit and Nuts/Seeds.

Something Sweet

By far my favorite sweetener is maple syrup. I think it is from my childhood packets of maple and brown sugar flavored instant oatmeal. Other sweeteners include stevia, dates, agave, raw sugar or whatever you prefer. Sometimes I’ll skip adding something sweet and just stick to the fruit.

Fruit

Go wild here, or be like me and choose seasonal favorites. Apples, raisins, berries (we often use frozen berries for a budget-friendly option), bananas, coconut, or whatever you have on hand. In the summer I lean more toward fresh berries and in the winter I use apples and raisins.

Nuts/Seeds

If you hare allergic to nuts do not use nuts. If you can have nuts I recommend walnuts, slivered almonds or pecans. Seeds are a fun option that I choose most of the time. Chia seeds, hemp seeds, ground flax seeds and pumpkin seeds are all really good.

Where to Buy

I buy most of my oats online. We go through a lot so I order them using my Amazon Prime account so I can get two day free shipping. Trust me, it is easier than taking the kids to the store. Try Amazon Prime 30-Day Free Trial to see if it works for you.

I encourage you to try different kinds of oats and different cooking methods. I’ll list some of the oats we use for reference but buy what works for you. Once you find a brand that you love you can sign up for “subscribe and save” on Amazon to get it delivered to you on a schedule, like one a month, or every six weeks.

Buying Oats

GF Harvest Rolled Oats Organic, GMO-Free, facility is wheat, soy and peanut-free. I met the family behind GF Harvest at an expo and believe them to have the utmost integrity and transparency about their process.

UPDATE

Jules Shepard was kind enough to inform me that Bob’s Red Mill Oats are not certified gluten-free. I was not aware of this and thought they were. Although the label says gluten-free and they are not certified. I encourage you to read more from Bob’s Red Mill and from Gluten-Free Watch Dog. 

If you do not have Celiac disease or a gluten-intolerance the Bob’s Red Mill oats will be okay for you. See Jules comment below for more information. You can also purchase GF products from her site.

Bob’s Red Mill Gluten Free Quick Oats

Bob’s Red Mill Gluten-Free Steel Cut Oats

Bob’s Red Mill Gluten-Free Rolled Oats

Bob’s Red Mill Oats

Quaker Oats (I’ve never purchased these from Amazon but they are budget-friendly so I included them)

Bulk bins and store-brand in your local grocery store will typically have a great price.

Your Turn

How do you cook and eat oatmeal? Got a favorite recipe or fruit combo?

My favorite oatmeal of all time is a little more extravagant that I made regularly. It has cardamom, toasted coconut and chai. See the full recipe at Gluten-Free and More.

Need a quick, easy and healthy breakfast? Overnight Oats is vegan (plant-based) option will simplify your mornings. Use GF oats for a gluten-free version.

Don’t forget Overnight Oats! It’s perfect for those of us who don’t want to cook at all!

This page contains affiliate links. 

Filed Under: Breakfast, How to, Plant-Based Basics, Recipes Tagged With: Breakfast, gluten free, Unprocessed

« Previous Page
Next Page »

Primary Sidebar

Footer

Find it here!

Amazon Affiliate Disclosure

Holly Yzquierdo of My Plant-Based Family is a participant in the Amazon Services LLC Associates Program, an affiliate advertising program designed to provide a means for sites to earn advertising fees by advertising and linking to amazon.com.

Disclosures

Unauthorized use and/or duplication of any part of this website or content without express and written permission from Holly Yzquierdo is prohibited. Excerpts and links may be used, provided that full credit is given to Holly Yzquierdo and MyPlantBasedFamily.com with links to the original content.

More information on our Privacy Policy and other Disclosures are available.

Copyright © 2025 · Wellness Pro on Genesis Framework · WordPress · Log in