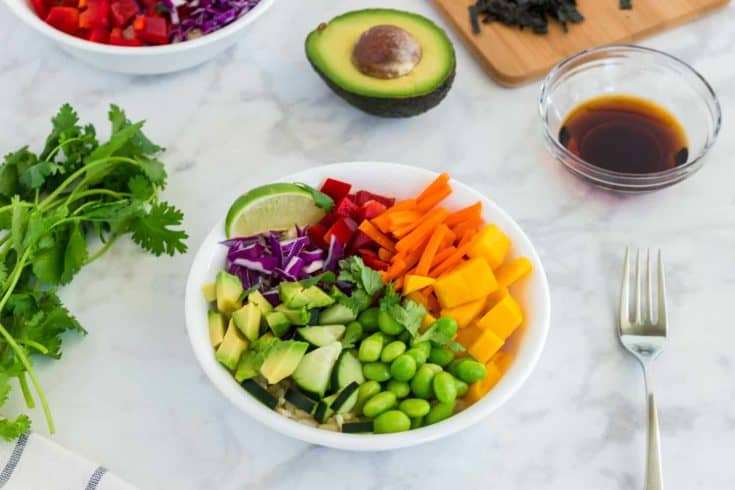
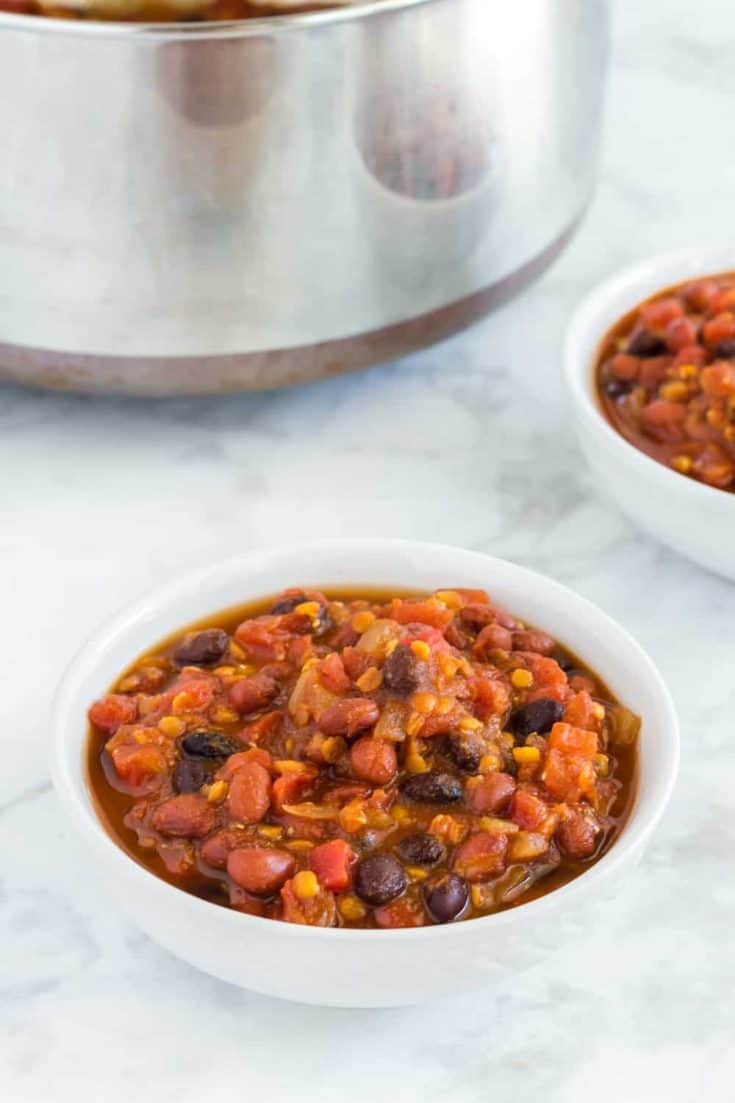
• Skip to primary navigation
  • Skip to main content
  • Skip to primary sidebar
  • Skip to footer

My Plant-Based Family

Feeding My Family a Whole Food, Plant-Based Diet, On a Budget

  • Plant-Based Recipes
    • Breakfast
    • Main Dish
    • Instant Pot
    • Side Dishes
    • Bread and Muffins
    • Salad and Wraps
    • Soup, Stews, and Chili
    • Sauces, Dips, and Salad Dressings
    • Desserts
    • Crock Pot
    • Mexican Food
  • Videos
  • Resources
    • Getting Started
    • Custom Meal Plans
    • Plant-Based eCourse
    • Books
      • The Plant-Based Diet Starter Guide
      • The Plant-Based Holiday Meal Plan & Cookbook
  • Meal Plans
    • Meal Plans 2020
    • Meal Plans 2019
    • Meal Plans 2017
    • Meal Plans 2016
    • Meal Plans 2015
    • Meal Plans 2014
    • Meal Plans 2013
  • About Us
    • Our Family
    • Contact Me
    • Our Food Philosophy
    • Disclosure Policy
      • Privacy Policy

Recipes

Instant Pot Winter One-Pot Lentils and Rice

March 8, 2017 by Holly Yzquierdo 42 Comments

Winter One-Pot Lentils and Rice is an easy and delicious vegan dish made completely in the Instant Pot.

I’m excited to share a recipe and tell you about The Ultimate Vegan Cookbook for Your Instant Pot! I was given a free copy to review. All opinions are my own. 

Winter One-Pot Lentils and Rice is an easy and delicious vegan dish made completely in the Instant Pot.

This page contains affiliate links.

Kathy Hester has knocked it out of the park with her new book The Ultimate Vegan Cookbook for Your Instant Pot! It has quickly moved to the top of the list of cookbooks I recommend.

Kathy understands that sometimes you need really simple recipes, other times you are missing an ingredient and need to make a substitution, and other days you want to try something new and fancy. This cookbook does it all!

The Ultimate Vegan Cookbook for your Instant Pot by Kathy Hester

I’ve enjoyed all of the recipes I’ve made so far from The Ultimate Vegan Cookbook for Your Instant Pot!

I’ve taken photos of a few of them and I’m excited to share the Winter One-Pot Lentils and Rice recipe. Unless you are new here, know how much I love lentils! First, I’ll tell you about a few other recipes I made from this book.

Kathy Hester's Instant Pot Rolled Oats

Check out this oatmeal cooked in the Instant Pot! Kathy used rolled oats and it turned out perfect!

My very favorite thing in the whole world right now is Kathy’s Vegan Cauliflower Queso. I can’t share those recipes but they are worth the price of the book alone! Truly, after tasting the queso you would gladly buy the book. It’s really that good!

Vegan Queso from the Ultimate Vegan Cookbook for your Instant Pot

Before I get ahead of myself let me tell you a little more about the book. It has 80 recipes and they are all completely vegan! I know that can be a relief when you are looking for Instant Pot recipes.

Plus, it was written for the Instant Pot so you don’t have to figure out how to make it in your pressure cooker if you are using the Instant Pot too.

Some recipes call for oil OR a dry saute with water or broth to prevent sticking. Often, recipes will let you know when substitutions are permitted. I love making substitutions so I appreciated the guidance, I avoided a trip to the store and had confidence my recipe would work.

Instant Pot Lentils and Rice is the perfect winter meal to make in your Instant Pot.

Instant Pot Winter One-Pot Lentils and Rice

This recipe says it serves four but we stretched it a bit further.

Winter One-Pot Lentils and Rice
 
Save Print
Prep time
10 mins
Cook time
23 mins
Total time
33 mins
 
This recipe is being published by permission.
Author: Kathy Hester, The Ultimate Vegan Cookbook for your Instant Pot
Recipe type: Main Dish
Serves: 4 servings
Ingredients
  • 1 tablespoon water or vegetable broth
  • ½ cup chopped onion
  • 2 cloves garlic, minced
  • 3½ cups water
  • 1½ cups brown rice
  • 1 cup brown lentils
  • 1 cup peeled and diced rutabaga (or turnip or potato)
  • 2 inches sprig fresh rosemary
  • 1 tablespoon dried marjoram (or thyme)
  • salt and pepper to taste
Instructions
  1. For the saute, use the saute setting over normal, or medium heat, and heat the water or broth. Add the onion and saute until transparent, 5 minutes. Then add the garlic and saute a minute more.
  2. For the pressure cooker, add the water, brown rice, lentils, rutabaga, rosemary and marjoram to the onion mixture and stir to combine. Put the lid on and make sure that the vent is sealed. Cook on manual setting at high pressure and set for 23 minutes.
  3. Let the pressure release naturally. Season with salt and pepper before serving and add more marjoram and ground rosemary as needed.
3.5.3226

I highly recommend this book. There are so many recipes I can’t wait to try! It’s deeply discounted right now on Amazon so get it before it goes up!

You can also try to win your own copy!

a Rafflecopter giveaway

This page contains affiliate links.

Filed Under: Instant Pot, Main Dish Recipes, Recipes Tagged With: Instant Pot, Plant Based Diet, Vegan

Apple Cider Bread

February 14, 2017 by Holly Yzquierdo 2 Comments

Vegan Apple Cider Bread

We love quick breads and muffins. Banana Bread has long been a favorite but I know a lot of people who can’t tolerate bananas. I thought apples would be the next best thing. I created a recipe with all the flavors of spiced apple cider in a simple quick bread, Apple Cider Bread.

Vegan Apple Cider Bread

This recipe is perfect for an after school snack or to have on hand for when you want just a little something extra. Tell me I’m not the only one who likes a little snack when the kids finally get in bed.

My boys love Apple Cider Bread. This loaf disappeared in about two days.

Vegan Apple Cider Bread

It’s not strictly a fall or holiday recipe but the spices, and citrus zest definitely remind me of Thanksgiving and Christmas.

Apple Cider Bread

Your family will enjoy this oil-free, vegan sweet bread recipe. Serve it with fruit and a cup of coffee or apple cider for a tasty snack.

Vegan Apple Cider Bread

Apple Cider Bread
 
Save Print
Prep time
15 mins
Cook time
50 mins
Total time
1 hour 5 mins
 
Author: Holly Yzquierdo
Recipe type: Quick Bread
Serves: 12
Ingredients
  • 2 cups all purpose flour (or an all purpose gluten-free baking blend)
  • 2 teaspoons baking powder
  • 1 teaspoon baking soda
  • 1 Tablespoon ground cinnamon
  • ¼ teaspoon ground nutmeg
  • ¼ teaspoon ground ginger
  • ¼ teaspoon ground cloves
  • ¼ teaspoon sea salt
  • Egg replacer + water to make two vegan eggs
  • 1 cup apple juice
  • zest + juice from one orange
  • zest + juice from one lemon
  • 1 teaspoon vanilla
Instructions
  1. Preheat oven to 350 degrees. Use parchment paper or cooking spray to prepare a loaf pan.
  2. In a small bowl or cup, mix egg replacer and water together to make vegan eggs. Set aside to thicken.
  3. In a large mixing bowl, stir all dry ingredients together.
  4. In a small bowl, mix the vegan eggs, apple juice, citrus juice and zest and vanilla together.
  5. Pour wet ingredients into dry ingredients and stir well.
  6. Pour batter into your loaf pan and bake for 50 minutes.
3.5.3226


Filed Under: Bread & Muffin Recipes, Recipes Tagged With: Plant Based Diet, Vegan

Banana Nut Oatmeal (Instant Pot and Stove top directions)

January 25, 2017 by Holly Yzquierdo 1 Comment

Instant Pot Banana Nut Oatmeal takes the flavors of Banana Bread and adds the wholesomeness of oatmeal.

We made Banana Nut Oatmeal in my Instant Pot and it was good! I wasn’t sure what I would think of warm banana. I regularly use banana in my baked goods so I thought it was worth taking the chance and I’m so glad I did!

Instant Pot Banana Nut Oatmeal takes the flavors of Banana Bread and adds the wholesomeness of oatmeal.

This page contains affiliate links.

After all, when I was a kid I loved Banana Pudding. I remember eating it while it was still warm.

I also loved Banana Bread. I thought about the flavors I like in my banana bread and incorporated those into my oatmeal, cinnamon and almonds. If you can’t have tree nuts, try hemp seeds. I love the nutty flavor that hemp seeds infuse in recipes. I’ll probably make it with hemp seeds instead of nuts about half the time.

Since I was cooking with steel cut oats I decided to do a spin off of my Instant Pot Oatmeal recipe. You could make this with rolled oats as well. I’ll include directions for both.

I don’t like to cook steel cut oats on the stove because they take too long. The Instant Pot still takes time to come to pressure, cook and depressurize, but I can walk away and do other things while it cooks.

I always buy gluten-free oats. If you don’t need gluten-free you can buy regular oats. I buy these steel cut oats for pressure cooking. See other varieties of oats here.

If you are in the mood for a warm banana nut treat, try this Banana Nut Oatmeal!

Instant Pot Banana Nut Oatmeal takes the flavors of Banana Bread and adds the wholesomeness of oatmeal.

Banana Nut Oatmeal Stove Top directions

If you are making this on the stove top with rolled or instant oats, you’ll want to check the side of the package to see how much oats and water you need for you (or your family). I generally use 2 cups of water for every cup of rolled or instant oats.

For this recipe you will need:

  • gluten-free rolled oats + water
  • 2 Bananas, sliced
  • 1 teaspoon cinnamon
  • 2 tablespoons chopped nuts, I used almonds
  • maple syrup to taste
  1. Bring your water to boil. Once boiling, add your oats.
  2. Reduce heat to a simmer.
  3. Chop one banana and add it to the cooking oats. Add the cinnamon.
  4. Stir regularly. Once done, add in the other banana slices, nuts and maple syrup to taste.

Banana Nut Oatmeal in the Instant Pot

If you are making this with steel cut oats I highly recommend using the Instant Pot. I typically cook my oats plain, then add in any toppings but I wanted to have the banana cooked in too.

The oatmeal seemed to be a little more watery than normal when it was done. I just shut the lid for 5 minutes. When I came back it was perfect. I topped it with a the remaining banana slices, extra sliced almonds and a little maple syrup.

Instant Pot Banana Nut Oatmeal
 
Save Print
Author: Holly Yzquierdo
Recipe type: Breakfast
Serves: 3 servings
Ingredients
  • 1 cup steel cut oats (gluten-free if needed)
  • 3 cups water
  • 2 Bananas, sliced
  • 1 teaspoon cinnamon
  • ½ cup almonds, sliced
  • maple syrup to taste
Instructions
  1. Pour steel cut oats, water, one banana sliced and cinnamon into the Instant Pot and give it a little stir.
  2. Close the lid, seal the vent and press the Manual button. Use the arrows to move down to 3 minutes.
  3. The Instant Pot will come to pressure in about 15 minutes or so. Then it will start counting down as it cooks. When it's done, it will beep. I usually turn it off and allow the pressure to naturally come down (natural pressure release).
  4. After about 10 minutes, open the lid carefully so the steam doesn't burn you. Scoop out your oatmeal into a bowl. Add the extra banana slices, almond slices and maple syrup to your bowl.
3.5.3226

This page contains affiliate links.

Filed Under: Breakfast, Instant Pot, Recipes Tagged With: Instant Pot, Plant Based Diet, Recipes, Vegan

Busy Night Pasta

January 19, 2017 by Holly Yzquierdo 23 Comments

Try this Busy Night Pasta recipe! It's simple and fast! Make a pasta dinner tonight in the Instant Pot!

This post is sponsored by Fry’s Food Stores. 

I finally did it, I made pasta in my Instant Pot.

Try this Busy Night Pasta recipe! It's simple and fast! Make a pasta dinner tonight in the Instant Pot!

Pasta is already quick and easy to cook but some days are so long I need to make it even easier. Don’t I sound dramatic!

Most of the time I work from home, this is a huge perk of my job, but when I actually go to the office I feel like I can’t function after work. I think my inner introvert gets overwhelmed at all the traffic, talking and smiling. By the time I make it home and pick up my kids, I’m spent. Maybe not too spent to cook pasta but I don’t mind making it easier. I take the motto, “work smarter, not harder” to heart.

Try this Busy Night Pasta recipe! It's simple and fast! Make a pasta dinner tonight in the Instant Pot!

This recipe is as easy as making pasta with broccoli and adding sauce. That’s basically it, you can skip the rest. Just kidding, but you can make this pasta on the stove or in the Instant Pot. I’ll give you directions for both.

Cooking Pasta in the Instant Pot

Simple Truth Organic whole wheat rotini cooked perfectly. Let me share a few things I learned about making pasta in the Instant Pot.

  • Gluten-free pasta is way more temperamental. I’m sticking to stove top for GF pasta.
  • When cooking pasta in a pressure cooker you want to do it on low pressure.
  • When cooking pasta in the Instant Pot, cook it on manual for HALF of the minutes needed for stove top cooking. So, if the box says cook it for 10 minutes, you’ll cook it on low pressure in the Instant Pot for 5 minutes.

The only downside to cooking a dish like this is that the broccoli gets very soft. Thankfully, I like my broccoli super soft, especially in pasta and casseroles. I don’t mind very soft broccoli, but if you want your broccoli more on the firm side, you may want to steam it separately. I don’t because it goes against my plan to make this meal as easy as possible.

Try this Busy Night Pasta recipe! It's simple and fast! Make a pasta dinner tonight in the Instant Pot!

Choosing the Right Ingredients

I regularly get questions from people asking me what pasta they should buy. The key is to find whole grain pasta. I buy the healthiest ingredients I can afford. That means organic when possible.

Last year we had a new Fry’s Food Store open up right outside our neighborhood. They make eating healthy so easy! I love their Simple Truth Organic brand of products. I was surprised at how budget-friendly their organic line of products is. Plus, they do have gluten-free for those who need it!

The Simple Truth Organic whole wheat pasta was perfect in the Instant Pot! I think it is because there is only one ingredient, whole wheat flour. Nothing extra!

Try this Busy Night Pasta recipe! It's simple and fast! Make a pasta dinner tonight in the Instant Pot!

This pasta and bread are both organic, whole grain wheat products. They are not suitable for someone with Celiac disease, or gluten-sensitivity or allergies. You can make this recipe on the stove top with gluten-free Simple Truth Organic Pasta! I like the GF macaroni made with organic brown rice flour, organic amaranth flour and organic quinoa flour. That’s it!

I keep pasta, sauce and frozen veggies on hand at all times for quick, family-friendly meals. I like to put a lot of veggies in my pasta but my kids are picky, I mean purists. Yeah, we will go with purists but you all know what I mean. They don’t want a lot of extra stuff in their pasta. They always get nervous when I make pasta because I use it as an opportunity to add every random veggie I can find.

I wanted this dish to win them over and it did! In fact, my 7 year old said, “this is the only pasta I want you to make ever again.” My 5 year old went on and on about it too.

Busy Night Pasta for the WIN!

Another thing I love about making pasta is it’s so easy and doesn’t dirty a lot of dishes. Does anyone else skip cooking so they don’t have to clean up?

This recipe uses just one pot for the main dish. I also made a quick salad using organic greens. If you plan ahead, you can have fresh herbs on hand for bolder flavor!

Try this Busy Night Pasta recipe! It's simple and fast! Make a pasta dinner tonight in the Instant Pot!

Busy Night Pasta

Stove Top Directions

  • One 16 oz box of Simple Truth Organic Pasta
  • 4 quarts water
  • One 25 oz. Jar of Simple Truth Organic Tomato Basil Pasta Sauce
  • One 10 oz bag of frozen organic Broccoli
  1. Bring the water to a boil. Dump in the pasta and give it a quick stir.
  2. Set your timer for 5 minutes less than the cooking time on the side of the box, it will vary depending on the type of pasta you are cooking. I cooked rotini which needed to cook for a total of 8-10 minutes. I set the timer for 5 minutes.
  3. When the timer goes off, add the broccoli florets and set the timer for the rest of the pasta cooking time, should be 5 minutes.
  4. When this timer goes off, drain the pasta and broccoli and pour in the sauce. Stir and heat on low until the sauce has warmed up.

Using the 16 oz box, it made 8 servings. Plenty for two dinners which made me happy! The gluten-free pasta usually comes in a slightly smaller box, serving 6. Still enough for dinner and leftovers.

Instant Pot Directions

I’ve only successfully made whole wheat pasta in my Instant Pot. If you are using gluten-free pasta I recommend following the stove top directions above.

  • One 16 oz box of Simple Truth Organic Pasta
  • 4 cups water
  • One 25 oz. Jar of Tomato Basil Simple Truth Organic Pasta Sauce
  • One 10 oz bag Simple Truth Organic frozen Broccoli florets
  1. Pour Pasta, 4 cups of water, one 10 oz bag of broccoli and one 25 oz jar of Simple Truth Tomato Basil pasta sauce into your Instant Pot.
  2. Close and lock the lid so that the vent is sealed.
  3. Press the pressure button to switch pressure to low. Press the Manual button and use the arrow buttons to lower to 5 minutes.
  4. The Instant Pot will come to pressure, then beep when done. Once done, carefully do a quick pressure release by turing the seal to open the vent.
  5. Once pressure is released, open the lid and store well. Allow to cool before serving. It’s a perfect time to prepare your salad.

Don’t miss my other Instant Pot recipes!

Try this Busy Night Pasta recipe! It's simple and fast! Make a pasta dinner tonight in the Instant Pot!

Instant Pot Pasta
 
Save Print
Author: Holly Yzquierdo
Ingredients
  • One 16 oz box of Simple Truth Pasta
  • 4 cups water
  • One 25 oz. Jar of Tomato Basil Simple Truth Sauce
  • One 10 oz bag for frozen organic Broccoli
Instructions
  1. I've only successfully make whole wheat pasta in my Instant Pot. If you are using gluten-free pasta I recommend following the stove top directions above.
  2. Pour Pasta, 4 cups of water, one 10 oz bag of broccoli and one 25 oz jar of Simple Truth Tomato Basil pasta sauce into your Instant Pot.
  3. Close and lock the lid so that the vent is sealed.
  4. Press the pressure button to switch pressure to low. Press the Manual button and use the arrow buttons to lower to 5 minutes.
  5. The Instant Pot will come to pressure, then beep when done. Once done, carefully do a quick pressure release by turing the seal to open the vent.
  6. Once pressure is released, open the lid and store well. Allow to cool before serving. It's a perfect time to prepare your salad.
3.5.3226

This post was sponsored by Fry’s Food Stores. All opinions are my own.

Filed Under: Instant Pot, Main Dish Recipes, Recipes Tagged With: Instant Pot, Plant Based Diet, Vegan

Chickpea and Rice Soup

December 16, 2016 by Holly Yzquierdo 29 Comments

This vegan and gluten-free Chickpea and Rice Soup is easy and delicious. It has stove top and Instant Pot instructions. This is my favorite Instant Pot recipe!

We’ve fallen in love with a new soup! Actually, it’s an old classic that I’ve turned into a healthy, plant-based family favorite, Chickpea and Rice Soup. Plus, I’m giving you instructions for both the stove top and Instant Pot versions.

See updated versions below! Now Printable!

This vegan and gluten-free Chickpea and Rice Soup is easy and delicious. It has stove top and Instant Pot instructions. This is my favorite Instant Pot recipe!

This post contains affiliate links.

You know I love my Chickpea Noodle Soup. I didn’t think life could get much better than that until I tried Chickpea and Rice Soup.

I really wanted to make a soup that I could make in the Instant Pot. I don’t make noodles in the Instant Pot because we usually use gluten-free noodles and they are more temperamental that their wheat counter parts.

The first time I made this soup, I did a stove top version to try to get all the proportions correct. Then I started working on my Instant Pot version. I made this soup so many times we grew a little sick of it. Not because of the taste but because it was the only thing I ate for days. Yes, days!

Usually when I make something with chickpeas I’ll use canned because chickpeas have such a long cooking time. I really wanted to get away from using canned though so I ordered some from Amazon. If you don’t have a Prime membership you are missing out! Try Amazon Prime 30-Day Free Trial OR Give the Gift of Amazon Prime!

I found Palouse Brand and was intrigued. Not only are they non-GMO but they give you a code so you can track your chickpeas to see the field they were grown in. Also, they are not irradiated, sounds strange to have to say but a lot of companies  expose food to radiation for sterilization. Maybe that is why these seem to taste so much better than other chickpeas I’ve had.

This vegan and gluten-free Chickpea and Rice Soup is easy and delicious. It has stove top and Instant Pot instructions. This is my favorite Instant Pot recipe!

Veggie Broth

Whichever process you follow to make this soup, Stove Top or Instant Pot, I highly recommend you use my Veggie Broth Mix. It will make the best soup. If you use my Veggie Broth Mix you won’t need to use the seasonings mentioned in the recipe, just use salt with the mix.

If you just can’t bring yourself to make my mix then you can use your favorite pre-made broth instead of water or use the seasonings I recommend. Your call! I like to make recipes that don’t have to be 100% exact.

Make sure you use brown rice when you make this. If you get a quick cooking rice this recipe won’t work. You need a rice that can stand up to a long cooking time in the Instant Pot with the chickpeas. If you only have a fast cooking rice, I recommend using the stove top version and adapting the recipe as needed.

Stove Top version (with canned chickpeas)

I know some of you will want to make this soup right away before you have a chance to order your Palouse Brand chickpeas from Amazon. You probably have all the ingredients already since they are regular pantry staples.

When I’m cooking recipes on the stove I like to start with my onion. I’ll add my diced onion to the pan and allow it to begin cooking, add a little water if needed when it starts to stick. Normally, I’d add my veggies next but since I cook with brown rice it takes a long time to cook on the stove. Add your brown rice and water and seasonings (or broth mix). Allow the rice to cook for 15 minutes. Then add the rest of your veggies. Cook the soup for another 30 minutes. Last, add your canned, drained and rinsed chickpeas. Your rice and veggies should be done. Add salt to taste.

Chickpea Rice Soup (Stove Top Version)

Instant Pot Chickpea and Rice Soup
Prep Time 10 minutes
Cook Time 30 minutes
Total Time 40 minutes

Ingredients

  • 1 15 oz can chickpeas
  • 1 cup white rice (you can use Jasmine or Basmati)
  • 4 cups water
  • 2 cups sliced carrots
  • 1 cup diced onion
  • 2 cups chopped celery
  • ½ cup nutritional yeast
  • 2 teaspoons salt
  • 2 teaspoons onion powder
  • 2 teaspoons garlic powder
  • 1 teaspoon parsley flakes
  • ½ teaspoon paprika

Instructions

  1. Chop your veggies and get a big soup pot.
  2. Add your diced onion to the pan and allow it to begin cooking, add a little water if needed when it starts to stick.
  3. Add the rest of your veggies. Cook them for about 10 minutes, adding more water or broth when they start sticking. Keep an eye on the veggies and stir them often. If you can't watch it closely add a cup or two of water.
  4. Add the uncooked rice, water and seasonings (or broth mix) and canned chickpeas.
  5. Allow the soup to simmer for about 15 minutes. Your rice and veggies should be done, if they are not cook for 5 more minutes. Add salt to taste.

Notes

If you are using brown rice, you will need to allow about 45 minutes for it to cook. Since this recipe uses canned chickpeas, you can use a quick cooking rice to cut the cooking time in half.

Did you make this recipe?

We'd love to see it! Tag us and use #MyPlantBasedFamily!

© Holly Yzquierdo
Category: Soups, Stews, & Chili
This vegan and gluten-free Chickpea and Rice Soup is easy and delicious. It has stove top and Instant Pot instructions. This is my favorite Instant Pot recipe!

Instant Pot version (with unsoaked chickpeas)

Even though this soup is easy, it’s one of the longest cooking things I’ve made in the Instant Pot. This recipe takes at least 20 minutes to come to pressure the first time. It isn’t a fast soup.

I’ve made this in the Instant Pot three ways. One is to cook everything at the same time even though the veggies get very soft. It’s easy because you add all the ingredients and cook on manual for 40 minutes with a natural pressure release. Yes, it’s that easy.

The second way is to cook the chickpeas and rice together, then add the veggies for a few more minutes. My husband likes it all cooked together because he prefers the veggies super soft. I like my veggies a little more firm but it requires a two step cooking process.

To make the two step cooking process work you’ll add dry chickpeas and rice to your Instant Pot with 4 cups of water. Cook on manual for 35 minutes. Once this is done, turn it off and allow the pressure to come down naturally for at least 10 minutes. Then carefully let out the steam.

Add the rest of the ingredients (veggies, spices unless using my veggie broth mix, and water), and give it a good stir so that nothing is stuck to the bottom. Cook on manual for 5 minutes then allow the pressure to come down naturally again.

It’s important to note that a lot of people have trouble getting their Instant Pots to come back up to pressure a second time after cooking something. If you run into this problem you can try to wash your lid and sealing ring (but be careful, it will be hot).

Instant Pot Chickpea and Rice Soup

This vegan and gluten-free Chickpea and Rice Soup is easy and delicious. It has stove top and Instant Pot instructions. This is my favorite Instant Pot recipe!

This version is for using unsoaked chickpeas in the Instant Pot. See other cooking versions above.

Prep Time 10 minutes
Cook Time 40 minutes
Additional Time 20 minutes
Total Time 1 hour 10 minutes

Ingredients

  • 1 cup dry chickpeas
  • 1 cup brown rice
  • 4 cups water (for step 1)
  • 2 cups sliced carrots
  • 1 cup diced onion
  • 2 cups chopped celery
  • 4 cups water (for step 2)
  • 1/2 cup nutritional yeast
  • 2 teaspoons salt
  • 2 teaspoons onion powder
  • 2 teaspoons garlic powder
  • 1 teaspoon parsley flakes
  • 1/2 teaspoon paprika

Instructions

  1. Add rice, chickpeas and 4 cups of water to your Instant Pot.
  2. Close the lid and vent.
  3. Press Manual (Pressure Cook on newer Instant Pot's) and use the arrows to go up to 35 minutes.
  4. Once done cooking, allow the IP to naturally release the pressure for at least 10 minutes. Then carefully open the lid.
  5. Add the rest of the veggies, spices (or Veggie Broth Mix mentioned above) and 4 more cups of water.
  6. Stir everything well and make sure nothing is stuck to the bottom.
  7. Close the lid and vent.
  8. Press Manual (Pressure Cook) and use arrows to go down to 5 minutes.
  9. Once done, allow pressure to release manually at least 10 minutes.

Notes

This recipe requires multiple cooking steps. You can wait longer time between each step. The veggies doesn't require as much time to cook. The Chickpeas and rice need a long cooking time.

Did you make this recipe?

We'd love to see it! Tag us and use #MyPlantBasedFamily!

© Holly Yzquierdo
Category: Soup

Instant Pot version (with Soaked Chickpeas)

This is the third way I’ve made Chickpea and Rice Soup and my favorite! It does require a little preplanning because you have to soak the chickpeas over night.

First, rinse off one cup of chickpeas and put them in a pot or large bowl with 4 cups of water. Then, the next morning rinse your soaked chickpeas in clean water and put them in your Instant Pot with your rice, veggies, spices and 8 cups of water. Give it a stir and press manual. Move the arrows to go down to 23 minutes. Once done, allow the pressure to release naturally, then scoop and enjoy!

This vegan and gluten-free Chickpea and Rice Soup is easy and delicious. It has stove top and Instant Pot instructions. This is my favorite Instant Pot recipe!

Chickpea and Rice Soup

This plant-based soup is also gluten-free. It’s a great fall or winter soup and uses basic pantry and fridge staples that we almost always have on hand.

This page contains affiliate links.

Filed Under: Instant Pot, Recipes, Soups, Stews, & Chili Tagged With: Dairy Free, gluten free, Plant Based Diet, Vegan

Chocolate Crunch Bites

December 7, 2016 by Holly Yzquierdo 3 Comments

These Chocolate Crunch Bites are peanut-free, dairy-free and gluten-free! They are full of flavor and perfect for a party or cookie exchange! Try these allergy-friendly cookies for dessert.

I love chocolate. Chocolate and peanut butter are even better!

If you know someone with food allergies peanuts can be deadly. There are several peanut butter alternatives that can be used instead. They have a taste and feel similar to peanut butter but no dangerous peanuts.

You can make this recipe with either peanut butter or a safe alternative!

These Chocolate Crunch Bites are peanut-free, dairy-free and gluten-free! They are full of flavor and perfect for a party or cookie exchange! Try these allergy-friendly cookies for dessert.

This page contains affiliate links.

You are going to fall in love with these Chocolate Crunch Bites! My son said they taste like a Kit Kat but that wasn’t my intention. I just wanted to combine my favorite snacks into an easy treat with mega flavor.

These Chocolate Crunch Bites are peanut-free, dairy-free and gluten-free! They are full of flavor and perfect for a party or cookie exchange! Try these allergy-friendly cookies for dessert.

Before I switched to a whole food plant-based diet my favorite cookies were the chocolate oatmeal no bakes. I think I took some inspiration from those days but I wanted to give them some crunch and some natural sweetness. Besides, that old recipe had a ton of butter, sugar, and milk. The ingredients in my Chocolate Crunch Bites make me much happier.

Use peanut butter or a peanut butter substitute, dairy-free chocolate chips, gluten-free pretzels, granola and dried fruit, all normal pantry staples for me. (All the links in the previous sentence are Amazon affiliate links). That is all!

I wouldn’t say they are healthy, but they are a fun and easy treat to take to parties or cookie exchanges. I’m thinking of giving some as gifts to my food allergy pals. You don’t have to save them for only people with food allergies though, they are so good, everyone will love them.

These Chocolate Crunch Bites are peanut-free, dairy-free and gluten-free! They are full of flavor and perfect for a party or cookie exchange! Try these allergy-friendly cookies for dessert.

When it’s time to cook you will want to have all of your ingredients out and ready. I broke my pretzels with my hands but you could chop them with a knife. Measure them after you break them into small pieces, not before. I didn’t want them to get too small and turn to dust.

It’s also important if you are making these for someone with food allergies to make sure all your ingredients are safe.

I choose Enjoy Life mini chips, Glutino pretzels, and Made In Nature dried fruit. You can choose brands you love.

The dried fruit I used was actually a Super Berry blend that also had pepita seeds. You can pick what you love but dried cranberries or dried tart cherries are both winners.

These Chocolate Crunch Bites are peanut-free, dairy-free and gluten-free! They are full of flavor and perfect for a party or cookie exchange! Try these allergy-friendly cookies for dessert.

If you have kids who like to help in the kitchen this is one of those recipes they can help with. When I say that, you know it’s a simple recipe because I’m not one of those people who invite the kids to cook with me.

I’ll let them stand on a chair on the other side of the counter and watch, sometimes. Usually, I’m shooing them away, but this recipe they can totally help with.

Chocolate Crunch Bites

Go ahead and make these easy and delicious Chocolate Crunch Bites. This no bake, allergy-friendly recipe will win your family over!

Chocolate Crunch Bites
 
Save Print
Author: Holly Yzquierdo
Recipe type: Dessert
Ingredients
  • ½ cup creamy peanut butter or peanut butter alternative
  • 1 cup dairy-free chocolate chips
  • 1 cup gluten-free pretzels, broken into small pieces
  • 1 cup your favorite granola
  • ½ cup dried fruit
Instructions
  1. Put ½ cup of peanut butter or alternative into a medium sauce pan on low heat. Use a silicone spatula to stir regularly.
  2. Once it starts to melt, add the 1 cup of chocolate chips. Stir often and use the spatula to scrape the bottom. Don't walk away or it could burn. Keep stirring until all the lumps are gone.
  3. Dump in the broken pretzels, granola, and dried fruit and stir well.
  4. Remove pan from heat and scoop out in tablespoon size scoops and lay them on a cookie sheet, covered with parchment paper.
  5. Place the cookie sheet into the refrigerator to cool and harden. Allow at least an hour before eating. These can be left on the counter for a few hours but store in the refrigerator.
3.5.3226


Filed Under: Dessert, Recipes Tagged With: allergies, Dairy Free, Dessert, gluten free, Recipes, Vegan

« Previous Page
Next Page »

Primary Sidebar

Footer

Find it here!

Amazon Affiliate Disclosure

Holly Yzquierdo of My Plant-Based Family is a participant in the Amazon Services LLC Associates Program, an affiliate advertising program designed to provide a means for sites to earn advertising fees by advertising and linking to amazon.com.

Disclosures

Unauthorized use and/or duplication of any part of this website or content without express and written permission from Holly Yzquierdo is prohibited. Excerpts and links may be used, provided that full credit is given to Holly Yzquierdo and MyPlantBasedFamily.com with links to the original content.

More information on our Privacy Policy and other Disclosures are available.

Copyright © 2023 · Wellness Pro on Genesis Framework · WordPress · Log in