• Skip to primary navigation
  • Skip to main content
  • Skip to primary sidebar
  • Skip to footer

My Plant-Based Family

Eating Whole Food, Plant-Based Diet recipes, On a Budget.

  • Plant-Based Recipes
    • Breakfast
    • Main Dish
    • Instant Pot
    • Daniel Fast Recipes
    • Side Dishes
    • Bread and Muffins
    • Salad and Wraps
    • Soup, Stews, and Chili
    • Sauces, Dips, and Salad Dressings
    • Desserts
    • Crock Pot
    • Mexican Food
  • Videos
  • Resources
    • Getting Started
    • Books
      • The Plant-Based Diet Starter Guide
      • The Plant-Based Holiday Meal Plan & Cookbook
  • Meal Plans
    • Meal Plans 2020
    • Meal Plans 2019
    • Meal Plans 2017
    • Meal Plans 2016
    • Meal Plans 2015
    • Meal Plans 2014
    • Meal Plans 2013
  • About Us
    • Our Family
    • Contact Me
    • Our Food Philosophy
    • Disclosure Policy
      • Privacy Policy
  • Daniel Fast Recipes

Side Dishes

2-Step Steamed White Rice Recipe

May 3, 2024 by Holly Yzquierdo Leave a Comment

Steamed Rice

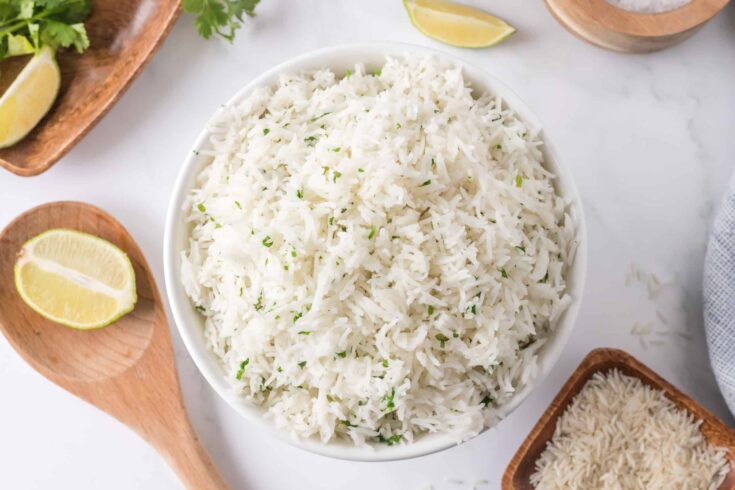
Brown rice is the default rice in our house, but we always keep white rice in the pantry for quick meals. Steamed White Rice is versatile, inexpensive and easy to make.

Jasmine rice is one of my favorites, but I also like basmati rice. For years, I used the cheapest generic white rice I could find, and that works too. As I’ve tried different varieties, I get new preferences. Most of the different types of white rice can be interchanged. Some are starchier than others or more aromatic. Just pay attention to the cooking time listed on the package. That will tell you what you need to know.

Plant-Based Recipes to Eat with Steamed White Rice

  • Flavor Packed Moroccan Chickpeas
  • Easy Vegan Sweet Potato Curry
  • Pineapple and Tofu Kabobs
  • Broccoli and Mushroom Stir Fry
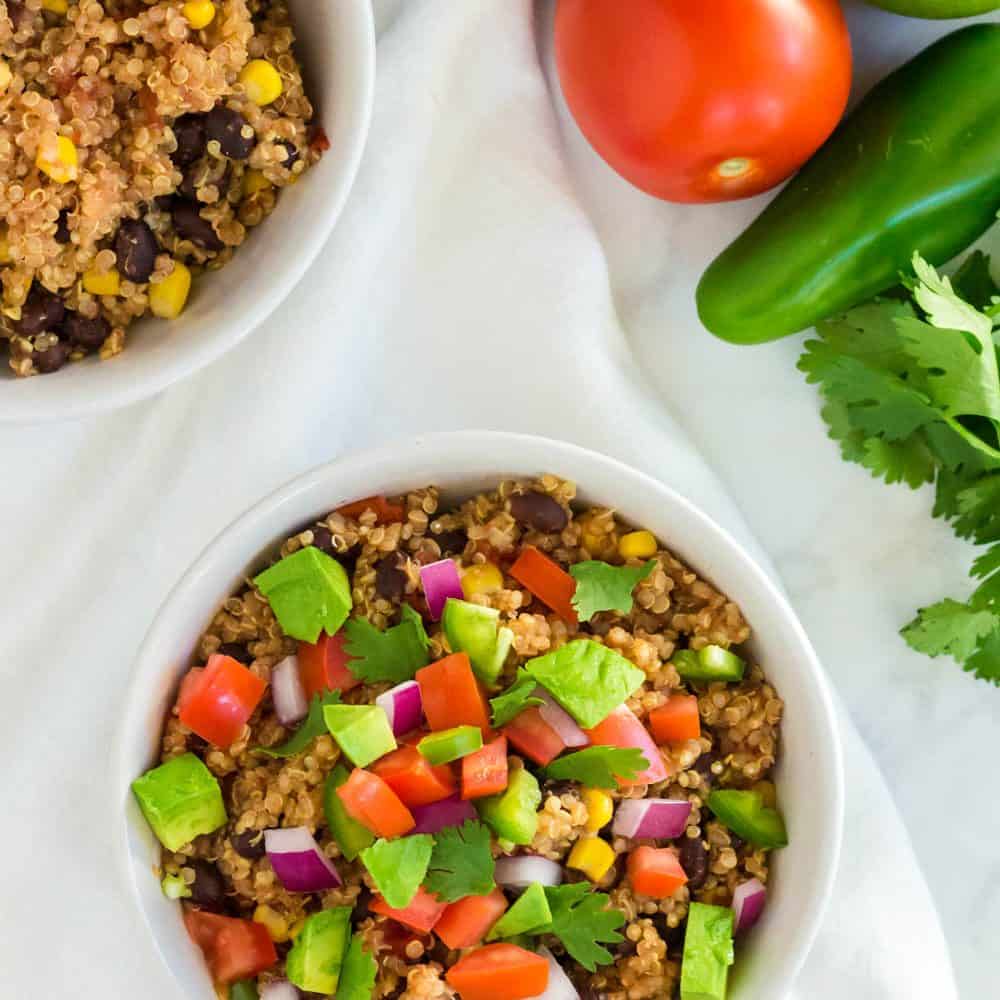
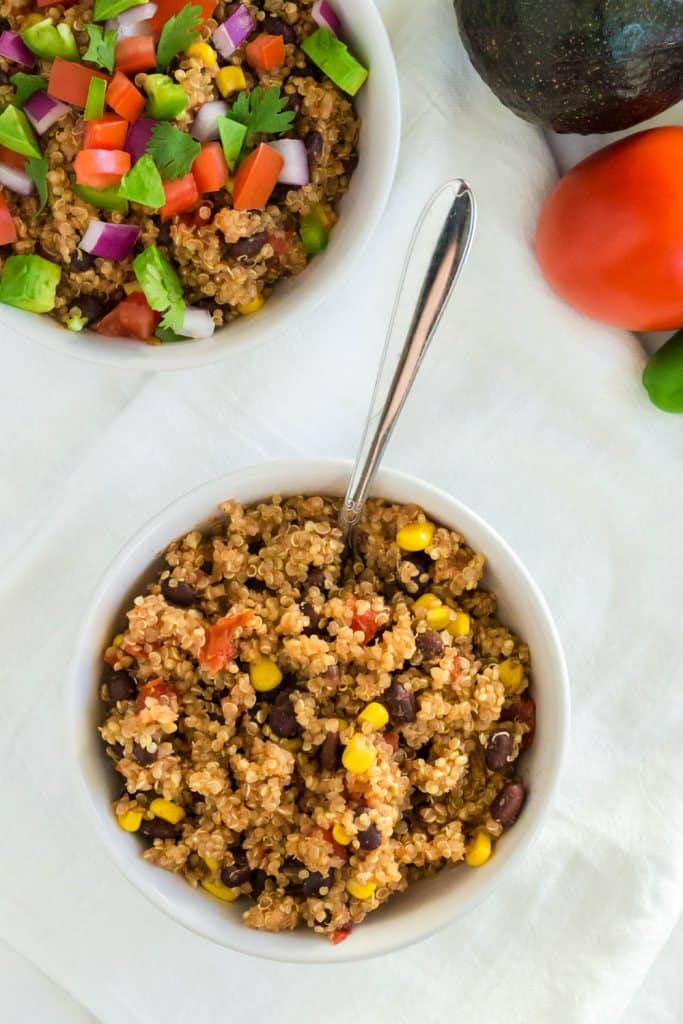
  • Chickpea and Quinoa Stir Fry

How to Make Steamed White Rice

Ingredients

  • 2 cups Water
  • 1 cup Jasmine Rice (dry, rinsed)

Step 1 – Boil Water

Bring water to a boil in a medium saucepan.

Step 2 – Simmer

Stir in the rice, cover, and reduce heat to low. Simmer for 15 minutes, or until all the water is absorbed. If the rice is too firm, add a few tablespoons of water and cook longer. Fluff your steamed rice with a fork and enjoy!

Serving Size

Each serving equals approximately one cup of rice.

More Flavor

Add your choice of herbs or spices to create different flavors. You can also cook the rice in broth instead of water.

Storage

Any leftover rice can be stored in a refrigerator in an airtight container for up to six days. You an also freeze cooked rice for up to three months.

Yield: 4 Servings

2-Step Steamed White Rice

Steamed Rice

Steamed white rice is a staple that goes great with so many dishes, and it couldn't be easier to make.

Prep Time 5 minutes
Cook Time 15 minutes
Total Time 20 minutes

Ingredients

  • 2 cups Water
  • 1 cup Jasmine Rice (dry, rinsed)

Instructions

  1. Bring water to a boil in a medium saucepan.
  2. Stir in the rice, cover and reduce heat to low. Simmer for 15 minutes, or until all the water is absorbed. If the rice is too firm, add a few tablespoons of water and cook longer. Fluff with a fork and enjoy.

Notes

  • Serving Size: Each serving equals approximately one cup of rice.
  • More Flavor: Add your choice of herbs or spices to create different flavors. You can also cook the rice in broth instead of water.
  • Storage: Any leftover rice can be stored in a refrigerator in an airtight container for up to six days. You can also freeze cooked rice for up to three months.

Recommended Products

As an Amazon Associate and member of other affiliate programs, I earn from qualifying purchases.

  • RiceSelect Organic Jasmati, Long Grain Jasmine Rice, Gluten-Free, Non-GMO, 32 oz (Pack of 1 Jar)
    RiceSelect Organic Jasmati, Long Grain Jasmine Rice, Gluten-Free, Non-GMO, 32 oz (Pack of 1 Jar)

Did you make this recipe?

We'd love to see it! Tag us and use #MyPlantBasedFamily!

Filed Under: Recipes, Side Dishes

Oil-Free Cowboy Caviar

February 29, 2024 by Holly Yzquierdo 2 Comments

Oil-Free Cowboy Caviar

Flavorful, vegan and oil-free cowboy caviar can be eaten as a dip, salad, relish or on a spoon. With my Sweet and Tangy Salad Dressing poured over it, you’ll never miss the oil. Bonus – there’s no added sugar either!

We love to eat this at home with tortilla chips, but it’s also great to make ahead for potlucks and parties. Just be sure to leave the avocado out until you are ready to serve.

What is Cowboy Caviar Made of?

This oil-free cowboy caviar is made with black beans, black eyed peas, corn, tomatoes, bell pepper, onion, jalapeno and cilantro. It all gets tossed in tangy and sweet salad dressing to bring the flavors together. Then avocado is added before serving. Yum!

Is Cowboy Caviar Fattening?

While the traditional Cowboy Caviar made with Italian dressing or olive oil is high in fat, the only ingredient with any significant fat in my oil-free cowboy caviar is avocado, which can be left out if desired. This is a lighter version with big, fresh flavors. The beans are packed with protein and fiber too.

Oil-Free Cowboy Caviar Recipe

Ingredients

  • 1 can black beans, drained and rinsed 
  • 1 can black eyed peas, drained and rinsed 
  • 1 can whole kernel corn, drained and rinsed 
  • 2 cups diced tomatoes (I used 3 Roma tomatoes) 
  • 1/2 cup diced red onion 
  • 1 diced bell pepper (red, yellow or orange) 
  • 1 diced jalapeno pepper (remove seeds if you don’t want it spicy) 
  • ½ cup diced cilantro 
  • 3 avocados, diced (we leave them out and slice some right before each serving, if adding at once, splash with lime juice to keep from browning) 
  • 1 recipe of Sweet and Tangy Salad Dressing (see recipe for ingredients and steps) 

Instructions

Step 1 – Make Salad Dressing

First, follow my recipe to make Sweet and Tangy Salad Dressing. It needs a bit of time to thicken while you put together the cowboy caviar.

Step 2 – Mix Peas, Beans and Corn

In a large mixing bowl, add your beans, peas and corn that have been rinsed and drained.

Step 3 – Chop

Now chop all the tomatoes, red onion, bell pepper, cilantro and avocado.

Step 4 – Stir

Stir in everything, minus the avocado (unless it’s covered with lime to prevent browning).

Step 5 – Pour Dressing

Next, pour the Sweet and Tangy Salad Dressing over the cowboy caviar and mix them together.

Step 6 – Refrigerate

Refrigerate the oil-free cowboy caviar until you are ready to serve. Add the avocado immediately before serving.

Serving Options

My kids love scooping this up with tortilla chips. You can also serve it over a bed of lettuce or just eat it with a fork! I love topping baked potatoes with it too.

Storage

Leftovers can be stored in an airtight container in the refrigerator for 3-5 days as long as it doesn’t have avocado in it. Avocado does not store well and will become brown and mushy.

Slice fresh avocado to serve with any leftovers.

More Plant Based Salsas and Dips

If you love this recipe, check out my other dips and salsas. They are all oil-free too!

  • Mango Salsa
  • Oil-Free Hummus
  • Black Bean Corn Salad with Avocado
  • Vegan Spinach Artichoke Dip
  • Pico de Gallo
Yield: 4 Servings

Oil-Free Cowboy Caviar

Oil-Free Cowboy Caviar

Cowboy caviar is a fancy name for bean salsa. It is a blend of fresh flavors without any added oil that's great for dipping or eating alone.

Prep Time 10 minutes
Additional Time 30 minutes
Total Time 40 minutes

Ingredients

  • 1 can black beans, drained and rinsed
  • 1 can black eyed peas, drained and rinsed
  • 1 can whole kernel corn, drained and rinsed
  • 2 cups diced tomatoes (I used 3 Roma tomatoes)
  • 1/2 cup diced red onion
  • 1 diced bell pepper (red, yellow or orange)
  • 1 diced jalapeno pepper (remove seeds if you don’t want it spicy)
  • ½ cup diced cilantro
  • 3 avocados, diced (we leave out and slice some right before each serving, if adding at once, splash with lime juice to keep from browning)
  • 1 recipe of Sweet and Tangy Salad Dressing (see separate recipe for ingredients and steps)

Instructions

  1. Make Sweet and Tangy Salad Dressing first so it can thicken. 
  2. In a large mixing bowl, add beans, peas and corn that have been drained and rinsed. 
  3. Chop all veggies. 
  4. Stir in all the veggies, minus the avocado (unless it's covered with lime to prevent browning).  
  5. Pour in Sweet and Tangy Salad Dressing and stir everything together. 
  6. Refrigerate until ready to serve. Add avocado right before serving. 

Notes

  • Serve with tortilla chips, on a bed of lettuce or eat it with a spoon
  • Refrigerate leftovers in an airtight container for 3-5 days without avocado
  • Slice fresh avocado and add before serving

Did you make this recipe?

We'd love to see it! Tag us and use #MyPlantBasedFamily!

© Holly Yzquierdo

Filed Under: Daniel Fast Recipes, Main Dish Recipes, Recipes, Salads & Wraps, Sauces, Dips, and Salad Dressings, Side Dishes

Rice Cooker Cilantro and Lime Rice

January 17, 2024 by Holly Yzquierdo Leave a Comment

RICE COOKER CILANTRO AND LIME RICE

My family loves Mexican flavors, so I’m making this easy rice cooker cilantro and lime rice on repeat. It’s a zesty twist on plain rice that pairs well with Mexican-inspired dishes.

Making this recipe in a rice cooker is super simple, trust me, we eat a lot of rice. Plus, there are several variations to keep the flavors fresh week after week.

Can I Use a Different Kind of Rice?

Yes, you can use different types of rice, but keep in mind that cooking times and water ratios may vary. Adjust the recipe accordingly based on the rice variety you choose.

Can I Make Cilantro and Lime Rice without a Rice Cooker?

Absolutely! You can cook the rice on the stovetop following package instructions for the specific type of rice you are using. Once cooked, proceed with the steps to add cilantro, lime, salt, and pepper.

Can I Adjust the Recipe for a Larger Crowd?

Simply double or triple the quantities of all the ingredients to accommodate a larger group. Ensure that your rice cooker can handle the increased volume. Otherwise, it could overflow making a big mess!

Can I Use Bottled Lime Juice Instead of Fresh Lime Juice?

While fresh lime juice is recommended for the best flavor, you can use bottled lime juice as a convenient alternative.

How to Make Cilantro and Lime Rice in a Rice Cooker

Ingredients

  • 1 cup Basmati Rice
  • 2 cups Water
  • 4 tbsp Chopped Cilantro
  • 2 tbsp Lime Juice
  • 3/4 tsp Salt
  • 1/2 tsp Black Pepper

Step 1 – Rinse Rice

Start by rinsing the basmati rice under cold water until the water runs clear. This helps remove excess starch and prevents the rice from becoming too sticky.

Step 2 – Add to Rice Cooker

In the rice cooker, add the rinsed basmati rice, lime juice and water. Close the lid, and start the rice cooker according to its instructions.

Step 3 – Chop Cilantro

While the rice is cooking, finely chop the cilantro.

Step 4 – Fluff Rice

Once the rice cooker indicates the rice is ready, open the lid and gently fluff the rice with a fork.

Step 5 – Add Cilantro

Now add the cilantro to the fluffed rice.

Step 6 – Salt and Pepper

Sprinkle salt and pepper evenly over the rice. You can adjust the seasoning according to your taste preference.

Step 7 – Mix to Combine

Using a fork, gently mix the rice, cilantro, salt and pepper until everything is well combined.

Step 8 – Serve

Spoon the cilantro and lime rice into a serving dish. Garnish with additional chopped cilantro if desired.

Storage

Allow the rice to cool to room temperature before placing it in an airtight container and placing it in the refrigerator. This helps prevent condensation inside the container, which can make the rice soggy.

Consume the refrigerated rice within 3-4 days for the best quality.

While cilantro and lime rice can be frozen, keep in mind that the texture may change slightly upon thawing. If you choose to freeze the cilantro and lime rice, place it in an airtight container or freezer bag. Label it with the date, and consume within 1-2 months.

Tips for the Best Cilantro and Lime Rice

Here are a few tips to ensure your cilantro and lime rice comes out perfectly every time:

  1. Use fresh cilantro and limes for the best flavor. Fresh ingredients contribute significantly to the overall taste of the dish.
  2. Cooking times may vary depending on your rice cooker model. Follow the manufacturer’s instructions for cooking basmati rice.
  3. Taste the rice before serving, and adjust the seasoning if needed. You can add more lime juice, salt, or pepper according to you preference.
  4. If cilantro isn’t your favorite herb, try experimenting with other fresh herbs like parsley or mint. Each herb brings a unique twist to the dish.

Variations

With a few additional ingredients, this recipe can be varied to create whole new flavors. Fiesta rice and coconut cilantro lime rice are winners for my family.

Fiesta Rice

Add finely diced red bell peppers, corn kernels, and black beans to the rice for a colorful and festive twist. This variation is perfect for serving alongside Mexican-inspired dishes, and you know we love those!

Coconut Cilantro Lime Rice

Replace half the water with coconut milk for a tropical flavor. Then garnish the rice with shredded coconut and chopped fresh cilantro for an exotic pairing for seafood or curry dishes.

More Plant Based Side Dishes

If you enjoyed this rice cooker cilantro and lime rice recipe, you’ll love these simple, vegan side dishes too:

  • Instant Pot Mexican Rice
  • Oil-Free Potato Wedges
  • Black Bean Corn Salad with Avocado
  • Instant Pot Mexican Quinoa
  • BBQ Cauliflower Bites
Yield: 4 Servings

Rice Cooker Cilantro Lime Rice

Rice Cooker Cilantro Lime Rice

Create flavorful cilantro lime rice in minutes with a rice cooker.

Prep Time 5 minutes
Cook Time 10 minutes
Total Time 15 minutes

Ingredients

  • 1 cup Basmati Rice
  • 2 cups Water
  • 4 tbsp Chopped Cilantro
  • 2 tbsp Lime Juice
  • 3/4 tsp Salt
  • 1/2 tsp Black Pepper

Instructions

  1. Rinse basmati rice under cold water until it runs clear.
  2. Add rice, lime juice and water to rice cooker. Close lid and start the rice cooker according to its instructions.
  3. Finely chop cilantro.
  4. When rice cooker indicates rice is ready, open the lid and gently fluff rice with a fork.
  5. Pour cilantro over rice.
  6. Add salt and pepper.
  7. Using a fork, gently mix until well combined.
  8. Spoon cilantro and lime rice into a serving dish.
  9. Garnish with additional chopped cilantro (optional).

Notes

  • Use fresh cilantro and limes for the best flavor
  • Cooking times may vary depending on rice cooker model. Follow the manufacturer's instructions for cooking basmati rice.
  • Taste before serving and adjust seasoning as needed.
  • Store in an airtight container in the refrigerator for up to 4 days

Did you make this recipe?

We'd love to see it! Tag us and use #MyPlantBasedFamily!

Filed Under: Mexican Food, Recipes, Side Dishes

Black Bean Corn Salad with Avocado

April 29, 2021 by Holly Yzquierdo 4 Comments

No cook, fresh, healthy, delicious and easy – This black bean corn salad with avocado checks all the boxes!

I make this salad that also doubles as a dip while I’m doing meal prep for the week. There is no cooking involved when using canned beans and corn.

It is meant to be served cold, but Jim always heats his up. I keep it in the refrigerator to grab for a quick lunch or snack.

Spoon the bean mixture over greens for a fresh salad. It’s much faster than starting a salad from scratch. It also works well over baked potatoes, or scooped up with tortilla chips.

There are many variations of black bean and corn salad, from the ingredients to the name. Sometimes it referred to as black bean and corn salsa or black bean and corn dip.

Want it spicy? Add a jalapeno. Don’t have fresh tomatoes? Grab a can. Don’t like avocado? Leave it out.

Since there is no cooking involved, feel free to experiment with the flavors to make it exactly as you’d like.

Black Bean Salad Recipe

Ingredients

  • 1 can Black Beans (15 ounces, drained and rinsed)
  • 1 can Corn (15 ounces, drained and rinsed)
  • 2 cups Tomatoes (diced)
  • 1/4 cup Red Onion (chopped)
  • 2 cloves Garlic (or 1 tbsp minced garlic)
  • 1 Avocado (diced)
  • 1 Jalapeno Pepper (diced, optional)
  • 2 Lime (juiced)
  • 1/2 tsp Chili Powder
  • 1/4 tsp Cumin
  • 1/8 tsp Salt (if using)
  • 1 head Romain Hearts (or other mixed greens)

Step 1 – Combine Beans and Veggies

In a large mixing bowl, combine the drained and rinsed black beans and corns with the diced tomatoes, pepper, onion, garlic and avocado.

Step 2 – Add Spices

Add the lime juice, chili powder, cumin, and salt. Stir.

Step 3 – Chill and Serve

Store in an air tight container and serve chilled over a bed of greens. You can also serve it over a baked potato or with tortilla chips.

Variations

If you don’t like it spice, omit the jalapeno. Want more spice? Add hot sauce. The addition of cilantro is a great flavor twist too.

Don’t have black beans in your pantry? Replace those with cooked lentils or chickpeas instead.

Storing Leftovers

Keep refrigerated in an air tight container for up to three days. One serving is approximately one cup.

More Black Bean Recipes

  • Black Bean Mango Salad
  • Sweet Potato and Black Bean Bowl
  • Instant Pot Black Beans and Rice
  • Cilantro-Lime Infused Quinoa with Black Beans
  • Chipotle Black Bean Chili
Yield: 4 servings

Black Bean Corn Salad with Avocado

Black Bean Corn Salad with Avocado

Make a fresh, no cook salad that doubles as a salsa.

Prep Time 15 minutes
Cook Time 15 minutes
Total Time 30 minutes

Ingredients

  • 1 can Black Beans (15 ounces, drained and rinsed)
  • 1 can Corn (15 ounces, drained and rinsed)
  • 2 cups Tomatoes (diced)
  • 1/4 cup Red Onion (chopped)
  • 2 cloves Garlic (or 1 tbsp minced garlic)
  • 1 Avocado (diced)
  • 1 Jalapeno Pepper (diced, optional)
  • 2 Lime (juiced)
  • 1/2 tsp Chili Powder
  • 1/4 tsp Cumin
  • 1/8 tsp Salt (if using)
  • 1 Head Romain Hearts (or other mixed greens)

Instructions

  1. In a large bowl combine the drained and rinsed black beans and corn with the diced tomatoes, pepper, onion, garlic and avocado.
  2. Add the lime juice, chili powder, cumin, and salt. Stir.
  3. Store in an air tight bowl and serve chilled over a bed of greens.

Notes

  • Leftovers: Refrigerate in an air tight container for up to three days.
  • Serving Size: One serving is approximately 1 cup.
  • More Flavor: Add cilantro or hot sauce for more flavor.
  • No Black Beans: Use cooked lentils or chickpeas instead.

Did you make this recipe?

We'd love to see it! Tag us and use #MyPlantBasedFamily!

© Holly Yzquierdo

Filed Under: Main Dish Recipes, Mexican Food, Recipes, Salads & Wraps, Sauces, Dips, and Salad Dressings, Side Dishes

Instant Pot Mexican Rice

March 25, 2021 by Holly Yzquierdo Leave a Comment

Instant Pot Mexican Rice

Making Mexican Rice in the Instant Pot is a game changer. It’s a ‘set it and forget it’ dish that can be used in a variety of ways. You’ll love this one for meal planning!

When I first started making Mexican rice 15 years ago, I used white rice. After going plant-based, 10 years ago, I adapted the recipe to use brown rice for a whole grain option.

Brown Rice vs. White Rice

The brown rice recipe tastes just as good as the quicker white rice version, but it took 45 minutes to cook on the stove.

Once I got an Instant Pot, I revised the recipe to incorporate the shorter cooking time. It’s super easy to make Mexican rice in an Instant Pot. Just throw all the ingredients in, and it’s completely hands-off until I’m ready to eat.

Spanish Rice vs. Mexican Rice

Sometimes Spanish rice and Mexican rice are used interchangeably, but they are not the same dish.

Spanish rice often looks yellow in color because it is seasoned with saffron. Mexican rice does not include saffron and usually takes on a red hue. This is caused by tomato sauce.

Instant Pot Mexican Rice

Meal Planning with Mexican Rice

Mexican rice can be used as a side dish or incorporated into a main dish. Go ahead and double the recipe by doubling the ingredients because you can create several meals with it throughout the week. Cooking time in the Instant Pot remains the same for a double batch, so why not?

Let start with tacos and Mexican rice on the side. This option makes the whole family happy because they can choose what to put in their tacos.

Then add some Mexican rice and refried beans to a tortilla for tasty burritos. Try making refried beans in the Instant Pot too. My recipe is oil-free.

Next, toss beans, pico de gallo, lettuce and Mexican rice in a bowl to make a pretty burrito bowl. I love the vibrant colors in this dish!

Have I convinced you to try making Mexican rice in your Instant Pot? Here are some more of my favorite recipes to make in the Instant Pot:

  • Instant Pot Refried Beans
  • Instant Pot Lentil Tacos
  • Instant Pot Mexican Casserole
  • Instant Pot Black Beans and Rice

How to Make Mexican Rice in the Instant Pot

Ingredients

  • 1 cup Brown Rice (uncooked)
  • 2 cups Veggie Broth (or water with veggie broth mix)
  • 1 tsp Onion Powder
  • 1 tsp Garlic Powder
  • 1 tsp Salt
  • 8 ounces Tomato Sauce
  • 1/2 cup Cilantro (optional)

Step 1 – Combine Ingredients

Combine the brown rice, water, and spices in the Instant Pot. Give it a stir.

Step 2 – Add Sauce

Pour the tomato sauce on top of the other ingredients, but do not stir.

Step 3 – Secure Lid

Put the lid on the Instant Pot, and close the sealing valve.

Step 4 – Cook Time

Press Manual (or Pressure Cook), and set it for 22 minutes.

Step 5 – Release Pressure

Once it’s done, allow the pressure to release naturally for at least 10 minutes. Then release the remaining pressure.

Step 6 – Fluff and Eat

Carefully remove the lid, and fluff with a fork. Garnish with cilantro, if desired. Enjoy!

Storage

All the Mexican rice to cool before storing it in an airtight container. It will be good for about 6 days. That’s plenty of time to use it in all the recipes shown above.

Tips and Tricks

For a faster cooking time, you can use white rice instead of brown rice. Simply follow the cooking directions for the type of rice you are using.

As previously mentioned, it is easy to make a double batch of Mexican rice in the Instant Pot. Double all the ingredients and keep the cooking time the same.

If you love the flavor of cilantro, add it to the rice when it is done cooking. Then put the lid of the Instant Pot back on for a couple of minutes to infuse the flavors. Yum!

Yield: 4 servings

Instant Pot Mexican Rice

Instant Pot Mexican Rice

Instant Pot Mexican Rice is plant-based and oil-free. We love this easy recipe and use it in our weekly meal prep for quick meals.

Prep Time 1 minute
Cook Time 35 minutes
Total Time 36 minutes

Ingredients

  • 1 cup Brown Rice (uncooked)
  • 2 cups Veggie Broth (or water with veggie broth mix)
  • 1 tsp Onion Powder
  • 1 tsp Garlic Powder
  • 1 tsp Salt
  • 8 ounces Tomato Sauce
  • 1/2 cup Cilantro (optional)

Instructions

  1. Combine the brown rice, water and spices in the Instant Pot. Give it a stir.
  2. Pour the tomato sauce on top of the other ingredients, but do not stir.
  3. Put the lid on the Instant Pot and close the sealing valve.
  4. Press Manual (or Pressure Cook) and set it for 22 minutes.
  5. Once it's done, allow the pressure to release naturally for at least 10 minutes. Then release the remaining pressure.
  6. Carefully remove the lid, and fluff with a fork.
  7. Garnish with cilantro, if desired.

Notes

Save Time: For faster cooking, consider using a quick cooking white rice and look up cooking directions for that type of rice.

Want More: You can double the recipe by doubling all the ingredients. The cooking time will remain the same.

Storage: Allow rice to cool before storing in an air tight container. This rice will be good for about 6 days.

More Flavor: You can also add fresh cilantro to the rice once you are done cooking. Just sprinkle on top and put the lid on for a couple of minutes.

Instant Pot Mexican Rice

Instant Pot Mexican Rice is plant-based and oil-free. We love this easy recipe and use it in our weekly meal prep for quick meals.

© Holly Yzquierdo
Category: Recipes

Filed Under: Daniel Fast Recipes, Mexican Food, Recipes, Side Dishes Tagged With: Mexican Food, Recipes

Instant Pot Mexican Quinoa

July 24, 2020 by Holly Yzquierdo 2 Comments

Instant Pot Mexican Quinoa

We’ve been eating my Mexican Rice and Bean Casserole for years. It’s a crowd pleaser. I’ve adapted it and made many different versions. It seems like it’s time to do it again. I’m taking the same flavor and most of the ingredients plus quinoa! It make it even easier, I’m making it in my Instant Pot!

Instant Pot Mexican Quinoa

This page contains affiliate links.

If you are like me, you probably have a giant bag of quinoa in your pantry. I don’t know why, but in the summer I always gravitate toward quinoa.

What is Quinoa?

Quinoa is technically a seed but most people treat it like a grain. It should be cooked before eating. Quinoa has a slightly nutty flavor.

Quinoa is a great versatile food to add to your rotation. We enjoy it in stir frys instead of rice, in breakfast bowls instead of oats, as a replacement for taco meat, your imagination is the limit.

  • Breakfast Quinoa
  • Quinoa Chickpea Wrap
  • Quinoa Tacos
  • Quinoa Lentil Salad
  • Chickpea Quinoa Stir Fry

Should I Washing Quinoa?

If you are new to quinoa, you will want to rinse your quinoa first. Quinoa is coated in saponin. It’s bitter and will make you think quinoa is gross. If you rinse the quinoa well, we use a fine mesh strainer, you’ll be able to get the saponin off easily.

Many brands of quinoa will prewash it to remove the saponin.

Instant Pot Mexican Quinoa

Instant Pot Mexican Quinoa

I love how versatile this recipe is. I enjoy it hot and cold. Whether I reheat leftovers or serve them cold, I love topping it with my pico de gallo. What can I say, fresh tomatoes, onions, garlic and cilantro are irresistible.

When I know I need a filling meal on the go, this is one of my top choices.

Yield: 4 servings

Instant Pot Mexican Quinoa

Instant Pot Mexican Quinoa

Instant Pot Mexican Quinoa is a quick and easy recipe your family will love. Adapt it to your individual preferences.

Prep Time 5 minutes
Cook Time 5 minutes
Additional Time 20 minutes
Total Time 30 minutes

Ingredients

  • 1 15 ounce can Black Beans (drained, rinsed)
  • 1 1/4 cups water or veggie broth
  • 1 cup Quinoa (uncooked)
  • 1 cup Diced Tomatoes (from the can, drained)
  • 1 cup Frozen Corn
  • 2 teaspoon Chili Powder
  • 1 teaspoon Cumin
  • 1 tsp Garlic Powder
  • 1/2 tsp Sea Salt
  • 1 Lime, sliced for garnish
  • 2 Avocado (diced)

Instructions

  1. Dump the black beans, water/veggie broth, quinoa, tomatoes, corn, chili powder, cumin, garlic powder, and salt into the Instant Pot.
  2. Close the lid and close the pressure valve. Press manual/pressure cooker and cook for 5 minutes on high pressure. Once it is done, release the pressure manually. Remove the lid carefully.
  3. Serve in bowls topped with lime wedges and diced avocado. Fresh pico de gallo is my favorite way to enjoy it.

Notes

Refrigerate leftovers in an air tight container. Enjoy for 3-4 days.

You can eat leftovers warm or cold.

Did you make this recipe?

We'd love to see it! Tag us and use #MyPlantBasedFamily!

© Holly Yzquierdo
Category: Instant Pot

Filed Under: Daniel Fast Recipes, Instant Pot, Main Dish Recipes, Mexican Food, Recipes, Side Dishes Tagged With: Instant Pot, plant-based diet, Pressure Cook, Quinoa, Vegan

« Previous Page
Next Page »

Primary Sidebar

Footer

Find it here!

Amazon Affiliate Disclosure

Holly Yzquierdo of My Plant-Based Family is a participant in the Amazon Services LLC Associates Program, an affiliate advertising program designed to provide a means for sites to earn advertising fees by advertising and linking to amazon.com.

Disclosures

Unauthorized use and/or duplication of any part of this website or content without express and written permission from Holly Yzquierdo is prohibited. Excerpts and links may be used, provided that full credit is given to Holly Yzquierdo and MyPlantBasedFamily.com with links to the original content.

More information on our Privacy Policy and other Disclosures are available.

Copyright © 2025 · Wellness Pro on Genesis Framework · WordPress · Log in