• Skip to primary navigation
  • Skip to main content
  • Skip to primary sidebar
  • Skip to footer

My Plant-Based Family

Eating Whole Food, Plant-Based Diet recipes, On a Budget.

  • Plant-Based Recipes
    • Breakfast
    • Main Dish
    • Instant Pot
    • Daniel Fast Recipes
    • Side Dishes
    • Bread and Muffins
    • Salad and Wraps
    • Soup, Stews, and Chili
    • Sauces, Dips, and Salad Dressings
    • Desserts
    • Crock Pot
    • Mexican Food
  • Videos
  • Resources
    • Getting Started
    • Books
      • The Plant-Based Diet Starter Guide
      • The Plant-Based Holiday Meal Plan & Cookbook
  • Meal Plans
    • Meal Plans 2020
    • Meal Plans 2019
    • Meal Plans 2017
    • Meal Plans 2016
    • Meal Plans 2015
    • Meal Plans 2014
    • Meal Plans 2013
  • About Us
    • Our Family
    • Contact Me
    • Our Food Philosophy
    • Disclosure Policy
      • Privacy Policy
  • Daniel Fast Recipes

Recipes

Strawberry Lemonade Popsicles

May 27, 2025 by Holly Yzquierdo Leave a Comment

Sweeten up your summer with these Creamy Strawberry Lemonade Popsicles. Whether you’re lounging poolside, entertaining guests, or simply looking for a refreshing, better-for-you dessert, these homemade popsicles are everything you could ask for—fruity, tangy, creamy, and naturally sweetened.

Made with vegan yogurt, strawberries, and fresh lemon juice, they strike the perfect balance between indulgent and wholesome. Think of them as a frozen version of your favorite strawberry lemonade with a creamy twist. The best part? They’re super easy to make, kid-friendly, and customizable to your taste.

Why You’ll Love These Popsicles

Popsicles are nostalgic. They bring back childhood memories of sticky hands and sunny afternoons. But unlike the artificial, sugar-laden versions you may have grown up with, these homemade strawberry lemonade pops are packed with real fruit, soy or coconut yogurt, and natural sweeteners like maple syrup.

They look beautiful with their swirled layers, taste refreshing and satisfying, and take just 10 minutes of prep before the freezer works its magic.

Whether you’re cutting down on processed sugar, following a high-protein diet, or simply craving a fruity dessert that feels like a treat without being overly indulgent, these popsicles check all the boxes.

Perfect for Any Occasion

These Creamy Strawberry Lemonade Popsicles are great for:

  • Backyard BBQs
  • Pool parties
  • Summer birthdays
  • After-school snacks
  • Healthy desserts for adults and kids alike

They’re also a fun project for kids to help with—from blending to layering and swirling. Just prepare to clean up a little berry-flavored yogurt afterward!

Recipe Tips and Variations

Lower Sugar? Use unsweetened yogurt and reduce or skip the sweetener altogether if your strawberries are super ripe and sweet.

No Popsicle Molds? No problem! Use small paper cups and insert wooden sticks after the popsicles have partially frozen (about 2 hours in). Peel off the paper to serve.

Extra Fruit? Fold in some chopped strawberries before layering to add texture and fruity bites.

How to Make Strawberry Lemonade Popsicles

Ingredients for Pink Strawberry Lemonade Layer:

  • 2½ cups strawberries (fresh or frozen)
  • 5 tbsp maple syrup
  • 1 tsp lemon juice
  • Zest of 1 lemon (optional)
  • 1 cup soy or coconut yogurt

Ingredients for White Yogurt Layer:

  • 2 cups soy or coconut yogurt (plain or vanilla)
  • 3 tbsp maple syrup
  • 2 tsp lemon juice

Instructions

Step 1 – Blend the Pink Layer

In a blender, combine the strawberries, lemon juice, zest, maple syrup, and soy or coconut yogurt. Blend until smooth and creamy. Taste and adjust the sweetness if needed.

If using frozen strawberries, you may want to let them thaw slightly or add a splash of water to help the blending process.

Step 2 – Mix the White Layer

In a separate bowl, stir together the vegan yogurt, lemon juice, and maple syrup. The lemon adds just enough tang to mimic the lemonade vibe while keeping this layer creamy and rich.

Step 3 – Layer and Swirl

Grab your popsicle molds (this recipe yields about 16 depending on mold size). Start layering by adding spoonful’s of the pink and white mixtures in an alternating fashion. Once filled, take a thin skewer or knife and gently swirl the layers to create a marbled effect. Don’t over-swirl—you want to keep some definition between the colors.

Step 4 – Freeze

Insert popsicle sticks and freeze for at least 6 hours, preferably overnight. Patience is key—these need time to set up fully so they’re firm enough to unmold cleanly.

Step 5 – Unmold & Enjoy

To release the popsicles, run the molds under warm water for 10–15 seconds. Gently pull them out and enjoy immediately, or store them in an airtight container or bag for up to a week.

Storage and Serving Tips

  • Store popsicles in a freezer-safe bag or container for up to one week.
  • To keep them from sticking, wrap each one in parchment paper or wax paper.
  • Serve with a wedge of fresh lemon or strawberry for a pretty presentation.

More Plant Based Treats

If you like this recipe, you’ll love these plant based treats too:

  • Easy Watermelon Slushie
  • Triple Berry Frozen Yogurt Pops
  • Plant Based Brownies
  • Mango Lime Ice Pops
  • Chocolate Banana Bread
Yield: 16 Popsicles

Strawberry Lemonade Popsicles

Strawberry Lemonade Popsicles

These creamy strawberry lemonade popsicles are the perfect summer treat—made with vegan yogurt, fresh fruit, and maple syrup.

Prep Time 10 minutes
Additional Time 6 hours
Total Time 6 hours 10 minutes

Ingredients

Pink Strawberry Lemonade Layer

  • 2 1/2 cup strawberries
  • 5 tbsp maple syrup
  • 1 tsp lemon juice
  • Zest of 1 lemon
  • 1 cup vegan yogurt

White Yogurt Layer

  • 2 cup vegan yogurt
  • 3 tbsp maple syrup
  • 2 tsp lemon juice

Instructions

      1. In a blender, combine the strawberries, lemon juice, zest, maple syrup, and vegan yogurt. Blend until smooth and creamy. Taste and adjust sweetness if needed. If using frozen strawberries, you may want to let them thaw slightly or add a splash of water to help the blending process.
      2. In a separate bowl, stir together the vegan yogurt, lemon juice, and maple syrup. The lemon adds just enough tang to mimic the lemonade vibe while keeping this layer creamy and rich.
      3. Grab your popsicle molds (this recipe yields about 16 depending on mold size). Start layering by adding spoonfuls of the pink and white mixtures in an alternating fashion. Once filled, take a thin skewer or knife and gently swirl the layers to create a marbled effect. Don't over-swirl—you want to keep some definition between the colors.
      4. Insert popsicle sticks and freeze for at least 6 hours, preferably overnight. Patience is key—these need time to set up fully so they’re firm enough to unmold cleanly.
      5. To release the popsicles, run the molds under warm water for 10–15 seconds. Gently pull them out and enjoy immediately, or store them in an airtight container or bag for up to a week.
  • Notes

  • Store popsicles in a freezer-safe bag or container for up to one week.
  • To keep them from sticking, wrap each one in parchment paper or wax paper.
  • Serve with a wedge of fresh lemon or strawberry for a pretty presentation.
  • Did you make this recipe?

    We'd love to see it! Tag us and use #MyPlantBasedFamily!

    © Holly Yzquierdo

    Filed Under: Dessert, Recipes

    Easy Greek Salad

    May 20, 2025 by Holly Yzquierdo Leave a Comment

    Looking for a fresh, colorful, and satisfying salad that’s bursting with flavor? This Greek Salad is the ultimate go-to. It’s crunchy, tangy, vibrant, and endlessly customizable. Tossed with a homemade Greek salad dressing and packed with Mediterranean-inspired ingredients, it makes a perfect side dish or a light, nourishing main.

    Whether you’re meal prepping for the week or throwing together a quick lunch, this recipe comes together in minutes—and delivers maximum flavor with minimal effort.

    Why You’ll Love It

    Greek salad is a classic for a reason. It’s full of bold flavors—crisp greens, juicy tomatoes, briny olives, and tangy dressing. But this version adds a modern twist: chickpeas for plant-based protein and optional add-ins like artichokes or pepperoncini to keep things interesting.

    Here’s why this salad deserves a spot in your rotation:

    • Fresh and fast – Ready in under 15 minutes
    • Plant-based and protein-packed – Chickpeas add heartiness
    • Customizable – Add or skip ingredients based on what you have
    • Perfect with homemade dressing – No bottled stuff needed
    • Meal prep friendly – Make a big bowl and enjoy all week

    Tips for the Best Greek Salad

    • Use fresh, in-season produce for maximum flavor. Ripe cherry tomatoes and crisp cucumbers make all the difference.
    • Chop everything into similar-sized pieces so each bite has a little of everything.
    • Toss with dressing just before serving to avoid soggy greens if making ahead.
    • For a creamy twist, try adding avocado or crumbled plant-based feta.

    Add Chickpeas?

    Classic Greek salads don’t typically include beans, but adding chickpeas transforms this side salad into a filling, protein-rich main dish. Chickpeas are also a great source of fiber, making this salad more satisfying and balanced—perfect if you’re eating plant-based or just looking to stay full longer.

    How to Make an Easy Greek Salad

    Ingredients

    • 3 Cups Chopped Romaine or your favorite greens
    • ½ cup cucumbers, chopped
    • ½ cup cherry tomatoes, sliced
    • ½ cup yellow bell pepper, diced
    • ½ cup chickpeas
    • ¼ cup red onion, diced (optional)
    • ¼ cup artichoke hearts (optional)
    • 1-3 pepperoncino (optional)
    • 10 olives (optional)
    • Greek Salad Dressing (separate recipe)

    Instructions

    Step 1 – Prep the Veggies

    Wash and chop all your vegetables. You want bite-sized pieces for easy eating. If you’re prepping in advance, store wet ingredients like tomatoes separately to keep things crisp.

    Step 2 – Build Your Salad

    Add the chopped romaine or your greens of choice to a large bowl. Layer in cucumbers, cherry tomatoes, bell peppers, chickpeas, and any of the optional ingredients you like—onion, olives, artichokes, or pepperoncini.

    Step 3 – Add the Dressing

    Drizzle with Greek salad dressing and toss everything well to coat. Start with a couple of tablespoons and add more to taste.

    Step 4 – Serve & Enjoy

    Serve immediately for the freshest flavor and crunch. This salad pairs beautifully with crusty bread, pita, or a side of hummus for a Mediterranean-style meal.

    Meal Prep & Storage

    Greek salad is perfect for meal prep with a few tips:

    • Store the dressing separately until ready to eat
    • Keep tomatoes and cucumbers separate if prepping more than 24 hours ahead
    • Use sturdy greens like kale or romaine for longer-lasting crunch
    • Store in an airtight container in the fridge for up to 3 days

    More Delicious Salad Ideas

    If you like this salad, you’ll love these recipes too:

    • Quinoa-Lentil Salad
    • BBQ Chickpea Salad
    • Black Bean Corn Salad with Avocado
    • Chopped Asian Salad
    • Vegan Potato Salad

    Easy Greek Salad

    Easy Greek Salad

    This fresh Greek salad with chickpeas is crunchy, colorful, and tossed in homemade dressing. A quick, plant-based meal or side dish ready in 15 minutes!

    Prep Time 15 minutes
    Total Time 15 minutes

    Ingredients

    • 3 cups Chopped Romaine or your favorite greens
    • ½ cup cucumbers, chopped
    • ½ cup cherry tomatoes, sliced
    • ½ cup yellow bell pepper, diced
    • ½ cup chickpeas
    • ¼ cup red onion, diced (optional)
    • ¼ cup artichoke hearts (optional)
    • 1-3 pepperoncino (optional)
    • 10 olives (optional)
    • Greek Salad Dressing (separate recipe)

    Instructions

      1. Wash and chop all your vegetables. You want bite-sized pieces for easy eating. If you're prepping in advance, store wet ingredients like tomatoes separately to keep things crisp.
      2. Add the chopped romaine or your greens of choice to a large bowl. Layer in cucumbers, cherry tomatoes, bell peppers, chickpeas, and any of the optional ingredients you like—onion, olives, artichokes, or pepperoncini.
      3. Drizzle with Greek salad dressing and toss everything well to coat. Start with a couple of tablespoons and add more to taste.
      4. Serve immediately for the freshest flavor and crunch. This salad pairs beautifully with crusty bread, pita, or a side of hummus for a Mediterranean-style meal.

    Notes

    Greek salad is perfect for meal prep with a few tips:

    • Store the dressing separately until ready to eat
    • Keep tomatoes and cucumbers separate if prepping more than 24 hours ahead
    • Use sturdy greens like kale or romaine for longer-lasting crunch
    • Store in an airtight container in the fridge for up to 3 days

    Did you make this recipe?

    We'd love to see it! Tag us and use #MyPlantBasedFamily!

    © Holly Yzquierdo

    Filed Under: Recipes, Salads & Wraps

    Greek Salad Dressing (No Oil)

    May 16, 2025 by Holly Yzquierdo 1 Comment

    Salads are only as good as their dressing, and if you’re tired of store-bought bottles full of oils and preservatives, this creamy Greek salad dressing is your new go-to. Made with cannellini beans as a base, it’s creamy, tangy, herby, and naturally plant-powered. Best of all? No oil, no dairy, and no fuss.

    This recipe is perfect for anyone trying to eat a little cleaner without sacrificing flavor—or creaminess. Whether you’re topping a classic Greek salad, using it as a dip for raw veggies, or spreading it on a wrap, this dressing is proof that healthy can taste amazing.

    Why You’ll Love This Greek Salad Dressing

    Let’s be real: the right dressing can make or break a salad. And while traditional Greek dressings are often loaded with olive oil, this version flips the script. It’s:

    • Creamy and satisfying without any dairy or oil
    • High in protein thanks to cannellini beans
    • Easy to blend up in minutes
    • Naturally gluten-free, vegan, and nut-free
    • Loaded with zesty Greek-inspired herbs
    • Perfect as a dressing, dip, or sandwich spread

    If you’re looking for a way to elevate your lunch salads or add a flavorful twist to your meal prep routine, this one’s for you.

    The Secret Ingredient: Cannellini Beans

    The creamy texture of this dressing comes from a can of humble cannellini beans. These soft white beans are mild in flavor, blend up beautifully smooth, and bring a dose of plant-based protein and fiber to your meal. They also thicken the dressing naturally without any emulsifiers or starches.

    Using beans as a base is a brilliant way to replace heavy oils or dairy-based ingredients in dressings. Plus, it keeps the recipe hearty and satisfying enough to turn a basic salad into a filling meal.

    Ways to Use This Dressing

    While it’s perfect on a classic Greek salad—think romaine, cucumber, tomato, olives, and red onion—this dressing is super versatile. Try it:

    • Drizzled over grain bowls or roasted vegetables
    • As a dip for fresh veggie sticks or pita chips
    • Spread inside wraps or sandwiches in place of mayo
    • As a dressing for a cold pasta salad or chickpea salad
    • Thinned with a little extra water or lemon to make a marinade for tofu or tempeh

    How to Make Greek Salad Dressing

    Ingredients

    • 1 15 ounce can of cannellini beans, drained and rinsed
    • Juice from one lemon (or about 3 Tablespoons of lemon juice)
    • ½ teaspoon garlic powder
    • 2 teaspoons dried parsley
    • 1 teaspoon onion powder
    • 1 teaspoon dried oregano
    • 1 teaspoon salt
    • 1 Tablespoon Dijon mustard
    • ½ Tablespoon red wine vinegar
    • ½ teaspoon maple syrup

    Instructions

    Step 1 – Add All Ingredients to a Blender

    Place the beans, lemon juice, garlic powder, parsley, onion powder, oregano, salt, Dijon mustard, red wine vinegar, and maple syrup into your blender or food processor. A high-powered blender like a Blendtec works best, especially if you’re aiming for a super smooth finish.

    Step 2 – Blend Until Creamy

    Blend until the dressing is completely smooth. If it’s too thick, add a tablespoon or two of water at a time until you reach your desired consistency. You want it pourable, but still thick enough to cling to greens.

    Step 3 – Taste and Adjust

    Give it a taste and tweak as needed. Add more lemon juice for brightness, more mustard for bite, or a pinch more salt if it feels flat.

    Step 4 – Store

    Transfer to a jar or airtight container. The dressing will thicken slightly in the fridge. Store for up to 5 days. Give it a stir (or shake) before each use.

    Recipe Tips and Variations

    Here are a few ways to customize the recipe or switch it up depending on what you have:

    Use Other Beans – If you don’t have cannellini beans, you can use great northern beans or even chickpeas. Just note that chickpeas will give a slightly grainier texture.

    Add Fresh Herbs – Have fresh parsley or oregano on hand? Swap in fresh herbs for dried (triple the amount), or blend in some fresh basil or dill for extra Mediterranean flair.

    Make It Spicy – Add a pinch of red pepper flakes or a splash of hot sauce for a spicy version.

    Make It Extra Creamy – Want it thicker for a dip? Reduce the lemon juice slightly and skip the added water altogether. Perfect for dunking raw veggies.

    More Plant Based Salad Dressings

    If you like this recipe, you love these plant based recipes too:

    • Spicy Vegan Ranch Dressing
    • Raspberry Vinaigrette Salad Dressing
    • Creamy Italian Salad Dressing (Oil-Free)
    • Homemade Vegan Ranch
    • Oil-Free Blueberry Vinaigrette

    Greek Salad Dressing (No Oil)

    Greek Salad Dressing (No Oil)

    This creamy Greek salad dressing is oil-free, protein-packed, and made with cannellini beans. Easy, healthy, and ready in minutes—perfect for any salad!

    Prep Time 10 minutes
    Total Time 10 minutes

    Ingredients

    • 1 15 ounce can of cannellini beans, drained and rinsed
    • Juice from one lemon (or about 3 Tablespoons of lemon juice)
    • ½ teaspoon garlic powder
    • 2 teaspoons dried parsley
    • 1 teaspoon onion powder
    • 1 teaspoon dried oregano
    • 1 teaspoon salt
    • 1 Tablespoon Dijon mustard
    • ½ Tablespoon red wine vinegar
    • ½ teaspoon maple syrup

    Instructions

    1. Place the beans, lemon juice, garlic powder, parsley, onion powder, oregano, salt, Dijon mustard, red wine vinegar, and maple syrup into your blender or food processor. A high-powered blender like a Blendtec works best, especially if you’re aiming for a super smooth finish.
    2. Blend until the dressing is completely smooth. If it’s too thick, add a tablespoon or two of water at a time until you reach your desired consistency. You want it pourable, but still thick enough to cling to greens.
    3. Give it a taste and tweak as needed. Add more lemon juice for brightness, more mustard for bite, or a pinch more salt if it feels flat.

    Notes

    Transfer to a jar or airtight container. The dressing will thicken slightly in the fridge. Store for up to 5 days. Give it a stir (or shake) before each use.

    Did you make this recipe?

    We'd love to see it! Tag us and use #MyPlantBasedFamily!

    © Holly Yzquierdo

    Filed Under: Recipes, Sauces, Dips, and Salad Dressings

    Cashew Queso

    April 29, 2025 by Holly Yzquierdo Leave a Comment

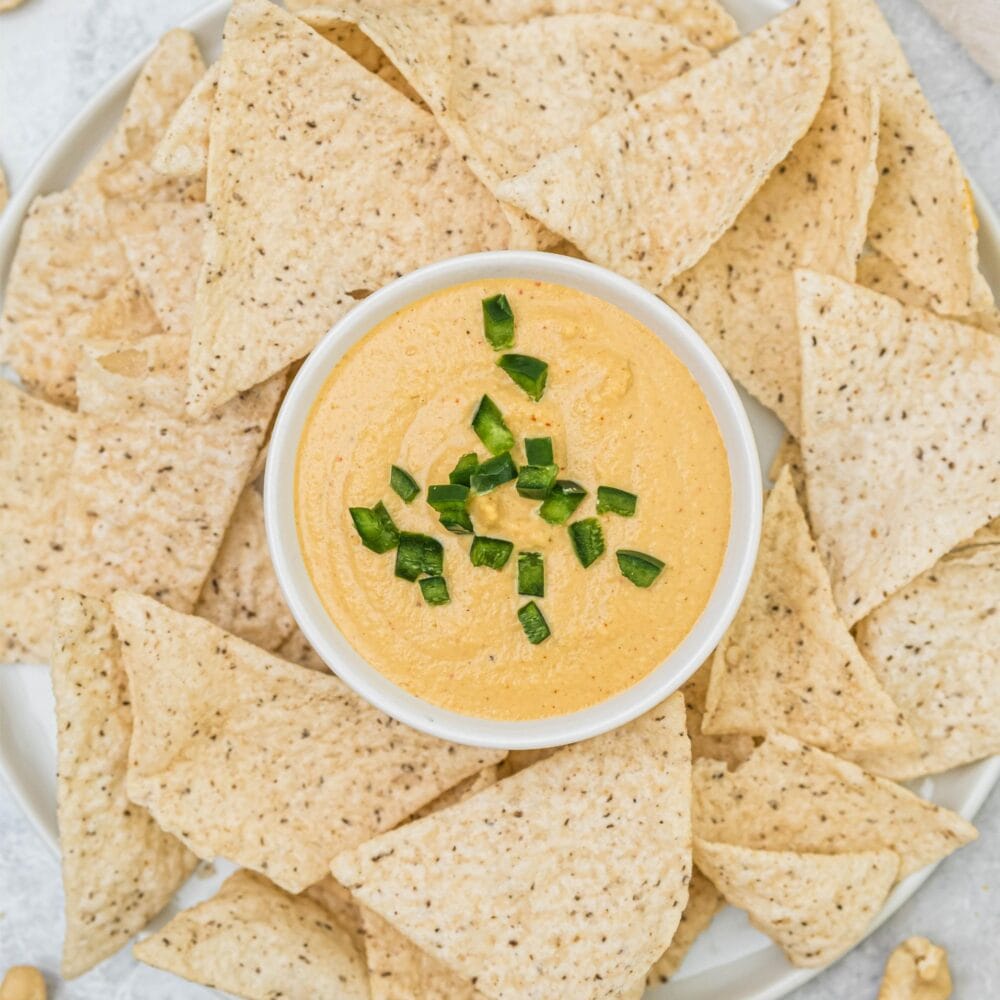
    Queso is a beloved dip known for its creamy texture and rich, cheesy flavor, often enjoyed with tortilla chips, tacos, and other Tex-Mex favorites. But for those who follow a plant-based lifestyle, finding a delicious, dairy-free alternative can be a challenge. Enter cashew queso—an irresistibly creamy, completely plant-based alternative that delivers all the indulgence of traditional queso without any dairy.

    What Is Cashew Queso?

    Cashew queso is a dairy-free, cheese-like dip made from blended cashews, seasonings, and other plant-based ingredients. It mimics the rich, smooth texture and tangy, savory flavor of traditional queso, making it a versatile and satisfying alternative. Unlike store-bought vegan cheese products, which often contain processed ingredients, it is typically made with whole-food components, making it a healthier and more natural option.

    How to Enjoy Cashew Queso

    As a Dip

    The classic way to enjoy cashew queso is as a dip for tortilla chips, crackers, or raw veggies like carrots, celery, and bell peppers. Its creamy texture and bold flavor make it an instant crowd-pleaser at gatherings or movie nights.

    Drizzled Over Tacos & Burritos

    Take your tacos and burritos to the next level by drizzling cashew queso over the top. It adds a rich, cheesy element that pairs perfectly with plant-based fillings like black beans, lentils, roasted vegetables, and avocado.

    Poured Over Nachos

    Upgrade your nachos by smothering them in warm cashew queso. Layer tortilla chips with beans, salsa, jalapeños, and guacamole for a fully loaded, dairy-free snack or meal.

    Mixed into Pasta

    Cashew queso can double as a creamy pasta sauce! Simply mix it with cooked pasta for a quick and delicious plant-based mac and cheese alternative.

    As a Topping for Roasted Vegetables

    Drizzle cashew queso over roasted broccoli, cauliflower, or Brussels sprouts to add a burst of flavor and a creamy texture to your veggies.

    Spread on Sandwiches & Burgers

    Use cashew queso as a spread for plant-based sandwiches, wraps, or veggie burgers for an extra layer of savory goodness.

    Customizing Your Cashew Queso

    One of the best things about cashew queso is how easily it can be customized to suit your taste preferences. Here are a few ways to change it up:

    Adjust the Spice Level

    If you love heat, add diced jalapeños, cayenne pepper, or chipotle powder for a spicy kick. Prefer a milder version? Stick with smoked paprika and a pinch of black pepper.

    Make It Smokier

    For a deeper, smoky flavor, add a little liquid smoke or extra smoked paprika.

    Boost the Umami

    A splash of tamari, soy sauce, or miso paste can enhance the umami flavor, making the queso even more savory and rich.

    Add a Veggie Base

    Blend in cooked butternut squash, sweet potatoes, or roasted red peppers for an extra layer of flavor and nutrients.

    Thicken or Thin It Out

    For a thicker queso, reduce the liquid and blend until creamy. If you prefer a thinner consistency for drizzling, add a little extra plant-based milk or water until you reach the desired texture.

    How to Make Cashew Queso

    Ingredients

    • 1 cup Cashews (150 grams)
    • Nutritional Yeast ½ cup (42 grams)
    • 1/2 cup Vegetable broth (260 grams)
    • 2 Tbsp Hot Sauce (I used Chollulas)
    • ½ teaspoon Cumin
    • 1 teaspoon Garlic powder
    • 1 teaspoon Onion Powder
    • ½ teaspoon of salt

    Instructions

    Step 1 – Soak Cashews

    Boil water and pour over the cashews until completely covered. Let soak for 15-20 minutes.

    Step 2 – Process

    Once your cashews have soaked, drain out the water and pour your cashews into a food processor.

    Step 3 – Add Remaining Ingredients

    Add the rest of your ingredients to your food processor.

    Step 4 – Blend

    Blend on high until completely smooth.

    Step 5 – Serve

    Serve immediately with chips. You can top the dip with more hot sauce, chili peppers, or salsa.

    Storing and Reheating

    Cashew queso stores well, making it a great option for meal prep. Here’s how to keep it fresh:

    • Refrigeration – Store in an airtight container in the fridge for up to a week.
    • Freezing – For longer storage, freeze in small portions and thaw as needed.
    • Reheating – Warm gently on the stovetop or in the microwave, adding a splash of water or plant-based milk to maintain a smooth consistency.

    More Plant Based Dips

    If you like this recipe, you’ll love these plant based dips too:

    • Homemade Ketchup: No Sugar Added
    • Spicy Vegan Ranch Dressing
    • Oil-Free Hummus
    • Vegan Spinach Artichoke Dip
    • Homemade Vegan Ranch

    Cashew Queso

    Cashew Queso

    Creamy, flavorful, and completely dairy-free, cashew queso is the perfect plant-based dip! Enjoy this rich, cheesy alternative with chips, veggies, or tacos.

    Prep Time 30 minutes
    Total Time 30 minutes

    Ingredients

    • 1 cup Cashews (150 grams)
    • Nutritional Yeast ½ cup (42 grams)
    • 1/2 cup Vegetable broth (260 grams)
    • 2 Tbsp Hot Sauce (I used Chollulas)
    • ½ teaspoon Cumin
    • 1 teaspoon Garlic powder
    • 1 teaspoon Onion Powder
    • ½ teaspoon of salt

    Instructions

    1. Boil water and pour over the cashews until completely covered. Let soak for 15-20 minutes.
    2. Once your cashews have soaked, drain out the water and pour your cashews into a food processor.
    3. Add the rest of your ingredients to your food processor.
    4. Blend on high until completely smooth.
    5. Serve immediately with chips. You can top the dip with more hot sauce, chili peppers, or salsa.

    Notes

    Store in the fridge in an air-tight container.

    Did you make this recipe?

    We'd love to see it! Tag us and use #MyPlantBasedFamily!

    © Holly Yzquierdo

    Filed Under: Mexican Food, Recipes, Sauces, Dips, and Salad Dressings, Side Dishes

    Balsamic Marinated Mushrooms

    April 25, 2025 by Holly Yzquierdo Leave a Comment

    marinated mushrooms

    Mushrooms are a staple in many plant-based kitchens, loved for their versatility, hearty texture, and ability to soak up flavors like a sponge. Whether you’re making stir-fries, pasta dishes, tacos, or grilled skewers, a well-crafted marinade can take your mushrooms to the next level. In this guide, we’ll explore the benefits of marinating mushrooms, how different ingredients influence their flavor, and creative ways to incorporate balsamic marinated mushrooms into your meals.

    Why Marinate Mushrooms?

    Unlike other vegetables, mushrooms have a porous structure, which allows them to absorb marinades effectively. This unique characteristic makes them ideal for soaking up a rich blend of seasonings and spices, enhancing their taste and texture. Here are some key reasons to marinate mushrooms:

    Enhances Flavor Depth

    Mushrooms naturally have an earthy, umami taste. A good marinade can amplify these flavors, creating a savory, smoky, tangy, or slightly sweet profile depending on your ingredient choices.

    Improves Texture

    Marinating can slightly soften mushrooms, making them even more enjoyable to eat. This is particularly useful when preparing firmer varieties like Portobello or cremini mushrooms.

    Creates Versatility in Cooking

    Once marinated, mushrooms can be grilled, sautéed, roasted, or even eaten raw in salads, making them a versatile ingredient in plant-based cooking.

    How Long Should You Marinate Mushrooms?

    Mushrooms absorb marinade more quickly than proteins or other vegetables, so you don’t need to let them sit for hours. Here’s a general guideline:

    • Quick marinade: 15-30 minutes for a light flavor boost
    • Medium intensity: 1-2 hours for a well-rounded taste
    • Deep flavor infusion: 4-8 hours for a robust, deeply infused flavor

    Over-marinating can sometimes cause mushrooms to become too soft or break down, so it’s best to monitor their texture based on your cooking method.

    Best Cooking Methods for Marinated Mushrooms

    Once your mushrooms have absorbed all that flavorful goodness, it’s time to cook them! Here are the best methods to bring out their full potential:

    Sautéing

    One of the easiest and quickest methods, sautéing marinated mushrooms in a hot pan with a little extra oil enhances their texture and caramelizes the marinade.

    Grilling

    Marinated mushrooms, especially portobellos, hold up beautifully on the grill. They develop a smoky char that pairs well with burgers, skewers, and wraps.

    Roasting

    Baking marinated mushrooms at a high temperature (400°F or higher) concentrates their flavors and creates a slightly crispy exterior.

    How to Make Balsamic Marinated Mushrooms

    Ingredients

    • 1 Tbsp Braggs
    • 1 Tbsp Worcestershire Sauce (vegan)
    • 1 Tbsp Liquid Smoke
    • 1 Tbsp Balsamic vinaigrette
    • 1 Tbsp Agave Nectar or Maple Syrup
    • 1 Tbsp Cooking Sherry (optional, I use in Italian dishes but not Mexican)
    • 1/2 to 1 cup of water
    • Mushrooms of your choice, we prefer Portobello

    Instructions

    Step 1 – Combine Liquids

    Mix all liquids for the marinade in a large bowl and stir to incorporate them all.

    Step 2 – Clean Mushrooms

    Wash mushrooms and pat dry.

    Step 3 – Add to Marinade

    You can slice the mushrooms or leave them whole, depending on the intended use. Then add them to the marinade.

    Step 4 – Soak

    Let them soak 15-30 minutes, stirring or flipping occasionally.

    Step 5 – Cook

    Cook the mushrooms however you prefer.

    Creative Ways to Use Marinated Mushrooms

    Now that you have perfectly marinated mushrooms, how can you incorporate them into your meals? Here are some ideas:

    Mushroom Tacos

    Grill or sauté marinated mushrooms and serve them in warm tortillas with avocado, salsa, and fresh cilantro for a delicious taco night.

    Pasta Toppings

    Toss marinated mushrooms with cooked pasta, cherry tomatoes, and spinach for a quick, flavorful meal.

    Plant-Based Burgers

    Grilled Portobello mushrooms make an excellent meat alternative for burgers. Layer them with lettuce, tomato, and a zesty mustard. Get my Grilled Portobello Mushroom Burger recipe here.

    Buddha Bowls

    Add roasted marinated mushrooms to grain bowls along with quinoa, roasted sweet potatoes, and a creamy tahini dressing.

    Vegan Fajitas

    Sauté mushrooms with bell peppers and onions for a delicious fajita filling, served with warm tortillas and guacamole.

    Stir-Fries

    Use marinated mushrooms as a flavorful addition to stir-fried veggies and tofu over steamed rice or noodles.

    Wraps and Sandwiches

    Marinated mushrooms work well as a filling for wraps or sandwiches, paired with hummus, fresh greens, and roasted peppers.

    More Plant Based Recipes

    If you like this recipe, you’ll love these plant based ideas too:

    • Spicy Vegan Ranch Dressing
    • Homemade BBQ Sauce
    • Raspberry Vinaigrette Salad Dressing
    • Homemade Ketchup: No Sugar Added
    • Oil-Free Hummus

    Balsamic Marinated Mushrooms

    marinated mushrooms

    Enhance your mushrooms with the perfect marinade! Learn expert tips, flavor boosters, and creative ways to use marinated mushrooms in any dish.

    Prep Time 5 minutes
    Additional Time 30 minutes
    Total Time 35 minutes

    Ingredients

    • 1 Tbsp Braggs
    • 1 Tbsp Worcestershire Sauce (vegan)
    • 1 Tbsp Liquid Smoke
    • 1 Tbsp Balsamic vinaigrette
    • 1 Tbsp Agave Nectar or Maple Syrup
    • 1 Tbsp Cooking Sherry (optional, I use in Italian dishes but not Mexican)
    • 1/2 to 1 cup of water
    • Mushrooms of your choice, we prefer Portobello

    Instructions

    1. Mix all liquids for the marinade in a large bowl and stir to incorporate them all.
    2. Wash mushrooms and pat dry.
    3. Slice or leave them whole. Then add to marinade.
    4. Let them soak 15-30 minutes, stirring occasionally.
    5. Cook the mushrooms however you prefer.

    Did you make this recipe?

    We'd love to see it! Tag us and use #MyPlantBasedFamily!

    © Holly Yzquierdo

    Filed Under: Main Dish Recipes, On the Grill, Recipes, Side Dishes, Tips for Plant-Based Living

    Carrot Cake Bites

    April 2, 2025 by Holly Yzquierdo 1 Comment

    carrot cake bikes

    Carrot cake is a classic dessert loved for its warm spices, sweet flavor, and moist texture. But what if you could enjoy all of that deliciousness in a small, bite-sized treat that’s plant-based, wholesome, and easy to make? Enter carrot cake bites—a nutritious, no-bake snack that satisfies cravings without the need for processed ingredients or refined sugars. Whether you’re a plant-based eater or simply looking for a better-for-you treat, these bites are a perfect addition to your snack lineup.

    Why Choose Carrot Cake Bites?

    Carrot cake bites offer the perfect balance of flavor, nutrition, and convenience. Unlike traditional carrot cake, which often contains dairy, eggs, and refined sugar, plant-based carrot cake bites use whole-food ingredients to create a naturally sweet, nutrient-packed alternative. Here’s why they deserve a place in your kitchen:

    • Wholesome Ingredients – Instead of processed flours and sugars, carrot cake bites rely on natural ingredients like dates, nuts, oats, and shredded carrots to create a naturally sweet and satisfying texture.
    • Nutrient-Rich – Carrots are loaded with beta-carotene, fiber, and antioxidants, while nuts and seeds add healthy fats and protein to keep you full and energized.
    • No-Bake Convenience – No need to preheat an oven—these bites come together in minutes with just a food processor and a few simple ingredients.
    • Allergy-Friendly – Many recipes can be made gluten-free, dairy-free, and refined sugar-free, making them a great option for those with dietary restrictions.
    • Perfect for Meal Prep – Make a batch ahead of time for a quick and easy snack throughout the week.

    The Nutritional Benefits of Carrot Cake Bites

    Not only taste amazing but also provide a wealth of nutritional benefits. Here’s what makes them a powerhouse snack:

    Carrots: Nature’s Sweetener

    Carrots are naturally sweet and packed with vitamins and minerals. They’re rich in beta-carotene, which supports eye health and immune function, and they provide fiber to aid digestion.

    Nuts and Seeds: Healthy Fats and Protein

    Many carrot cake bite recipes use walnuts, almonds, or cashews, which are great sources of heart-healthy fats and plant-based protein. Seeds like flax, chia, or hemp can also be added for extra fiber and omega-3 fatty acids.

    Natural Sweeteners: Dates, Maple Syrup, and More

    Instead of refined sugar, this snack relies on natural sweeteners like dates, maple syrup, or coconut sugar. Dates are particularly beneficial as they provide fiber, essential minerals, and a caramel-like sweetness that complements the spices in carrot cake.

    Warming Spices: Cinnamon, Nutmeg, and Ginger

    Classic carrot cake spices like cinnamon, nutmeg, and ginger not only add incredible depth of flavor but also provide anti-inflammatory and digestive benefits.

    Coconut: A Delicious, Dairy-Free Addition

    Shredded coconut is a common ingredient for this recipe, adding a natural sweetness and chewy texture. Plus, coconut contains healthy fats that help keep you satisfied longer.

    Ways to Enjoy Carrot Cake Bites

    Here are a few ways to enjoy this perfect snack:

    As a Grab-and-Go Snack

    These bites are perfect for busy days when you need a quick energy boost. Store them in the fridge or freezer for a convenient, nutritious snack.

    Pre-Workout Fuel

    Thanks to their balance of carbohydrates, healthy fats, and protein, they make an excellent pre-workout snack to keep you energized.

    Post-Dinner Dessert

    Craving something sweet after dinner? Carrot cake bites are a satisfying yet healthy alternative to traditional desserts.

    Lunchbox Addition

    Pack a couple of bites in your lunchbox or your kids’ lunchboxes for a fun, nutritious treat that feels indulgent without the added sugar.

    Party or Potluck Favorite

    Impress your friends and family by bringing a platter to your next gathering. They’re a great alternative to traditional baked goods and cater to a variety of dietary preferences.

    How to Customize Your Carrot Cake Bites

    One of the best things about carrot cake bites is how easy they are to customize. Whether you prefer a nuttier texture, an extra boost of protein, or a lower-sugar version, there’s a way to tailor them to your needs.

    Make Them Nut-Free

    If you have a nut allergy or want to make these bites school-friendly, swap out nuts for sunflower seeds or pumpkin seeds.

    Add a Protein Boost

    For an extra protein kick, mix in a scoop of your favorite plant-based protein powder. Vanilla or cinnamon flavors work especially well.

    Enhance the Texture

    If you love a little crunch, try adding chopped nuts, cacao nibs, or a sprinkle of granola to the mix.

    Play with the Spices

    Adjust the spice level to your preference—add extra cinnamon for warmth, a pinch of clove for depth, or extra ginger for a spicy kick.

    Drizzle with Dairy-Free Chocolate

    For an extra indulgent treat, drizzle your bites with melted dairy-free chocolate or dip them halfway for a chocolate-coated version.

    How to Make Carrot Cake Bites

    Ingredients

    • 3/4 Cup Walnuts
    • 1 cup Gluten-free Rolled Oats
    • 1 cup chopped Carrots
    • 3/4th cup Unsweetened Shredded Coconut*
    • 6 Pitted Dates**
    • 1/4th cup Sunbutter ***
    • 2 Tbsp Maple Syrup
    • ½ teaspoon Salt
    • 1 teaspoon Vanilla
    • 1.5 Teaspoon Cinnamon
    • 1.5 Teaspoon Ginger

    * Set aside 1/4th cup coconut to coat the Carrot Cake Bites.

    ** The dates should be soft, but if you have dates that are harder or have been stored in the fridge you can soak them in hot water for 2-3 minutes to soften them up.

    *** You can use any preferred nut butter

    Instructions

    Step 1 – Process

    In a food processor add in your chopped carrots, rolled oats, ½ cup shredded coconut & dates. Blend until coarsely chopped and combined.

    Step 2 – Add Flavor

    Add in your vanilla, cinnamon, ginger, sea salt, sunflower butter and maple syrup and blend until everything is combined.

    Step 3 – Form Balls

    Using an ice cream scoop or a tablespoon measure, scoop out your mixture & roll into balls.

    Step 4 – Coat with Coconut

    Pour the remaining remaining shredded coconut into a shallow dish and evenly coat the carrot cake bites.

    Step 5 – Serve

    Serve immediately or store in the fridge or freezer for later.

    Storage Tips for Carrot Cake Bites

    Since carrot cake bites are made with fresh, natural ingredients, proper storage is key to maintaining their texture and flavor. Here’s how to keep them fresh:

    • Refrigeration – Store your carrot cake bites in an airtight container in the fridge for up to a week.
    • Freezing – For longer storage, freeze the bites on a baking sheet before transferring them to a freezer-safe container. They’ll last for up to three months—just let them thaw for a few minutes before eating.

    More Plant Based Snacks

    If you like this recipe, you’ll love these snack ideas too:

    • Apple Oatmeal Muffins
    • Peanut Butter Granola Bars
    • Vanilla Coconut Chia Pudding
    • Baked Oatmeal Bars with Fruit
    • Oil-Free Pumpkin Granola
    Yield: 15 Servings

    Carrot Cake Bites

    carrot cake bikes

    Discover a delicious, no-bake treat with these carrot cake bites! Packed with wholesome ingredients, they're the perfect snack for any time of day.

    Prep Time 25 minutes
    Total Time 25 minutes

    Ingredients

    • 3/4 Cup Walnuts
    • 1 cup Gluten-free Rolled Oats
    • 1 cup chopped Carrots
    • 3/4th cup Unsweetened Shredded Coconut *
    • 6 Pitted Dates**
    • 1/4th cup Sunbutter ***
    • 2 Tbsp Maple Syrup
    • ½ teaspoon Salt
    • 1 teaspoon Vanilla
    • 1.5 Teaspoon Cinnamon
    • 1.5 Teaspoon Ginger

    Instructions

    1. In a food processor add in your chopped carrots, rolled oats, ½ cup shredded coconut & dates. Blend until coarsely chopped and combined.
    2. Add in your vanilla, cinnamon, ginger, sea salt, sunflower butter and maple syrup and blend until everything is combined.
    3. Using an ice cream scoop or a tablespoon measure, scoop out your mixture & roll into balls.
    4. Pour the remaining remaining shredded coconut into a shallow dish and evenly coat the carrot cake bites.
    5. Serve immediately or store in the fridge for up to 5 days.

    Notes

    * Set aside 1/4th cup coconut to coat the Carrot Cake Bites.

    ** The dates should be soft, but if you have dates that are harder or have been stored in the fridge you can soak them in hot water for 2-3 minutes to soften them up.

    *** You can use any preferred nut butter

    Did you make this recipe?

    We'd love to see it! Tag us and use #MyPlantBasedFamily!

    © Holly Yzquierdo

    Filed Under: Breakfast, Holiday Cooking, On the Go, Recipes

    « Previous Page
    Next Page »

    Primary Sidebar

    Footer

    Find it here!

    Amazon Affiliate Disclosure

    Holly Yzquierdo of My Plant-Based Family is a participant in the Amazon Services LLC Associates Program, an affiliate advertising program designed to provide a means for sites to earn advertising fees by advertising and linking to amazon.com.

    Disclosures

    Unauthorized use and/or duplication of any part of this website or content without express and written permission from Holly Yzquierdo is prohibited. Excerpts and links may be used, provided that full credit is given to Holly Yzquierdo and MyPlantBasedFamily.com with links to the original content.

    More information on our Privacy Policy and other Disclosures are available.

    Copyright © 2025 · Wellness Pro on Genesis Framework · WordPress · Log in