• Skip to primary navigation
  • Skip to main content
  • Skip to primary sidebar
  • Skip to footer

My Plant-Based Family

Eating Whole Food, Plant-Based Diet recipes, On a Budget.

  • Plant-Based Recipes
    • Breakfast
    • Main Dish
    • Instant Pot
    • Daniel Fast Recipes
    • Side Dishes
    • Bread and Muffins
    • Salad and Wraps
    • Soup, Stews, and Chili
    • Sauces, Dips, and Salad Dressings
    • Desserts
    • Crock Pot
    • Mexican Food
  • Videos
  • Resources
    • Getting Started
    • Books
      • The Plant-Based Diet Starter Guide
      • The Plant-Based Holiday Meal Plan & Cookbook
  • Meal Plans
    • Meal Plans 2020
    • Meal Plans 2019
    • Meal Plans 2017
    • Meal Plans 2016
    • Meal Plans 2015
    • Meal Plans 2014
    • Meal Plans 2013
  • About Us
    • Our Family
    • Contact Me
    • Our Food Philosophy
    • Disclosure Policy
      • Privacy Policy
  • Daniel Fast Recipes

Search Results for: Pumpkin+muffins

Gluten-Free Pumpkin Muffins

September 14, 2016 by Holly Yzquierdo 16 Comments

Gluten-Free Pumpkin Muffins with SoyNut Butter

Sometimes it’s hard to tell the difference between my breakfasts and desserts! I usually like a sweet breakfast and these Pumpkin Muffins makes them perfect for the morning.

Gluten-Free Pumpkin Muffins

This page contains affiliate links.

I’ve always had a sweet tooth. When I was a kid I’d often get donuts or sugary cereal for breakfast. I clearly remember going to the donut shop and getting a long John and a can of coke. Even when I make a savory breakfast, like my Breakfast Hash, I’ll want something sweet to follow.

I created these Pumpkin Muffins because I’m yearning for the cooler temperatures of fall. I didn’t want them to be super sweet and only appropriate for dessert. I wanted these Pumpkin Muffins to be a bit heartier and suitable for breakfast, even for people without a sweet tooth like me.
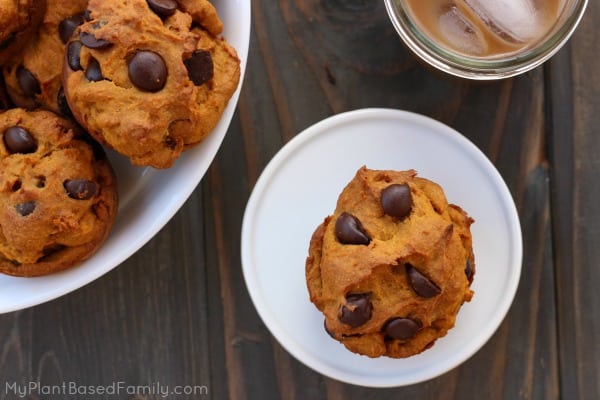
Pumpkin Muffins that are gluten-free

With or Without Chocolate Chips

With chocolate chips the Pumpkin Muffins are a decadent dessert. Without chocolate chips they are a delicious breakfast that pairs well with fruit and a cup of coffee (for the grown ups).

My husband is not a fan of chocolate so I’ll often scoop out half of the batter then pour chocolate chips into the remaining batter so we are both happy.

Allergy-Friendly Pumpkin Muffins

Allergy-Friendly

Like most of my recipes, these muffins are allergy-friendly. They are gluten-free, dairy-free and nut-free. I use a gluten-free flour blend from Jewel’s Bakery (but you can use your favorite gluten-free blend) and dairy-free chocolate chips. I also use a peanut butter substitute. It has the look and feel of peanut butter and tastes comparable considering there are not nuts. It’s perfect for families with a peanut allergy.

Gluten-Free Pumpkin Muffins

We’ve been enjoying these muffins for breakfast, after school snacks and desserts. You can’t really go wrong with these Pumpkin Muffins!

Ingredients

  • ½ cup Peanut Butter alternative (or peanut butter if you don’t have an allergy)
  • 1 15 oz can of pumpkin
  • ½ cup plant-based milk
  • ½ cup sugar
  • 1 tsp vanilla
  • 1 tsp cinnamon
  • ¼ tsp ground cloves
  • ½ tsp ground ginger
  • ¼ tsp salt
  • 1 tsp baking soda
  • 1½ cups gluten-free flour blend
  • ½ cup chocolate chips (optional)

Instructions

  1. Preheat oven to 350 degrees.
  2. Measure out ½ cup peanut butter alternative into a microwave safe bowl and microwave it for 20 seconds.
  3. Pour in the 15 oz can of pumpkin and plant-based milk, stir very well.
  4. Dump in the sugar and vanilla then stir again.
  5. Sprinkle all of the spices, salt, and baking soda into the batter.
  6. Pour in the gluten-free flour blend and mix everything together. After everything is mixed together you may add chocolate chips if desired.
  7. Spray cooking oil into muffin pan and scoop batter into muffin cups.
  8. Bake for 30 minutes (you can test at 25) but allow to cool for 10 minutes at least.
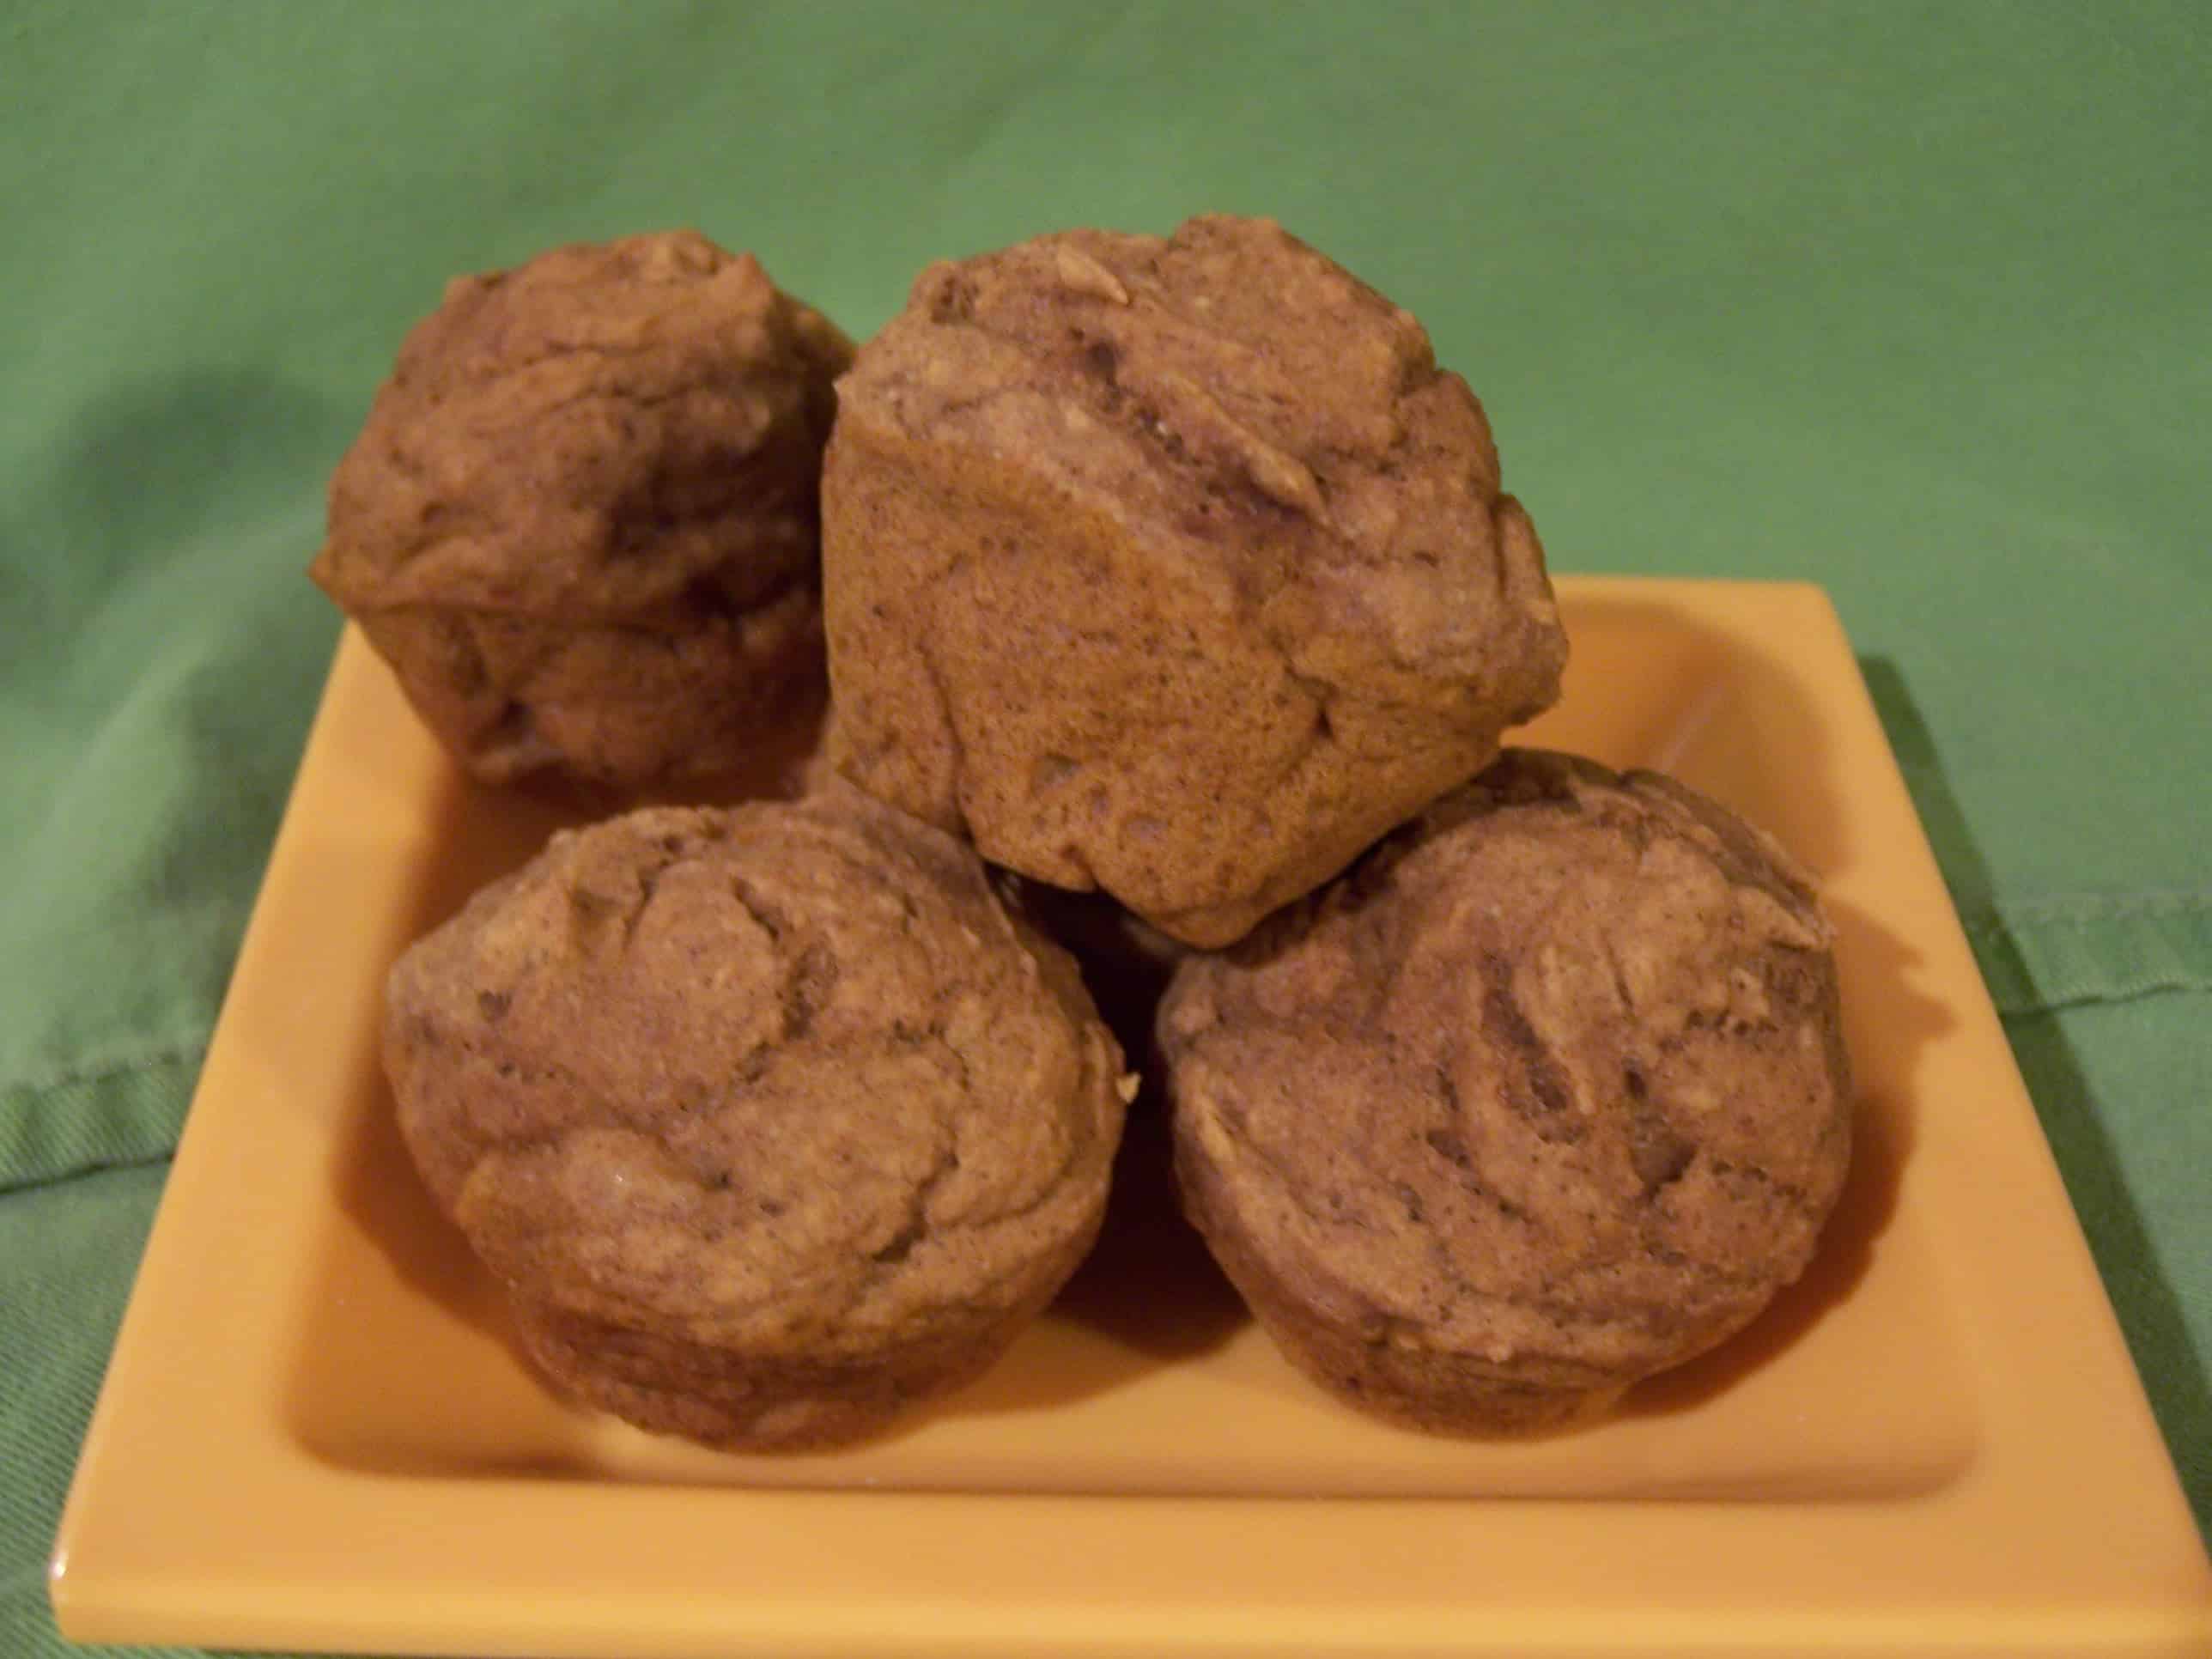
Yield: 12 Servings

Gluten-Free Pumpkin Muffins

Gluten-Free Pumpkin Muffins with SoyNut Butter
5.0 Stars (1 Review)

With chocolate chips the Pumpkin Muffins are a decadent dessert. Without chocolate chips they are a delicious breakfast that pairs well with fruit and a cup of coffee (for the grown ups).

Prep Time 10 minutes
Cook Time 30 minutes
Total Time 40 minutes

Ingredients

  • ½ cup Peanut Butter alternative (or peanut butter if you don't have an allergy)
  • 1 15 oz can of pumpkin
  • ½ cup plant-based milk
  • ½ cup sugar
  • 1 tsp vanilla
  • 1 tsp cinnamon
  • ¼ tsp ground cloves
  • ½ tsp ground ginger
  • ¼ tsp salt
  • 1 tsp baking soda
  • 1½ cups gluten-free flour blend
  • ½ cup chocolate chips (optional)

Instructions

  1. Preheat oven to 350 degrees.
  2. Measure out ½ cup peanut butter alternative into a microwave safe bowl and microwave it for 20 seconds.
  3. Pour in the 15 oz can of pumpkin and plant-based milk, stir very well.
  4. Dump in the sugar and vanilla then stir again.
  5. Sprinkle all of the spices, salt, and baking soda into the batter.
  6. Pour in the gluten-free flour blend and mix everything together. After everything is mixed together you may add chocolate chips if desired.
  7. Spray cooking oil into muffin pan and scoop batter into muffin cups.
  8. Bake for 30 minutes (you can test at 25) but allow to cool for 10 minutes at least.

Did you make this recipe?

We'd love to see it! Tag us and use #MyPlantBasedFamily!

© Heather Mayes

Filed Under: Allergies, Back to School, Bread & Muffin Recipes, Recipes Tagged With: gluten free, Plant Based Diet, Recipes, Vegan

Gluten-Free Pumpkin Muffins

October 31, 2012 by Holly Yzquierdo 51 Comments

Pumpkin muffins

Welcome to My Plant-Based Family! Thank you for stopping by today. I hope you are enjoying the Virtual Vegan Potluck. If you stopped by my page and aren’t quite sure what I’m talking about you are in for a treat. Over 100 bloggers are each “bringing” a dish to the potluck today. Just follow the links at the end of this post or click here to start at the beginning.

We have been eating a plant-based diet for 1 year. Last spring we found out my youngest son’s skin issues were the result of gluten. Thankfully he doesn’t have to miss out on delicious baked goods. I’m happy to report that this recipe is kid tested and approved! Don’t let the long ingredient list scare you, this recipe is easily made with pantry staples. If you don’t need to eat gluten-free but really want a delicious pumpkin filled treat check out the Pumpkin Bread or these Pumpkin Cupcakes.

Gluten-Free Pumpkin Muffins (Vegan)

Ingredients

  • 1 cup Brown Rice Flour
  • 1/2 cup Tapioca Flour
  • 1/2 cup Potato Starch
  • 1 tsp xanthum gum
  • 1/2 tsp sea salt
  • 1 1/2 tsp baking powder
  • 1 tsp baking soda
  • 1 Tbsp cinnamon
  • 1/4 tsp ginger
  • 1/4 tsp allspice
  • 1/8 tsp cloves
  • 1 ripe banana (I defrosted a frozen banana)
  • 1/2 cup unsweetened applesauce
  • 1/2 cup maple syrup
  • 1 tsp vanilla
  • 1 15 oz can of pumpkin or 1 1/2 cup pumpkin puree
  • 1/2 cup rice milk
  • 1/2 cup vegan chocolate chips (optional)

Do

  1. Pre-heat oven to 350° F and prepare your muffin pan, I use non-stick cooking spray (the only time I ever use oil).
  2. Mix all dry ingredients in a big bowl, except optional chocolate chips.
  3. Mix all wet ingredients in a medium bowl.
  4. Pour wet ingredients into dry ingredients and stir until mixed well.
  5. If using chocolate chips, add now.
  6. Scoop batter into muffin tins until almost full.
  7. Bake 20 to 25 minutes or until toothpick inserted comes out clean. If making mini muffins bake for 15 minutes.
  8. Store in an air tight container at room temperature.

Serve

These muffins are delicious and quite possibly the most delicious gluten-free muffin I’ve ever tasted.  They are perfect for a snack, but could also be eaten for breakfast or if you add chocolate chips a decadent dessert. Most of the gluten-free baking I’ve done doesn’t taste so great the next day but these pass the two-day test with flying colors. I’m taking them to a baby shower this weekend, if I can keep by kids from eating them all.

If you are looking for more gluten-free muffin recipes check out these Gluten-Free Chocolate Chip Banana Muffins or Gluten-Free Apple Muffins.

Please continue through the potluck, after all you don’t want to miss a single dish do you?

Filed Under: Bread & Muffin Recipes, Life with Kids, Recipes Tagged With: Breakfast, Dairy Free, gluten free, Healthy, muffins, Plant Based Diet, pumpkin muffins, Recipes, Vegan, Virtual Vegan Potluck

Carrot Cake Bites

April 2, 2025 by Holly Yzquierdo 3 Comments

carrot cake bikes

Carrot cake is a classic dessert loved for its warm spices, sweet flavor, and moist texture. But what if you could enjoy all of that deliciousness in a small, bite-sized treat that’s plant-based, wholesome, and easy to make? Enter carrot cake bites—a nutritious, no-bake snack that satisfies cravings without the need for processed ingredients or refined sugars. Whether you’re a plant-based eater or simply looking for a better-for-you treat, these bites are a perfect addition to your snack lineup.

Why Choose Carrot Cake Bites?

Carrot cake bites offer the perfect balance of flavor, nutrition, and convenience. Unlike traditional carrot cake, which often contains dairy, eggs, and refined sugar, plant-based carrot cake bites use whole-food ingredients to create a naturally sweet, nutrient-packed alternative. Here’s why they deserve a place in your kitchen:

  • Wholesome Ingredients – Instead of processed flours and sugars, carrot cake bites rely on natural ingredients like dates, nuts, oats, and shredded carrots to create a naturally sweet and satisfying texture.
  • Nutrient-Rich – Carrots are loaded with beta-carotene, fiber, and antioxidants, while nuts and seeds add healthy fats and protein to keep you full and energized.
  • No-Bake Convenience – No need to preheat an oven—these bites come together in minutes with just a food processor and a few simple ingredients.
  • Allergy-Friendly – Many recipes can be made gluten-free, dairy-free, and refined sugar-free, making them a great option for those with dietary restrictions.
  • Perfect for Meal Prep – Make a batch ahead of time for a quick and easy snack throughout the week.

The Nutritional Benefits of Carrot Cake Bites

Not only taste amazing but also provide a wealth of nutritional benefits. Here’s what makes them a powerhouse snack:

Carrots: Nature’s Sweetener

Carrots are naturally sweet and packed with vitamins and minerals. They’re rich in beta-carotene, which supports eye health and immune function, and they provide fiber to aid digestion.

Nuts and Seeds: Healthy Fats and Protein

Many carrot cake bite recipes use walnuts, almonds, or cashews, which are great sources of heart-healthy fats and plant-based protein. Seeds like flax, chia, or hemp can also be added for extra fiber and omega-3 fatty acids.

Natural Sweeteners: Dates, Maple Syrup, and More

Instead of refined sugar, this snack relies on natural sweeteners like dates, maple syrup, or coconut sugar. Dates are particularly beneficial as they provide fiber, essential minerals, and a caramel-like sweetness that complements the spices in carrot cake.

Warming Spices: Cinnamon, Nutmeg, and Ginger

Classic carrot cake spices like cinnamon, nutmeg, and ginger not only add incredible depth of flavor but also provide anti-inflammatory and digestive benefits.

Coconut: A Delicious, Dairy-Free Addition

Shredded coconut is a common ingredient for this recipe, adding a natural sweetness and chewy texture. Plus, coconut contains healthy fats that help keep you satisfied longer.

Ways to Enjoy Carrot Cake Bites

Here are a few ways to enjoy this perfect snack:

As a Grab-and-Go Snack

These bites are perfect for busy days when you need a quick energy boost. Store them in the fridge or freezer for a convenient, nutritious snack.

Pre-Workout Fuel

Thanks to their balance of carbohydrates, healthy fats, and protein, they make an excellent pre-workout snack to keep you energized.

Post-Dinner Dessert

Craving something sweet after dinner? Carrot cake bites are a satisfying yet healthy alternative to traditional desserts.

Lunchbox Addition

Pack a couple of bites in your lunchbox or your kids’ lunchboxes for a fun, nutritious treat that feels indulgent without the added sugar.

Party or Potluck Favorite

Impress your friends and family by bringing a platter to your next gathering. They’re a great alternative to traditional baked goods and cater to a variety of dietary preferences.

How to Customize Your Carrot Cake Bites

One of the best things about carrot cake bites is how easy they are to customize. Whether you prefer a nuttier texture, an extra boost of protein, or a lower-sugar version, there’s a way to tailor them to your needs.

Make Them Nut-Free

If you have a nut allergy or want to make these bites school-friendly, swap out nuts for sunflower seeds or pumpkin seeds.

Add a Protein Boost

For an extra protein kick, mix in a scoop of your favorite plant-based protein powder. Vanilla or cinnamon flavors work especially well.

Enhance the Texture

If you love a little crunch, try adding chopped nuts, cacao nibs, or a sprinkle of granola to the mix.

Play with the Spices

Adjust the spice level to your preference—add extra cinnamon for warmth, a pinch of clove for depth, or extra ginger for a spicy kick.

Drizzle with Dairy-Free Chocolate

For an extra indulgent treat, drizzle your bites with melted dairy-free chocolate or dip them halfway for a chocolate-coated version.

How to Make Carrot Cake Bites

Ingredients

  • 3/4 Cup Walnuts
  • 1 cup Gluten-free Rolled Oats
  • 1 cup chopped Carrots
  • 3/4th cup Unsweetened Shredded Coconut*
  • 6 Pitted Dates**
  • 1/4th cup Sunbutter ***
  • 2 Tbsp Maple Syrup
  • ½ teaspoon Salt
  • 1 teaspoon Vanilla
  • 1.5 Teaspoon Cinnamon
  • 1.5 Teaspoon Ginger

* Set aside 1/4th cup coconut to coat the Carrot Cake Bites.

** The dates should be soft, but if you have dates that are harder or have been stored in the fridge you can soak them in hot water for 2-3 minutes to soften them up.

*** You can use any preferred nut butter

Instructions

Step 1 – Process

In a food processor add in your chopped carrots, rolled oats, ½ cup shredded coconut & dates. Blend until coarsely chopped and combined.

Step 2 – Add Flavor

Add in your vanilla, cinnamon, ginger, sea salt, sunflower butter and maple syrup and blend until everything is combined.

Step 3 – Form Balls

Using an ice cream scoop or a tablespoon measure, scoop out your mixture & roll into balls.

Step 4 – Coat with Coconut

Pour the remaining remaining shredded coconut into a shallow dish and evenly coat the carrot cake bites.

Step 5 – Serve

Serve immediately or store in the fridge or freezer for later.

Storage Tips for Carrot Cake Bites

Since carrot cake bites are made with fresh, natural ingredients, proper storage is key to maintaining their texture and flavor. Here’s how to keep them fresh:

  • Refrigeration – Store your carrot cake bites in an airtight container in the fridge for up to a week.
  • Freezing – For longer storage, freeze the bites on a baking sheet before transferring them to a freezer-safe container. They’ll last for up to three months—just let them thaw for a few minutes before eating.

More Plant Based Snacks

If you like this recipe, you’ll love these snack ideas too:

  • Apple Oatmeal Muffins
  • Peanut Butter Granola Bars
  • Vanilla Coconut Chia Pudding
  • Baked Oatmeal Bars with Fruit
  • Oil-Free Pumpkin Granola
Yield: 15 Servings

Carrot Cake Bites

carrot cake bikes
No Ratings

Discover a delicious, no-bake treat with these carrot cake bites! Packed with wholesome ingredients, they're the perfect snack for any time of day.

Prep Time 25 minutes
Total Time 25 minutes

Ingredients

  • 3/4 Cup Walnuts
  • 1 cup Gluten-free Rolled Oats
  • 1 cup chopped Carrots
  • 3/4th cup Unsweetened Shredded Coconut *
  • 6 Pitted Dates**
  • 1/4th cup Sunbutter ***
  • 2 Tbsp Maple Syrup
  • ½ teaspoon Salt
  • 1 teaspoon Vanilla
  • 1.5 Teaspoon Cinnamon
  • 1.5 Teaspoon Ginger

Instructions

  1. In a food processor add in your chopped carrots, rolled oats, ½ cup shredded coconut & dates. Blend until coarsely chopped and combined.
  2. Add in your vanilla, cinnamon, ginger, sea salt, sunflower butter and maple syrup and blend until everything is combined.
  3. Using an ice cream scoop or a tablespoon measure, scoop out your mixture & roll into balls.
  4. Pour the remaining remaining shredded coconut into a shallow dish and evenly coat the carrot cake bites.
  5. Serve immediately or store in the fridge for up to 5 days.

Notes

* Set aside 1/4th cup coconut to coat the Carrot Cake Bites.

** The dates should be soft, but if you have dates that are harder or have been stored in the fridge you can soak them in hot water for 2-3 minutes to soften them up.

*** You can use any preferred nut butter

Did you make this recipe?

We'd love to see it! Tag us and use #MyPlantBasedFamily!

© Holly Yzquierdo

Filed Under: Breakfast, Holiday Cooking, On the Go, Recipes

How to Use Ginger: A Complete Guide

March 18, 2025 by Holly Yzquierdo Leave a Comment

Ginger with Grater

Ginger is one of the most versatile and beneficial ingredients you can have in your kitchen. Whether you’re using it for cooking, brewing tea, or even for its health benefits, this root spice adds warmth, depth, and a host of health benefits to your diet. I love keeping it in the freezer to quickly add flavor to dishes while reducing waste.

In this guide, we’ll explore how to use ginger in cooking, its health benefits, the differences between fresh and ground ginger, and the best ways to store it for maximum freshness.

Ginger with Grater

Why Use Ginger?

This spice is more than just a seasoning—it’s a powerhouse of flavor and nutrition. Used in cuisines around the world, it is known for its slightly spicy, zesty taste that enhances both sweet and savory plant-based dishes. Beyond the kitchen, it offers numerous health benefits, including aiding digestion, reducing inflammation, and boosting immunity.

Cooking with Ginger: Fresh vs. Ground

One of the first things to understand when using this ingredient is the difference between fresh and ground forms.

Fresh Ginger

Fresh ginger root is widely available and has a bright, slightly citrusy aroma. It’s commonly used in stir-fries, soups, teas, and marinades. When cooking with fresh ginger:

  • Peel it first: Use a spoon to scrape off the thin skin easily.
  • Grate or mince it: This helps release its potent flavor.
  • Add it at the right time: For a strong, fresh taste, add it at the end of cooking. For a more mellow flavor, cook it earlier.

Ground Ginger

Ground ginger is dried and powdered, offering a more concentrated and slightly different flavor than fresh ginger. It’s commonly used in baking, spice blends, and beverages like chai tea. When substituting ground for fresh, use 1/4 teaspoon ground ginger for every 1 tablespoon of fresh ginger.

How to Store Ginger

To keep the root fresh and flavorful, proper storage is key.

  • Refrigerator: Store fresh in an airtight container or a resealable plastic bag with the skin intact. It will last up to 3 weeks.
  • Dried and Ground: Store the ground spice in a cool, dark place in an airtight container to maintain its potency.
  • Freezer: You can grate the frozen root directly into dishes. Just keep the whole root in a zip lock bag in the freezer.

Pro Tip: Freezing the root (and similar foods like turmeric root) allows you to grate them straight from the freezer without the hassle of peeling and chopping every time. This trick also helps reduce waste, since you won’t have to throw out unused, shriveled pieces. I use this grater, and it works great!

Health Benefits

Beyond its culinary uses, this root is known for its impressive health benefits:

  • Aids Digestion: Helps relieve nausea, bloating, and indigestion.
  • Reduces Inflammation: Its natural anti-inflammatory properties can help with muscle pain and arthritis.
  • Boosts Immunity: Has antibacterial and antiviral properties that help fight colds and infections.
  • Supports Weight Loss: May help increase metabolism and reduce appetite.

Using Ginger in Cooking

Now that we understand the different forms, let’s explore various ways to incorporate this root into your plant-based meals.

1. In Stir-Fries

This spice is a staple in Asian cuisine, adding a warm, slightly spicy flavor to stir-fried vegetables and tofu. Simply grate fresh ginger and sauté it with your other ingredients.

2. In Soups and Broths

A small piece of the root adds depth to broths and soups. Try adding slices to miso soup, lentil soup, or a spicy coconut curry.

3. Tea

One of the easiest ways to enjoy this ingredient is as a soothing tea. Here’s a simple recipe:

  • Boil 2 cups of water.
  • Add 1 tablespoon of freshly sliced ginger.
  • Simmer for 5-10 minutes, then strain.
  • Add maple syrup or lemon to taste.

4. In Smoothies and Juices

For a refreshing and healthy kick, add a small piece of fresh ginger to your morning smoothie or juice. It pairs well with citrus fruits, carrots, and apples.

5. Baking

Ground ginger is a key ingredient in cookies, cakes, and muffins. Try adding it to gingerbread, spiced banana bread, or even pumpkin pie for extra warmth.

6. Marinades and Dressings

This spice works well in marinades for tofu, tempeh, or plant-based proteins. Combine the freshly grated root with soy sauce, garlic, and maple syrup for a delicious glaze. It also enhances salad dressings.

Recipes with Ginger

Here are some of my favorite recipes that include this spice. They are all plant based and full of flavor. I hope you like them as much as I do!

  • Egg Roll in a Bowl
  • Chopped Asian Salad
  • Easy Ramen Stir Fry
  • Chana Masala
  • Sweet Potato Curry

Ginger is an incredibly versatile ingredient that enhances both flavor and health. Whether you’re cooking with fresh ginger, adding ground ginger to baked goods, or making soothing tea, there are countless ways to enjoy this amazing spice. By understanding how to use ginger, store it properly, and incorporate it into different plant-based dishes, you can make the most of its benefits and delicious taste.

Filed Under: Uncategorized

Peanut Butter Granola Bars

February 5, 2025 by Holly Yzquierdo 7 Comments

When it comes to snacks that check all the boxes—delicious, nutritious, and easy to make—peanut butter granola bars are hard to beat. Whether you’re packing lunch for the kids, fueling up for a workout, or just satisfying a mid-afternoon craving, these bars are the perfect go-to option.

Why Peanut Butter Granola Bars Are a Game-Changer

Granola bars have long been a staple in the snack aisle, but peanut butter granola bars elevate the concept to a whole new level. Here’s why:

  1. Convenience: The bars are portable and mess-free, making them ideal for busy lifestyles. Toss one in your bag for a quick energy boost on the go.
  2. Versatility: These bars can double as a breakfast replacement, post-workout snack, or even a dessert. They’re endlessly adaptable to fit your needs.
  3. Flavor-Packed: The rich, creamy taste of peanut butter pairs beautifully with the crunch of granola, creating a satisfying texture that’s hard to resist.
  4. Nutrient-Rich: Packed with protein, fiber, and healthy fats, they are a balanced snack that keeps you energized and satisfied.

How to Customize Your Peanut Butter Granola Bars

One of the best things about peanut butter granola bars is their versatility. With a few simple tweaks, you can create a bar that suits your taste preferences and dietary needs. Here are some ideas to get you started:

1. Add-Ins for Extra Crunch

  • Nuts and Seeds: Almonds, walnuts, pumpkin seeds, and sunflower seeds add texture and a nutritional boost.
  • Crispy Rice: For a lighter, airy texture, mix in some puffed rice or rice cereal.

2. Sweeten the Deal

  • Natural Sweeteners: Maple syrup, or agave nectar provide a touch of sweetness without refined sugars.
  • Dried Fruits: Raisins, cranberries, apricots, or chopped dates can add natural sweetness and chewy texture.

3. Amp Up the Flavor

  • Spices: A pinch of cinnamon, nutmeg, or ginger can enhance the flavor profile.
  • Extracts: Add a splash of vanilla or almond extract for a subtle aromatic twist.

4. Make Them Indulgent

  • Chocolate Chips: Dark chocolate or mini chocolate chips can make your bars feel like a dessert.
  • Drizzles: Top your bars with a drizzle of melted chocolate for an extra layer of indulgence.

5. Tailor to Dietary Needs

  • Gluten-Free: Use certified gluten-free oats and check labels on other ingredients.
  • Nut-Free: Replace peanut butter with sunflower seed butter.

Creative Uses for Peanut Butter Granola Bars

Granola bars aren’t just for snacking. Here are some innovative ways to incorporate them into your meals and desserts:

  1. Breakfast Parfaits: Crumble a bar over vegan yogurt and fresh fruit for a quick, balanced breakfast.
  2. Energy Balls: Roll the mixture into bite-sized balls instead of forming bars for a fun, poppable snack.
  3. Trail Mix Booster: Chop a bar into small pieces and mix it with nuts, seeds, and dried fruit for a homemade trail mix.
  4. Dessert Crust: Use crushed bars as a base for pies.

How to Make Peanut Butter Granola Bars

Ingredients

  • 2 ¾ cups quick cooking rolled oats
  • ¾ cup peanut butter
  • ½ cup maple syrup
  • ½ teaspoon sea salt
  • 1 teaspoon vanilla
  • ½ teaspoon cinnamon
  • ¼ cup vegan chocolate chips

Instructions

Step 1 – Preheat Oven

Preheat the oven to 350 degrees.

Step 2 – Mix Peanut Butter

Combine peanut butter, maple syrup, sea salt, cinnamon and vanilla in a medium sized mixing bowl. Mix well.

Step 3 – Incorporate Oats

Add oats to the peanut butter slowly, being sure to fully incorporate all ingredients.

Step 4 – Add Chocolate Chips

Add chocolate chips to the mixture and mix well. Ingredients should stick well together when pressed.

Step 5 – Pour into Dish

Pour oat mixture into a 9×9 dish lined with parchment paper. Press mixture firmly into the pan.

Step 6 – Bake

Bake for 15 minutes.

Step 7 – Cool

Remove from the oven and allow the bars to completely cool. Once cooled, carefully lift the parchment paper along with the oat mixture out of the pan and onto a cutting board.

Carefully slice your bars in half and then each half can be sliced into fourths.

Tips for Storing Peanut Butter Granola Bars

To ensure your peanut butter granola bars stay fresh and delicious, proper storage is key. Here’s how to do it:

  • Room Temperature: Store bars in an airtight container for up to one week.
  • Refrigeration: Extend shelf life by keeping bars in the fridge, where they can last up to two weeks.
  • Freezing: For longer storage, freeze bars in a single layer before transferring them to a freezer-safe bag or container. They’ll stay fresh for up to three months.

More Plant Based Snacks

If you like this recipe, you’ll love these plant based snacks too:

  • No Bake Energy Balls
  • Strawberry Chia Pudding
  • Oatmeal Cups
  • Apple Oatmeal Muffins
  • Chocolate Banana Bread
Yield: 8 Bars

Peanut Butter Granola Bars

Peanut Butter Granola Bars
No Ratings

Peanut butter granola bars are a versatile snack packed with protein, fiber, and flavor. Perfect for busy lifestyles and easy to customize!

Prep Time 5 minutes
Cook Time 15 minutes
Total Time 20 minutes

Ingredients

  • 2 ¾ cups quick cooking rolled oats
  • ¾ cup peanut butter
  • ½ cup maple syrup
  • ½ teaspoon sea salt
  • 1 teaspoon vanilla
  • ½ teaspoon cinnamon
  • ¼ cup vegan chocolate chips

Instructions

  1. Preheat the oven to 350 degrees.
  2. Combine peanut butter, maple syrup, sea salt, cinnamon and vanilla in a medium sized mixing bowl. Mix well.
  3. Add oats to the peanut butter slowly, being sure to fully incorporate all ingredients.
  4. Add chocolate chips to the mixture and mix well. Ingredients should stick well together when pressed.
  5. Pour oat mixture into a 9x9 dish lined with parchment paper. Press mixture firmly into the pan.
  6. Bake for 15 minutes.
  7. Remove from the oven and allow the bars to completely cool. Once cooled, carefully lift the parchment paper along with the oat mixture out of the pan and onto a cutting board. Carefully slice your bars in half and then each half can be sliced into fourths.

Notes

Store in an air tight container on the counter or in the refrigerator for 3-5 days.

Did you make this recipe?

We'd love to see it! Tag us and use #MyPlantBasedFamily!

© Holly Yzquierdo

Filed Under: Breakfast, Dessert, Recipes

Baked Oatmeal Bars with Fruit

February 5, 2023 by Holly Yzquierdo 1 Comment

This plant-based baked oatmeal recipe has everything you could ever want without eggs, dairy, oil, added sugar or banana. It’s the perfect breakfast!

You know I love to meal prep on Sundays, and baked oatmeal bars are on the list often. I make a batch using any kind of fruit and nuts I have on hand. Then cut it into bars for an easy grab-and-go breakfast or snack throughout the week.

Perfect Baked Oatmeal without Banana

I don’t have anything against banana, but my husband has a banana intolerance. You definitely don’t have to put banana in these baked oatmeal bars. The recipe shown uses apple, peach and blueberries. That just happens to be the fruit I had on-hand that day.

Any fruit or berry will work! Feel free to use all one fruit or mix and match. Just make sure it adds up to 2 cups.

Apple is always safe, and it’s a crowd pleaser. I would love to try a strawberry baked oatmeal too. I’m writing a mental note to make that when fresh strawberries are in season. You can also use frozen fruit. Simply let it thaw and drain any excess liquid first.

Do you have to put Eggs in Baked Oatmeal?

Eggs are typically used in baked oatmeal as a binder to hold all the other ingredients together. A binder is necessary, but it doesn’t have to be eggs. It is simple to make a vegan baked oatmeal using flaxseed eggs instead.

Egg Substitute in Baked Oatmeal

Create flax eggs for your plant-based baked oatmeal bars using ground flax seeds and water. Mix them up first, so they have time to set up. The flax is sticky enough to keep all the oats, fruit and nuts in bar form without using chicken eggs. Everything stays moist, yet easy to pick up and eat.

Do you have to Soak Oats Before Baking?

The short answer is no. To make oatmeal bars, you want the oats to retain their shape and some crunch. This helps keep the bars together and creates a more satisfying bite. Soaking oats in advance of baking would give the bars a soft and creamy texture.

How to Make Fruit and Nut Baked Oatmeal Bars

Ingredients

  • 4 Flax Eggs (4 Tbsp ground flax seeds plus 12 Tbsp water)
  • 1 cup Applesauce
  • 1 tsp Vanilla
  • 1/2 tsp Salt
  • 1/2 cup Maple Syrup (Daste Paste works too.)
  • 1 tsp Cinnamon (or Pumpkin Pie Spice)
  • 2 cups Fruit (I use 1 Apple, 1 Peach and Blueberries)
  • 1 tsp Baking Soda
  • 3 1/2 cups Rolled Oats
  • 1 cup Rice Milk
  • 1/3 cup Nuts (optional. Choose your favorite – pecans, walnuts, almonds.)
  • 2 Tbsp Pumpkin Seeds (optional. Hemp seeds also work.)

Step 1 – Preheat

Begin by preheating your oven to 350 degrees.

Step 2 – Make Flax Eggs

Mix the grounds flax seeds and water to make flax eggs. Then move them aside, so they have time to set up.

Step 3 – Mix

In a large mixing bowl, add the applesauce, vanilla, salt, maple syrup and cinnamon.

Step 4 – Add Fruit

Next, prepare your fruit. Core, peel and dice the apple and peach. Berries can be left whole. The total fruit should equal 2 cups.

Step 5 – Combine

Now pour the flax eggs, that have hopefully set up, and baking soda. Give it all a good stir.

Step 6 – Add Oats

Add the oats and stir again.

Step 7 – Plant-Based Milk

Then add your rice milk or any plant-based milk you prefer. Stir the mixture once more, and let it rest while preparing the pan.

Step 8 – Prepare Pan

Grab a 9×13 pan. Non-stick pans can be used as-is. If food tends to stick to your pan, line it with parchment paper or spray with a small amount of cooking spray. Rub the spray around with a paper towel to remove excess while retaining the nonstick property.

Step 9 – Add Nuts and Seeds (Optional)

If using nuts and seeds, you can either stir them into the mixture at this point or sprinkle them on top after it is poured into the pan.

Step 10 – Bake

Pour the oatmeal mixture into the pan and bake for 45 minutes. It should be slightly brown. Allow to cool slightly before eating.

Storage

Oatmeal bars can be stored in the refrigerator in an air tight container. I like to cut them into a size for an easy grab-and-go snack or breakfast.

Fruit Options

Apples are perfect for this recipe. You can use them for the whole 2 cups if desired. I prefer to add more variety by combining apples with other fruit I have on hand. Blueberries are a favorite.

Frozen Fruit

You can use frozen fruit in oatmeal bars. Let it thaw and drain any excess liquid before using.

More Plant-Based Oatmeal Recipes

If you enjoyed this recipe, check out these other great ways to eat oatmeal:

  • Oatmeal Cups
  • Apple Cinnamon Baked Oatmeal
  • Banana Nut Oatmeal (Instant Pot or Stove Top)
  • Apple Oatmeal Muffins
Yield: 12

Baked Oatmeal with Fruit

Baked Oatmeal with Fruit
4.4 Stars (5 Reviews)

Mix and match fruit in this baked oatmeal. Then cut it into bars for a delicious and nutritious breakfast or snack.

Prep Time 15 minutes
Cook Time 45 minutes
Total Time 1 hour

Ingredients

  • 4 Flax Eggs (4 Tbsp ground flax seeds plus 12 Tbsp water)
  • 1 cup Applesauce
  • 1 tsp Vanilla
  • 1/2 tsp Salt
  • 1/2 cup Maple Syrup (Daste Paste works too.)
  • 1 tsp Cinnamon (or Pumpkin Pie Spice)
  • 2 cups Fruit (I use 1 Apple, 1 Peach and Blueberries)
  • 1 tsp Baking Soda
  • 3 1/2 cups Rolled Oats
  • 1 cup Rice Milk
  • 1/3 cup Nuts (optional. Choose your favorite - pecans, walnuts, almonds.)
  • 2 Tbsp Pumpkin Seeds (optional. Hemp seeds also work.)

Instructions

      1. Preheat oven to 350 degrees.
      2. Mix up your flax eggs and set them aside to give them time to set.
      3. Grab your favorite big mixing bowl and add applesauce, vanilla, salt, maple syrup and cinnamon.
      4. Core, peel and dice your fruit. If using a combination of fruit, the total fruit should equal 2 cups. Blueberries can be left whole.
      5. Pour in your flax eggs that have hopefully set up and your baking soda. Give it all a good stir.
      6. Add your oats and stir again.
      7. Add your rice milk or whatever kind of plant-based milk you prefer. Stir it all again and let it rest while you get your pan ready.
      8. Use a 9x13 pan.
      9. If your food tends to stick in your pan, you can use parchment paper or a small amount of cooking spray to rub it around. If your pan is nonstick, you don't have to do anything special.
      10. If using optional nuts and seeds, you can stir them in or sprinkle them on top after you pour it into the pan.
      11. Pour the oatmeal into your pan and smooth it out. Bake for 45 minutes. It should be slightly brown. You can cook an extra 5-10 minutes if needed. Allow to cool slightly before eating.

Notes

  • Storage: Store in a refrigerator in an air tight container.
  • Nuts & Seeds: Nuts and seeds are optional. You can substitute any type of nuts and seeds you like.
  • Choosing Fruit: Apple is perfect in this. You can use it for the whole 2 cups if desired. We like to add more variety by combining apples with other fruit we already have. Blueberries are perfect too.
  • Frozen Fruit: Frozen fruit can be used. I recommend letting it thaw and allow the extra liquid to drain a bit before using.

Did you make this recipe?

We'd love to see it! Tag us and use #MyPlantBasedFamily!

© Heather Mayes

Filed Under: Breakfast, Recipes

Next Page »

Primary Sidebar

Footer

Find it here!

Amazon Affiliate Disclosure

Holly Yzquierdo of My Plant-Based Family is a participant in the Amazon Services LLC Associates Program, an affiliate advertising program designed to provide a means for sites to earn advertising fees by advertising and linking to amazon.com.

Disclosures

Unauthorized use and/or duplication of any part of this website or content without express and written permission from Holly Yzquierdo is prohibited. Excerpts and links may be used, provided that full credit is given to Holly Yzquierdo and MyPlantBasedFamily.com with links to the original content.

More information on our Privacy Policy and other Disclosures are available.

Copyright © 2026 · Wellness Pro on Genesis Framework · WordPress · Log in