• Skip to primary navigation
  • Skip to main content
  • Skip to primary sidebar
  • Skip to footer

My Plant-Based Family

Eating Whole Food, Plant-Based Diet recipes, On a Budget.

  • Plant-Based Recipes
    • Breakfast
    • Main Dish
    • Instant Pot
    • Daniel Fast Recipes
    • Side Dishes
    • Bread and Muffins
    • Salad and Wraps
    • Soup, Stews, and Chili
    • Sauces, Dips, and Salad Dressings
    • Desserts
    • Crock Pot
    • Mexican Food
  • Videos
  • Resources
    • Getting Started
    • Books
      • The Plant-Based Diet Starter Guide
      • The Plant-Based Holiday Meal Plan & Cookbook
  • Meal Plans
    • Meal Plans 2020
    • Meal Plans 2019
    • Meal Plans 2017
    • Meal Plans 2016
    • Meal Plans 2015
    • Meal Plans 2014
    • Meal Plans 2013
  • About Us
    • Our Family
    • Contact Me
    • Our Food Philosophy
    • Disclosure Policy
      • Privacy Policy
  • Daniel Fast Recipes

Dessert

Power Berry Smoothie Bowl

June 10, 2025 by Holly Yzquierdo Leave a Comment

The Power Berry Smoothie Bowl is packed with antioxidants, plant-based goodness, and your favorite toppings. It is the kind of meal that makes you feel great from the inside out! Whether you’re a busy parent, a student on the go, or just someone trying to add more whole foods into your day, this recipe has something for everyone.

It’s quick to prepare, endlessly customizable, and so visually appealing that you’ll actually look forward to eating it. Let’s dive into what makes this smoothie bowl such a great addition to your routine and learn how to whip one up in just 10 minutes.

What is a Smoothie Bowl?

Unlike traditional smoothies, which you sip through a straw, smoothie bowls are thicker and spoonable (Is that a word?), making them the perfect canvas for a variety of toppings. They combine the refreshing taste of a smoothie with the texture and satisfaction of a more filling meal.

The Berry Power Smoothie Bowl is not only beautiful to look at but also packed with powerful ingredients that support wellness. With a base of frozen berries, plant-based milk, chia seeds, and optional vegan yogurt and sweetener, this bowl is loaded with fiber, healthy fats, and essential vitamins. The best part? You can personalize it with your favorite toppings for texture, flavor, and even more nutrition.

A Meal that Works Anytime

While smoothie bowls are traditionally thought of as breakfast fare, they’re also great as:

  • A post-workout meal: The carbs and fiber help replenish energy, and the chia seeds or vegan yogurt offer a bit of protein.
  • A refreshing afternoon snack: Better than reaching for a sugary treat, this bowl satisfies your sweet tooth and keeps you full.
  • A light dinner: On warm days when you don’t want to cook, a smoothie bowl is a perfect cooling, quick option.

Customization Tips

One of the best things about this recipe is its versatility. You can tweak it to match your mood, nutritional goals, or what you have on hand.

Milk options: Use any plant-based milk you like—almond, oat, soy, or coconut all work well. Adjust the amount to reach your desired thickness.

Yogurt optional: For extra creaminess and probiotics, add plant-based yogurt. If skipping, the bowl will still be thick and fruity.

Sweetener tips: The natural sweetness from the berries is often enough, but feel free to add maple syrup, agave, or a date if needed.

Make it protein-rich: Add a scoop of plant-based protein powder, a spoonful of nut butter, or hemp hearts to boost protein.

Add greens: A handful of spinach or kale can be blended in for extra nutrients—don’t worry, you won’t taste it.

How to Make a Berry Power Smoothie Bowl

Ingredients

  • 3 ½ cups frozen mixed berries (blueberries, strawberries, raspberries)
  • 1 cup plant-basedmilk (adjust for desired thickness)
  • 2 tablespoons chia seeds
  • ½ cup plant-based yogurt (optional for creaminess)
  • 1 tsp. maple syrup (optional, to taste)

Toppings

  • Fresh blueberries and
  • Sliced strawberries
  • Sliced banana
  • Coconut flakes
  • Chia seeds
  • Pumpkin seeds
  • (Any toppings you like)

Instructions

Step 1 – Blend

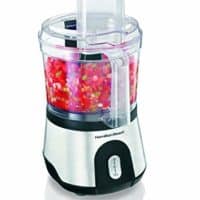
In a high-powered blender, combine the frozen berries, plant-based milk, chia seeds, vegan yogurt (if using), and maple syrup (if desired). Blend until smooth and thick.

You may need to stop and scrape down the sides or add a touch more plant-based milk to help it along but keep it thick enough to eat with a spoon.

Step 2 – Pour

Divide the smoothie into 3–4 bowls.

Step 3 – Top

Get creative! Add your favorite toppings. The key is to balance flavors and textures, think creamy banana slices, crunchy seeds, juicy fresh berries, and a sprinkle of coconut flakes.

Step 4 – Serve

Smoothie bowls are best enjoyed right away while the texture is still thick and frosty.

Storage

Best enjoyed fresh, but you can store the smoothie base (without toppings) in the fridge for up to 24 hours. Give it a stir before serving.

Plant Based Breakfast Ideas

If you like this recipe, you’ll love these plant based recipes for breakfast (or anytime!):

  • Strawberry Chia Pudding
  • Peanut Butter Overnight Oats
  • Instant Pot Breakfast Rice
  • Vanilla Coconut Pudding
  • Chocolate Chia Overnight Oats
Yield: 3 Bowls

Power Berry Smoothie Bowl

Power Berry Smoothie Bowl

Whip up this vibrant berry smoothie bowl in 10 minutes! Packed with antioxidants, plant-based ingredients & fun toppings. A perfect healthy breakfast or snack.

Prep Time 10 minutes
Total Time 10 minutes

Ingredients

  • 3 ½ cups frozen mixed berries (blueberries, strawberries, raspberries)
  • 1 cup plant-based milk (adjust to desired thickness)
  • 2 tablespoons chia seeds
  • ½ cup plant-based yogurt (optional)
  • 1 tsp. maple syrup (optional)

Topping Ideas

  • Fresh blueberries
  • Sliced Strawberries
  • Sliced banana
  • Coconut flakes
  • Extra chia seeds
  • Pumpkin Seeds
  • Granola

Instructions

  1. Blend: In a high-powered blender, combine the frozen berries, plant-based milk, chia seeds, yogurt (if using), and maple syrup (if desired). Blend until smooth and thick. You may need to stop and scrape down the sides or add a touch more milk to help it along—but keep it thick enough to eat with a spoon.
  2. Pour: Divide the smoothie into 3–4 bowls, depending on how hungry you are.
  3. Top: Get creative! Add your favorite toppings. The key is to balance flavors and textures—think creamy banana slices, crunchy seeds, juicy fresh berries, and a sprinkle of coconut flakes.
  4. Serve Immediately: Smoothie bowls are best enjoyed right away while the texture is still thick and frosty.

Notes

Storage: Best enjoyed fresh, but you can store the smoothie base (without toppings) in the fridge for up to 24 hours. Stir before serving.

Did you make this recipe?

We'd love to see it! Tag us and use #MyPlantBasedFamily!

© Holly Yzquierdo

Filed Under: Breakfast, Dessert, Recipes

Strawberry Lemonade Popsicles

May 27, 2025 by Holly Yzquierdo Leave a Comment

Sweeten up your summer with these Creamy Strawberry Lemonade Popsicles. Whether you’re lounging poolside, entertaining guests, or simply looking for a refreshing, better-for-you dessert, these homemade popsicles are everything you could ask for—fruity, tangy, creamy, and naturally sweetened.

Made with vegan yogurt, strawberries, and fresh lemon juice, they strike the perfect balance between indulgent and wholesome. Think of them as a frozen version of your favorite strawberry lemonade with a creamy twist. The best part? They’re super easy to make, kid-friendly, and customizable to your taste.

Why You’ll Love These Popsicles

Popsicles are nostalgic. They bring back childhood memories of sticky hands and sunny afternoons. But unlike the artificial, sugar-laden versions you may have grown up with, these homemade strawberry lemonade pops are packed with real fruit, soy or coconut yogurt, and natural sweeteners like maple syrup.

They look beautiful with their swirled layers, taste refreshing and satisfying, and take just 10 minutes of prep before the freezer works its magic.

Whether you’re cutting down on processed sugar, following a high-protein diet, or simply craving a fruity dessert that feels like a treat without being overly indulgent, these popsicles check all the boxes.

Perfect for Any Occasion

These Creamy Strawberry Lemonade Popsicles are great for:

  • Backyard BBQs
  • Pool parties
  • Summer birthdays
  • After-school snacks
  • Healthy desserts for adults and kids alike

They’re also a fun project for kids to help with—from blending to layering and swirling. Just prepare to clean up a little berry-flavored yogurt afterward!

Recipe Tips and Variations

Lower Sugar? Use unsweetened yogurt and reduce or skip the sweetener altogether if your strawberries are super ripe and sweet.

No Popsicle Molds? No problem! Use small paper cups and insert wooden sticks after the popsicles have partially frozen (about 2 hours in). Peel off the paper to serve.

Extra Fruit? Fold in some chopped strawberries before layering to add texture and fruity bites.

How to Make Strawberry Lemonade Popsicles

Ingredients for Pink Strawberry Lemonade Layer:

  • 2½ cups strawberries (fresh or frozen)
  • 5 tbsp maple syrup
  • 1 tsp lemon juice
  • Zest of 1 lemon (optional)
  • 1 cup soy or coconut yogurt

Ingredients for White Yogurt Layer:

  • 2 cups soy or coconut yogurt (plain or vanilla)
  • 3 tbsp maple syrup
  • 2 tsp lemon juice

Instructions

Step 1 – Blend the Pink Layer

In a blender, combine the strawberries, lemon juice, zest, maple syrup, and soy or coconut yogurt. Blend until smooth and creamy. Taste and adjust the sweetness if needed.

If using frozen strawberries, you may want to let them thaw slightly or add a splash of water to help the blending process.

Step 2 – Mix the White Layer

In a separate bowl, stir together the vegan yogurt, lemon juice, and maple syrup. The lemon adds just enough tang to mimic the lemonade vibe while keeping this layer creamy and rich.

Step 3 – Layer and Swirl

Grab your popsicle molds (this recipe yields about 16 depending on mold size). Start layering by adding spoonful’s of the pink and white mixtures in an alternating fashion. Once filled, take a thin skewer or knife and gently swirl the layers to create a marbled effect. Don’t over-swirl—you want to keep some definition between the colors.

Step 4 – Freeze

Insert popsicle sticks and freeze for at least 6 hours, preferably overnight. Patience is key—these need time to set up fully so they’re firm enough to unmold cleanly.

Step 5 – Unmold & Enjoy

To release the popsicles, run the molds under warm water for 10–15 seconds. Gently pull them out and enjoy immediately, or store them in an airtight container or bag for up to a week.

Storage and Serving Tips

  • Store popsicles in a freezer-safe bag or container for up to one week.
  • To keep them from sticking, wrap each one in parchment paper or wax paper.
  • Serve with a wedge of fresh lemon or strawberry for a pretty presentation.

More Plant Based Treats

If you like this recipe, you’ll love these plant based treats too:

  • Easy Watermelon Slushie
  • Triple Berry Frozen Yogurt Pops
  • Plant Based Brownies
  • Mango Lime Ice Pops
  • Chocolate Banana Bread
Yield: 16 Popsicles

Strawberry Lemonade Popsicles

Strawberry Lemonade Popsicles

These creamy strawberry lemonade popsicles are the perfect summer treat—made with vegan yogurt, fresh fruit, and maple syrup.

Prep Time 10 minutes
Additional Time 6 hours
Total Time 6 hours 10 minutes

Ingredients

Pink Strawberry Lemonade Layer

  • 2 1/2 cup strawberries
  • 5 tbsp maple syrup
  • 1 tsp lemon juice
  • Zest of 1 lemon
  • 1 cup vegan yogurt

White Yogurt Layer

  • 2 cup vegan yogurt
  • 3 tbsp maple syrup
  • 2 tsp lemon juice

Instructions

      1. In a blender, combine the strawberries, lemon juice, zest, maple syrup, and vegan yogurt. Blend until smooth and creamy. Taste and adjust sweetness if needed. If using frozen strawberries, you may want to let them thaw slightly or add a splash of water to help the blending process.
      2. In a separate bowl, stir together the vegan yogurt, lemon juice, and maple syrup. The lemon adds just enough tang to mimic the lemonade vibe while keeping this layer creamy and rich.
      3. Grab your popsicle molds (this recipe yields about 16 depending on mold size). Start layering by adding spoonfuls of the pink and white mixtures in an alternating fashion. Once filled, take a thin skewer or knife and gently swirl the layers to create a marbled effect. Don't over-swirl—you want to keep some definition between the colors.
      4. Insert popsicle sticks and freeze for at least 6 hours, preferably overnight. Patience is key—these need time to set up fully so they’re firm enough to unmold cleanly.
      5. To release the popsicles, run the molds under warm water for 10–15 seconds. Gently pull them out and enjoy immediately, or store them in an airtight container or bag for up to a week.
  • Notes

  • Store popsicles in a freezer-safe bag or container for up to one week.
  • To keep them from sticking, wrap each one in parchment paper or wax paper.
  • Serve with a wedge of fresh lemon or strawberry for a pretty presentation.
  • Did you make this recipe?

    We'd love to see it! Tag us and use #MyPlantBasedFamily!

    © Holly Yzquierdo

    Filed Under: Dessert, Recipes

    Peanut Butter Granola Bars

    February 5, 2025 by Holly Yzquierdo 5 Comments

    When it comes to snacks that check all the boxes—delicious, nutritious, and easy to make—peanut butter granola bars are hard to beat. Whether you’re packing lunch for the kids, fueling up for a workout, or just satisfying a mid-afternoon craving, these bars are the perfect go-to option.

    Why Peanut Butter Granola Bars Are a Game-Changer

    Granola bars have long been a staple in the snack aisle, but peanut butter granola bars elevate the concept to a whole new level. Here’s why:

    1. Convenience: The bars are portable and mess-free, making them ideal for busy lifestyles. Toss one in your bag for a quick energy boost on the go.
    2. Versatility: These bars can double as a breakfast replacement, post-workout snack, or even a dessert. They’re endlessly adaptable to fit your needs.
    3. Flavor-Packed: The rich, creamy taste of peanut butter pairs beautifully with the crunch of granola, creating a satisfying texture that’s hard to resist.
    4. Nutrient-Rich: Packed with protein, fiber, and healthy fats, they are a balanced snack that keeps you energized and satisfied.

    How to Customize Your Peanut Butter Granola Bars

    One of the best things about peanut butter granola bars is their versatility. With a few simple tweaks, you can create a bar that suits your taste preferences and dietary needs. Here are some ideas to get you started:

    1. Add-Ins for Extra Crunch

    • Nuts and Seeds: Almonds, walnuts, pumpkin seeds, and sunflower seeds add texture and a nutritional boost.
    • Crispy Rice: For a lighter, airy texture, mix in some puffed rice or rice cereal.

    2. Sweeten the Deal

    • Natural Sweeteners: Maple syrup, or agave nectar provide a touch of sweetness without refined sugars.
    • Dried Fruits: Raisins, cranberries, apricots, or chopped dates can add natural sweetness and chewy texture.

    3. Amp Up the Flavor

    • Spices: A pinch of cinnamon, nutmeg, or ginger can enhance the flavor profile.
    • Extracts: Add a splash of vanilla or almond extract for a subtle aromatic twist.

    4. Make Them Indulgent

    • Chocolate Chips: Dark chocolate or mini chocolate chips can make your bars feel like a dessert.
    • Drizzles: Top your bars with a drizzle of melted chocolate for an extra layer of indulgence.

    5. Tailor to Dietary Needs

    • Gluten-Free: Use certified gluten-free oats and check labels on other ingredients.
    • Nut-Free: Replace peanut butter with sunflower seed butter.

    Creative Uses for Peanut Butter Granola Bars

    Granola bars aren’t just for snacking. Here are some innovative ways to incorporate them into your meals and desserts:

    1. Breakfast Parfaits: Crumble a bar over vegan yogurt and fresh fruit for a quick, balanced breakfast.
    2. Energy Balls: Roll the mixture into bite-sized balls instead of forming bars for a fun, poppable snack.
    3. Trail Mix Booster: Chop a bar into small pieces and mix it with nuts, seeds, and dried fruit for a homemade trail mix.
    4. Dessert Crust: Use crushed bars as a base for pies.

    How to Make Peanut Butter Granola Bars

    Ingredients

    • 2 ¾ cups quick cooking rolled oats
    • ¾ cup peanut butter
    • ½ cup maple syrup
    • ½ teaspoon sea salt
    • 1 teaspoon vanilla
    • ½ teaspoon cinnamon
    • ¼ cup vegan chocolate chips

    Instructions

    Step 1 – Preheat Oven

    Preheat the oven to 350 degrees.

    Step 2 – Mix Peanut Butter

    Combine peanut butter, maple syrup, sea salt, cinnamon and vanilla in a medium sized mixing bowl. Mix well.

    Step 3 – Incorporate Oats

    Add oats to the peanut butter slowly, being sure to fully incorporate all ingredients.

    Step 4 – Add Chocolate Chips

    Add chocolate chips to the mixture and mix well. Ingredients should stick well together when pressed.

    Step 5 – Pour into Dish

    Pour oat mixture into a 9×9 dish lined with parchment paper. Press mixture firmly into the pan.

    Step 6 – Bake

    Bake for 15 minutes.

    Step 7 – Cool

    Remove from the oven and allow the bars to completely cool. Once cooled, carefully lift the parchment paper along with the oat mixture out of the pan and onto a cutting board.

    Carefully slice your bars in half and then each half can be sliced into fourths.

    Tips for Storing Peanut Butter Granola Bars

    To ensure your peanut butter granola bars stay fresh and delicious, proper storage is key. Here’s how to do it:

    • Room Temperature: Store bars in an airtight container for up to one week.
    • Refrigeration: Extend shelf life by keeping bars in the fridge, where they can last up to two weeks.
    • Freezing: For longer storage, freeze bars in a single layer before transferring them to a freezer-safe bag or container. They’ll stay fresh for up to three months.

    More Plant Based Snacks

    If you like this recipe, you’ll love these plant based snacks too:

    • No Bake Energy Balls
    • Strawberry Chia Pudding
    • Oatmeal Cups
    • Apple Oatmeal Muffins
    • Chocolate Banana Bread
    Yield: 8 Bars

    Peanut Butter Granola Bars

    Peanut Butter Granola Bars

    Peanut butter granola bars are a versatile snack packed with protein, fiber, and flavor. Perfect for busy lifestyles and easy to customize!

    Prep Time 5 minutes
    Cook Time 15 minutes
    Total Time 20 minutes

    Ingredients

    • 2 ¾ cups quick cooking rolled oats
    • ¾ cup peanut butter
    • ½ cup maple syrup
    • ½ teaspoon sea salt
    • 1 teaspoon vanilla
    • ½ teaspoon cinnamon
    • ¼ cup vegan chocolate chips

    Instructions

    1. Preheat the oven to 350 degrees.
    2. Combine peanut butter, maple syrup, sea salt, cinnamon and vanilla in a medium sized mixing bowl. Mix well.
    3. Add oats to the peanut butter slowly, being sure to fully incorporate all ingredients.
    4. Add chocolate chips to the mixture and mix well. Ingredients should stick well together when pressed.
    5. Pour oat mixture into a 9x9 dish lined with parchment paper. Press mixture firmly into the pan.
    6. Bake for 15 minutes.
    7. Remove from the oven and allow the bars to completely cool. Once cooled, carefully lift the parchment paper along with the oat mixture out of the pan and onto a cutting board. Carefully slice your bars in half and then each half can be sliced into fourths.

    Notes

    Store in an air tight container on the counter or in the refrigerator for 3-5 days.

    Did you make this recipe?

    We'd love to see it! Tag us and use #MyPlantBasedFamily!

    © Holly Yzquierdo

    Filed Under: Breakfast, Dessert, Recipes

    Easy Watermelon Slushie

    June 4, 2024 by Holly Yzquierdo Leave a Comment

    Watermelon Slushie

    Try this Watermelon Slushie recipe made with frozen watermelon, lime juice, and a touch of brown sugar for a naturally sweet and refreshing treat.

    How to Make a Watermelon Slushie at Home

    My kids ask for watermelon slushies from convenience stores and see the fast food commercials. Those are filled with dyes and processed ingredients. It’s easy to make them at home, so I know exactly what’s in them!

    It takes a little preplanning to freeze the watermelon in advance. Once that’s done, just toss the frozen cubes into a blender with some lime juice and sugar or maple syrup.

    Can You Blend and Freeze Watermelon?

    Yes, but I prefer to do it the other way around. Freeze the watermelon first, then blend it into a slushie.

    Cut the watermelon into cubes, and place it in an even layer on a sheet pan or in plastic freezer bags. Place them in the freezer for at least two hours. I leave mine overnight.

    Now the watermelon is ready to be blended into a delicious slushie!

    Watermelon Slushie Recipe

    Ingredients

    • 7 cups watermelon, cubed 
    • ½ cup lime juice 
    • ¼ cup light brown sugar, packed, or maple syrup 
    • 6-10 Tablespoons cold water 
    • Lime slices, optional garnish 

    Instructions

    Step 1 – Freeze Watermelon

    Lay the cubed watermelon on a baking sheet in the freezer or place it in a single layer in sealable plastic bags and freeze until frozen, 2 hours to overnight.  

    Step 2 – Gather Ingredients

    Once the watermelon is frozen, and you’re ready to make your Slushie, place the frozen watermelon, lime juice, and brown sugar in a large blender.  

    Step 3 – Blend

    Blend for 3-5 minutes, tamping (pushing all ingredients down towards the blades) often until everything is smooth and creamy. If your blender doesn’t come with a tamper you should stop the blender every so often and carefully press the ingredients down and towards the blades with a spatula.  

    Step 4 – Check Consistency

    If the mixture is too thick and dry, this will depend on how much juice your watermelon had, add 2-3 Tablespoons of cold water and blend until combined.  

    Step 5 – Adjust Moisture

    Continue adding 2-3 Tablespoons of cold water and blending until you reach your desired consistency.  

    Step 6 – Serve

    Serve cold in glasses with straws and lime slices, optional.  

    Storing Watermelon Slushie

    The watermelon slushie is best served immediately after blending. If you have leftovers, store them in an airtight container for up to a week.

    Before serving the stored slushie, allow it to thaw on the counter for 10-15 minutes, and then blend it in the blender to restore its texture. Note that the slushie may lose some of its original texture and flavor after freezing, so it’s best to consume it fresh. 

    More Plant Based Recipes with Fruit

    If you like this recipe, check out these other ideas where fruit is the star:

    • Mango Lime Ice Pops
    • Smoothie Bowl
    • 2 Ingredient Fruit Dip
    • Triple Berry Frozen Yogurt Pops
    • Banana Pudding Ice Cream
    Yield: 3-4 Servings

    Watermelon Slushie

    Watermelon Slushie

    Try this Watermelon Slushie recipe made with frozen watermelon, lime juice, and a touch of brown sugar for a naturally sweet and refreshing treat.

    Prep Time 5 minutes
    Additional Time 2 hours
    Total Time 2 hours 5 minutes

    Ingredients

    • 7 cups watermelon, cubed
    • ½ cup lime juice
    • ¼ cup light brown sugar, packed, or maple syrup
    • 6-10 Tablespoons cold water
    • Lime slices, optional garnish

    Instructions

    1. Lay the cubed watermelon on a baking sheet in the freezer or place it in a single layer in sealable plastic bags and freeze until frozen, 2 hours to overnight.  
    2. Once the watermelon is frozen, and you’re ready to make your Slushie, place the frozen watermelon, lime juice, and brown sugar in a large blender.  
    3. Blend for 3-5 minutes, tamping (pushing all ingredients down towards the blades) often until everything is smooth and creamy. If your blender doesn't come with a tamper you should stop the blender every so often and carefully press the ingredients down and towards the blades with a spatula.  
    4. If the mixture is too thick and dry, this will depend on how much juice your watermelon had, add 2-3 Tablespoons of cold water and blend until combined.  
    5. Continue adding 2-3 Tablespoons of cold water and blending until you reach your desired consistency.  
    6. Serve cold in glasses with straws and lime slices, optional.  

    Notes

    If you have leftovers, you can store them in an airtight container for a week. Before serving the slushie, allow it to thaw on the counter for 10-15 minutes, and then blend it in the blender to restore its texture.

    Did you make this recipe?

    We'd love to see it! Tag us and use #MyPlantBasedFamily!

    © Holly Yzquierdo

    Filed Under: Dessert, Recipes

    Oatmeal Cups

    December 18, 2020 by Holly Yzquierdo 3 Comments

    These vegan Oatmeal Cups are beautiful and delicious. I started making these in early 2020. We were addicted and made a batch every week until it became too hot to bake here in Arizona.

    Vegan Oatmeal Cups

    I’ve made a lot of baked oatmeal recipes but these always seemed more festive. The combination of the dried fruit and the nuts and seeds always made them feel like a Christmas snack. I decided to wait all year to share them and now it’s time.

    Most of the time I made them in my Pampered Chef brownie pan. You may have seen some Instagram stories of them. They taste just as good whether they are square or round.

    Vegan Oatmeal Cups

    I love that these are oil-free but taste decadent thanks to the seeds, nuts, and dried fruit. Those all help them to be really filling too! We eat them for breakfast, snack and dessert!

    Another bonus to this recipe is it makes 18 oatmeal cups. Trust me, a dozen is never enough for our crew. We are also able to package some up and give them to others.

    Yield: 18

    Fruit and Nut Oatmeal Cups

    Vegan Oatmeal Cups

    These plant-based Fruit and Nut Oatmeal Cups are not only delicious, they are also beautiful.

    Prep Time 15 minutes
    Cook Time 20 minutes
    Additional Time 5 minutes
    Total Time 40 minutes

    Ingredients

    • 2 Tablespoons ground flax seed
    • 6 Tablespoons water
    • 3/4 cup applesauce
    • 1 teaspoon vanilla
    • 1/2 teaspoon salt
    • 1/3 cup maple syrup
    • 1 teaspoon pumpkin spice seasoning
    • 1 teaspoon baking soda
    • 1 cup dried fruit (I use a cranberry, golden raisin and cherry mix)
    • 1/4 cup dried fruit (for topping)
    • 2 Tablespoon raw pepitas (divided)
    • 2 Tablespoon hemp seeds (divided)
    • 1/4 cup chopped walnuts
    • 2 1/2 cups rolled oats
    • 1 1/2 cup plant-based milk (we use rice milk)

    Instructions

    1. Make flax eggs by combining ground flax seed and water in a small bowl. Stir well then set aside.
    2. Preheat over to 350 degrees.
    3. In a big bowl, add applesauce, vanilla, salt, maple syrup, pumpkin spice seasoning together and stir well.
    4. Next, add baking soda, 1 cup of the dried fruit, have the hemp seeds and half the raw pepitas, and all the walnuts. Stir well.
    5. Add the oats, flax seed mixture, plant-based milk and stir well. I like to let this sit for 5-10 minutes so the oats absorb the liquid.
    6. Scoop the mixture into a muffin pan. My muffin pan is nonstick. I use a 1/4 cup measuring cup. The muffin cups will rise slightly. If things tend to stick in your pan, use a little cooking spray.
    7. Sprinkle the remaining dried fruit and seeds on top of the muffin cup. (If you forgot and added it all inside that is ok too. You can add a little more on top if you want).
    8. Bake for 20-25 minutes. The oatmeal cups will be golden brown.

    Notes

    Store muffin cups in the refrigerator in an air tight container for about a week.

    Recommended Products

    As an Amazon Associate and member of other affiliate programs, I earn from qualifying purchases.

    • Raw Shelled Seeds, Pumpkin Seeds/Pepitas
      Raw Shelled Seeds, Pumpkin Seeds/Pepitas
    • Manitoba Harvest Organic Hemp Hearts 
      Manitoba Harvest Organic Hemp Hearts 
    • Trader Joe's Golden Berry Blend 
      Trader Joe's Golden Berry Blend 
    • Bob's Red Mill Gluten Free Organic Old Fashioned Rolled Oats
      Bob's Red Mill Gluten Free Organic Old Fashioned Rolled Oats

    Did you make this recipe?

    We'd love to see it! Tag us and use #MyPlantBasedFamily!

    © Holly Yzquierdo
    Category: Breakfast

    Substitutions

    This versatile recipe works with a lot of substitutions.

    • If you don’t have applesauce you can used mashed bananas. See more tips here.
    • Can’t have nuts, you can skip them all together.
    • Can’t have seeds? The flax seeds work as a binder so you could try an egg replacer. I think it would work fine if you skipped it.
    • Can’t have oats? We are working on some variations using other grains because my husband can’t have oats.
    • Don’t have this dried fruit mix? You can use other dried fruit like raisins or dried cherries. I haven’t tried dried tropical fruit yet.
    • No maple syrup? You can use another sweetener like date paste or agave. You could also use sugar.
    • Want to use less sweetener? Go for it. The applesauce and dried fruit provide some sweetener already.
    Vegan Oatmeal Cups

    Our family LOVES this oatmeal cups recipe! If you make these I’d love to hear what you think!

    Filed Under: Bread & Muffin Recipes, Breakfast, Dessert, Holiday Cooking, Recipes Tagged With: Breakfast, Dessert, Oatmeal, plantbased, snack, Vegan

    Vegan Peach Crisp

    July 7, 2020 by Holly Yzquierdo 10 Comments

    Oil-Free Vegan Peach Crisp

    I love peaches! Every year as summer gets closer I patiently wait for the peaches to hit the stores. This year, the peaches and nectarines have been exceptionally good. With an abundance of peaches, it’s time to make my oil-free Vegan Peach Crisp.

    Oil-Free Vegan Peach Crisp

    Don’t get me wrong, I love fresh peaches but baked peaches are out of this world. I don’t make a lot of desserts because most are full of oil and sugar. This easy Peach Crisp is oil-free and uses maple syrup to sweeten it.

    It’s not overly sweet. This is not a gooey peach cobbler. I love traditional peach cobbler but this is not a cobbler recipe. You can’t make cobbler crust without oil, butter or lard and I’m not doing that. A whole bunch of foods trigger headaches for me so I’m avoiding anything that could be a trigger and keeping to simple ingredients that make me feel good.

    Oil-Free Vegan Peach Crisp

    You can’t get much simpler than these ingredients. Other than peaches, the rest are pantry staples.

    • Peaches
    • Rolled Oats
    • Maple Syrup
    • Applesauce

    You can add other ingredients to liven it up. Cinnamon, lemon juice and lemon zest, vanilla, almonds, pecans or even other stone fruit.

    The topping on this crisp is similar to my oil-free granola. Since it doesn’t use oil or added fat, it doesn’t get super crispy. You can also add a scoop of your favorite dairy-free vanilla ice cream.

    We think this Peach Crisp tastes best after a day or two.

    Vegan Peach Crisp

    Can I use frozen peaches for Peach Crisp?

    I know it’s difficult to get delicious peaches all year long, don’t worry, you can use frozen peaches! Just let them thaw all the way first.

    You can use a mix of fruit too. I’ve made this with a mix of peaches and nectarines and it was glorious!

    Is Peach Crisp gluten-free?

    Yes, if you use gluten-free oats. Most oats are processed on the same equipment with wheat. If you need to eat gluten-free, make sure your oats are certified gluten-free.

    What can I substitute for applesauce?

    If you don’t have applesauce you can use an apple for a substitute by blending it in your blender. If you don’t have an apple you can mash a banana or puree a peach. See more Applesauce Substitutes here.

    Is Peach Crisp a dessert?

    Yes and no. This Peach Crisp is so good for you, you could eat it for breakfast. It’s pretty similar to my Baked Oatmeal.

    Yield: 6

    Vegan Peach Crisp

    Oil-Free Vegan Peach Crisp

    Delicious oil-free Vegan Peach Crisp is an easy plant-based dessert. Fresh peaches and a few pantry ingredients are all you need.

    Prep Time 10 minutes
    Cook Time 25 minutes
    Additional Time 5 minutes
    Total Time 40 minutes

    Ingredients

    • 3 cups Rolled Oats (divided)
    • 3/4 cup Unsweetened Applesauce
    • 1/4 cup Maple Syrup
    • 4 Peaches (pit removed, 3 cups peeled and sliced)

    Instructions

    1. Preheat oven to 375 degrees. Lightly spray a 9x9 pan with cooking spray. (8x8 works too)
    2. Put 1 cup of rolled oats into a blender or food processor and blend until the oats are a fine oat flour.
    3. In a medium mixing bowl, pour applesauce, maple syrup and oat flour together and mix well. Dump in remaining 2 cups of oats and stir well.
    4. Pour about half of the oat mixture into your prepared pan and mash down to form a crust. It doesn’t have to be perfect.
    5. Pour peeled and sliced peaches on top of the layer of oats in the baking pan.
    6. Spoon the rest of the oat mixture on top of the peaches. Try to cover the peaches evenly.
    7. Bake for 25 minutes.

    Notes

    Store Peach Crisp in an air tight container for about 4 days. It can be kept on the counter but will last longer refrigerated.

    Recommended Products

    As an Amazon Associate and member of other affiliate programs, I earn from qualifying purchases.

    • Bob's Red Mill Old Fashioned Regular Rolled Oats, 32 Oz (4 Pack)
      Bob's Red Mill Old Fashioned Regular Rolled Oats, 32 Oz (4 Pack)
    • Hamilton Beach 10-Cup Food Processor 
      Hamilton Beach 10-Cup Food Processor 

    Did you make this recipe?

    We'd love to see it! Tag us and use #MyPlantBasedFamily!

    © Holly Yzquierdo
    Category: Dessert

    Filed Under: Dessert, Recipes Tagged With: Dessert, plant-based diet, Vegan

    Next Page »

    Primary Sidebar

    Footer

    Find it here!

    Amazon Affiliate Disclosure

    Holly Yzquierdo of My Plant-Based Family is a participant in the Amazon Services LLC Associates Program, an affiliate advertising program designed to provide a means for sites to earn advertising fees by advertising and linking to amazon.com.

    Disclosures

    Unauthorized use and/or duplication of any part of this website or content without express and written permission from Holly Yzquierdo is prohibited. Excerpts and links may be used, provided that full credit is given to Holly Yzquierdo and MyPlantBasedFamily.com with links to the original content.

    More information on our Privacy Policy and other Disclosures are available.

    Copyright © 2025 · Wellness Pro on Genesis Framework · WordPress · Log in