• Skip to primary navigation
  • Skip to main content
  • Skip to primary sidebar
  • Skip to footer

My Plant-Based Family

Eating Whole Food, Plant-Based Diet recipes, On a Budget.

  • Plant-Based Recipes
    • Breakfast
    • Main Dish
    • Instant Pot
    • Daniel Fast Recipes
    • Side Dishes
    • Bread and Muffins
    • Salad and Wraps
    • Soup, Stews, and Chili
    • Sauces, Dips, and Salad Dressings
    • Desserts
    • Crock Pot
    • Mexican Food
  • Videos
  • Resources
    • Getting Started
    • Books
      • The Plant-Based Diet Starter Guide
      • The Plant-Based Holiday Meal Plan & Cookbook
  • Meal Plans
    • Meal Plans 2020
    • Meal Plans 2019
    • Meal Plans 2017
    • Meal Plans 2016
    • Meal Plans 2015
    • Meal Plans 2014
    • Meal Plans 2013
  • About Us
    • Our Family
    • Contact Me
    • Our Food Philosophy
    • Disclosure Policy
      • Privacy Policy
  • Daniel Fast Recipes

Plant Based Diet

Oil-Free Hummus Without Tahini (Easy 5-Minute Recipe)

April 11, 2019 by Holly Yzquierdo 1,368 Comments

Oil-Free Hummus

This Oil-Free Hummus Without Tahini is one of the recipes that has been part of My Plant-Based Family almost from the beginning. I started making hummus after our family went plant-based in 2011, and it quickly became a staple in our refrigerator.

It’s easy, inexpensive and made with simple ingredients I usually have on hand. Unlike many hummus recipes, this version doesn’t use oil or tahini. Chickpeas, lemon, garlic and seasonings come together to make a flavorful dip or spread that’s perfect for quick family meals and snacks.

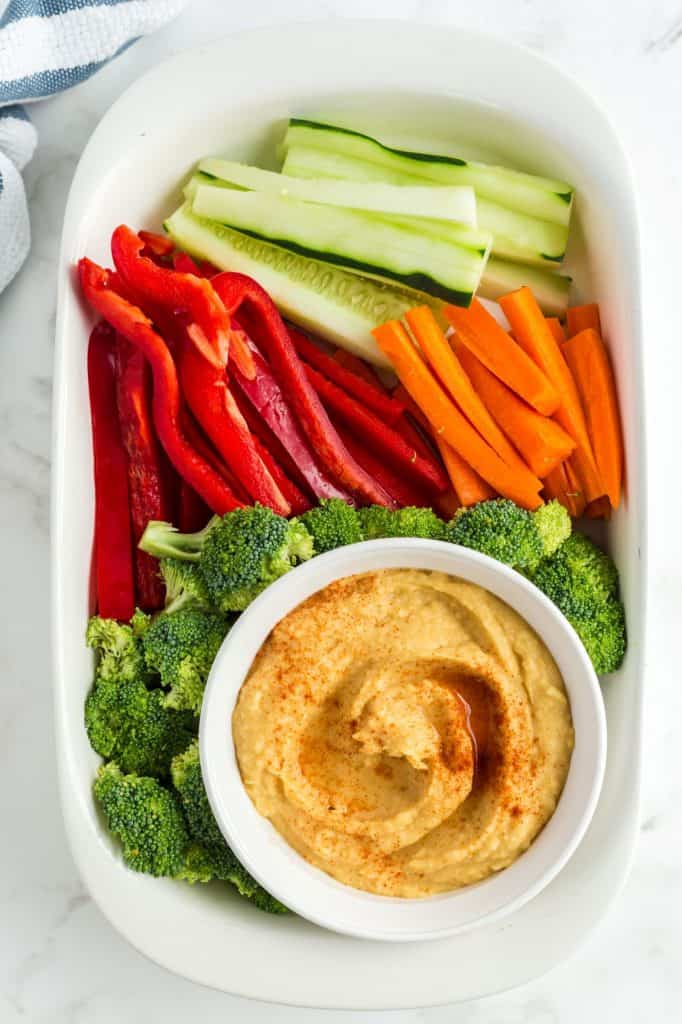
We eat it with fresh vegetables, spread it on sandwiches and wraps, and add it to bowls and other easy meals. It’s also a great recipe to make ahead and keep in the refrigerator when everyone needs something quick.

Oil-Free Hummus

This page contains affiliate links.

Why You’ll Love This Recipe

  • No oil or tahini: This recipe gets its flavor and creamy texture without either.
  • Budget-friendly: Chickpeas are inexpensive, and the rest of the recipe uses simple pantry and grocery-store ingredients.
  • Quick and easy: Put everything in a food processor or blender and blend.
  • Family-friendly: Use it as a dip, sandwich spread, wrap filling or addition to bowls.
  • Easy to customize: Adjust the garlic, lemon and seasonings to suit your family’s tastes.

Key Ingredients

Chickpeas: Canned chickpeas make this incredibly convenient, but cooked-from-dry chickpeas work too.

Lemon juice: Fresh lemon gives hummus its brightness. Add a little more if your family likes a stronger lemon flavor.

Garlic: Start conservatively, as raw garlic can become quite strong in hummus.
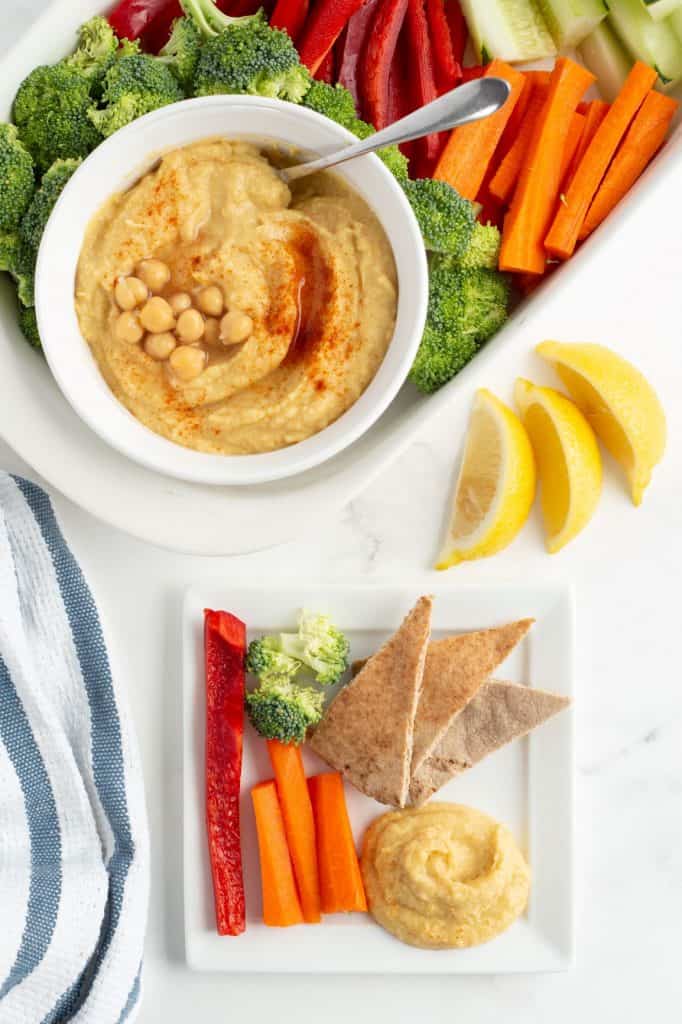
Oil-Free Hummus

How to Make Oil-Free Hummus

This hummus is only flavored with lemon juice, garlic and optional salt. I like to sprinkle a little paprika on top as well but it’s optional.
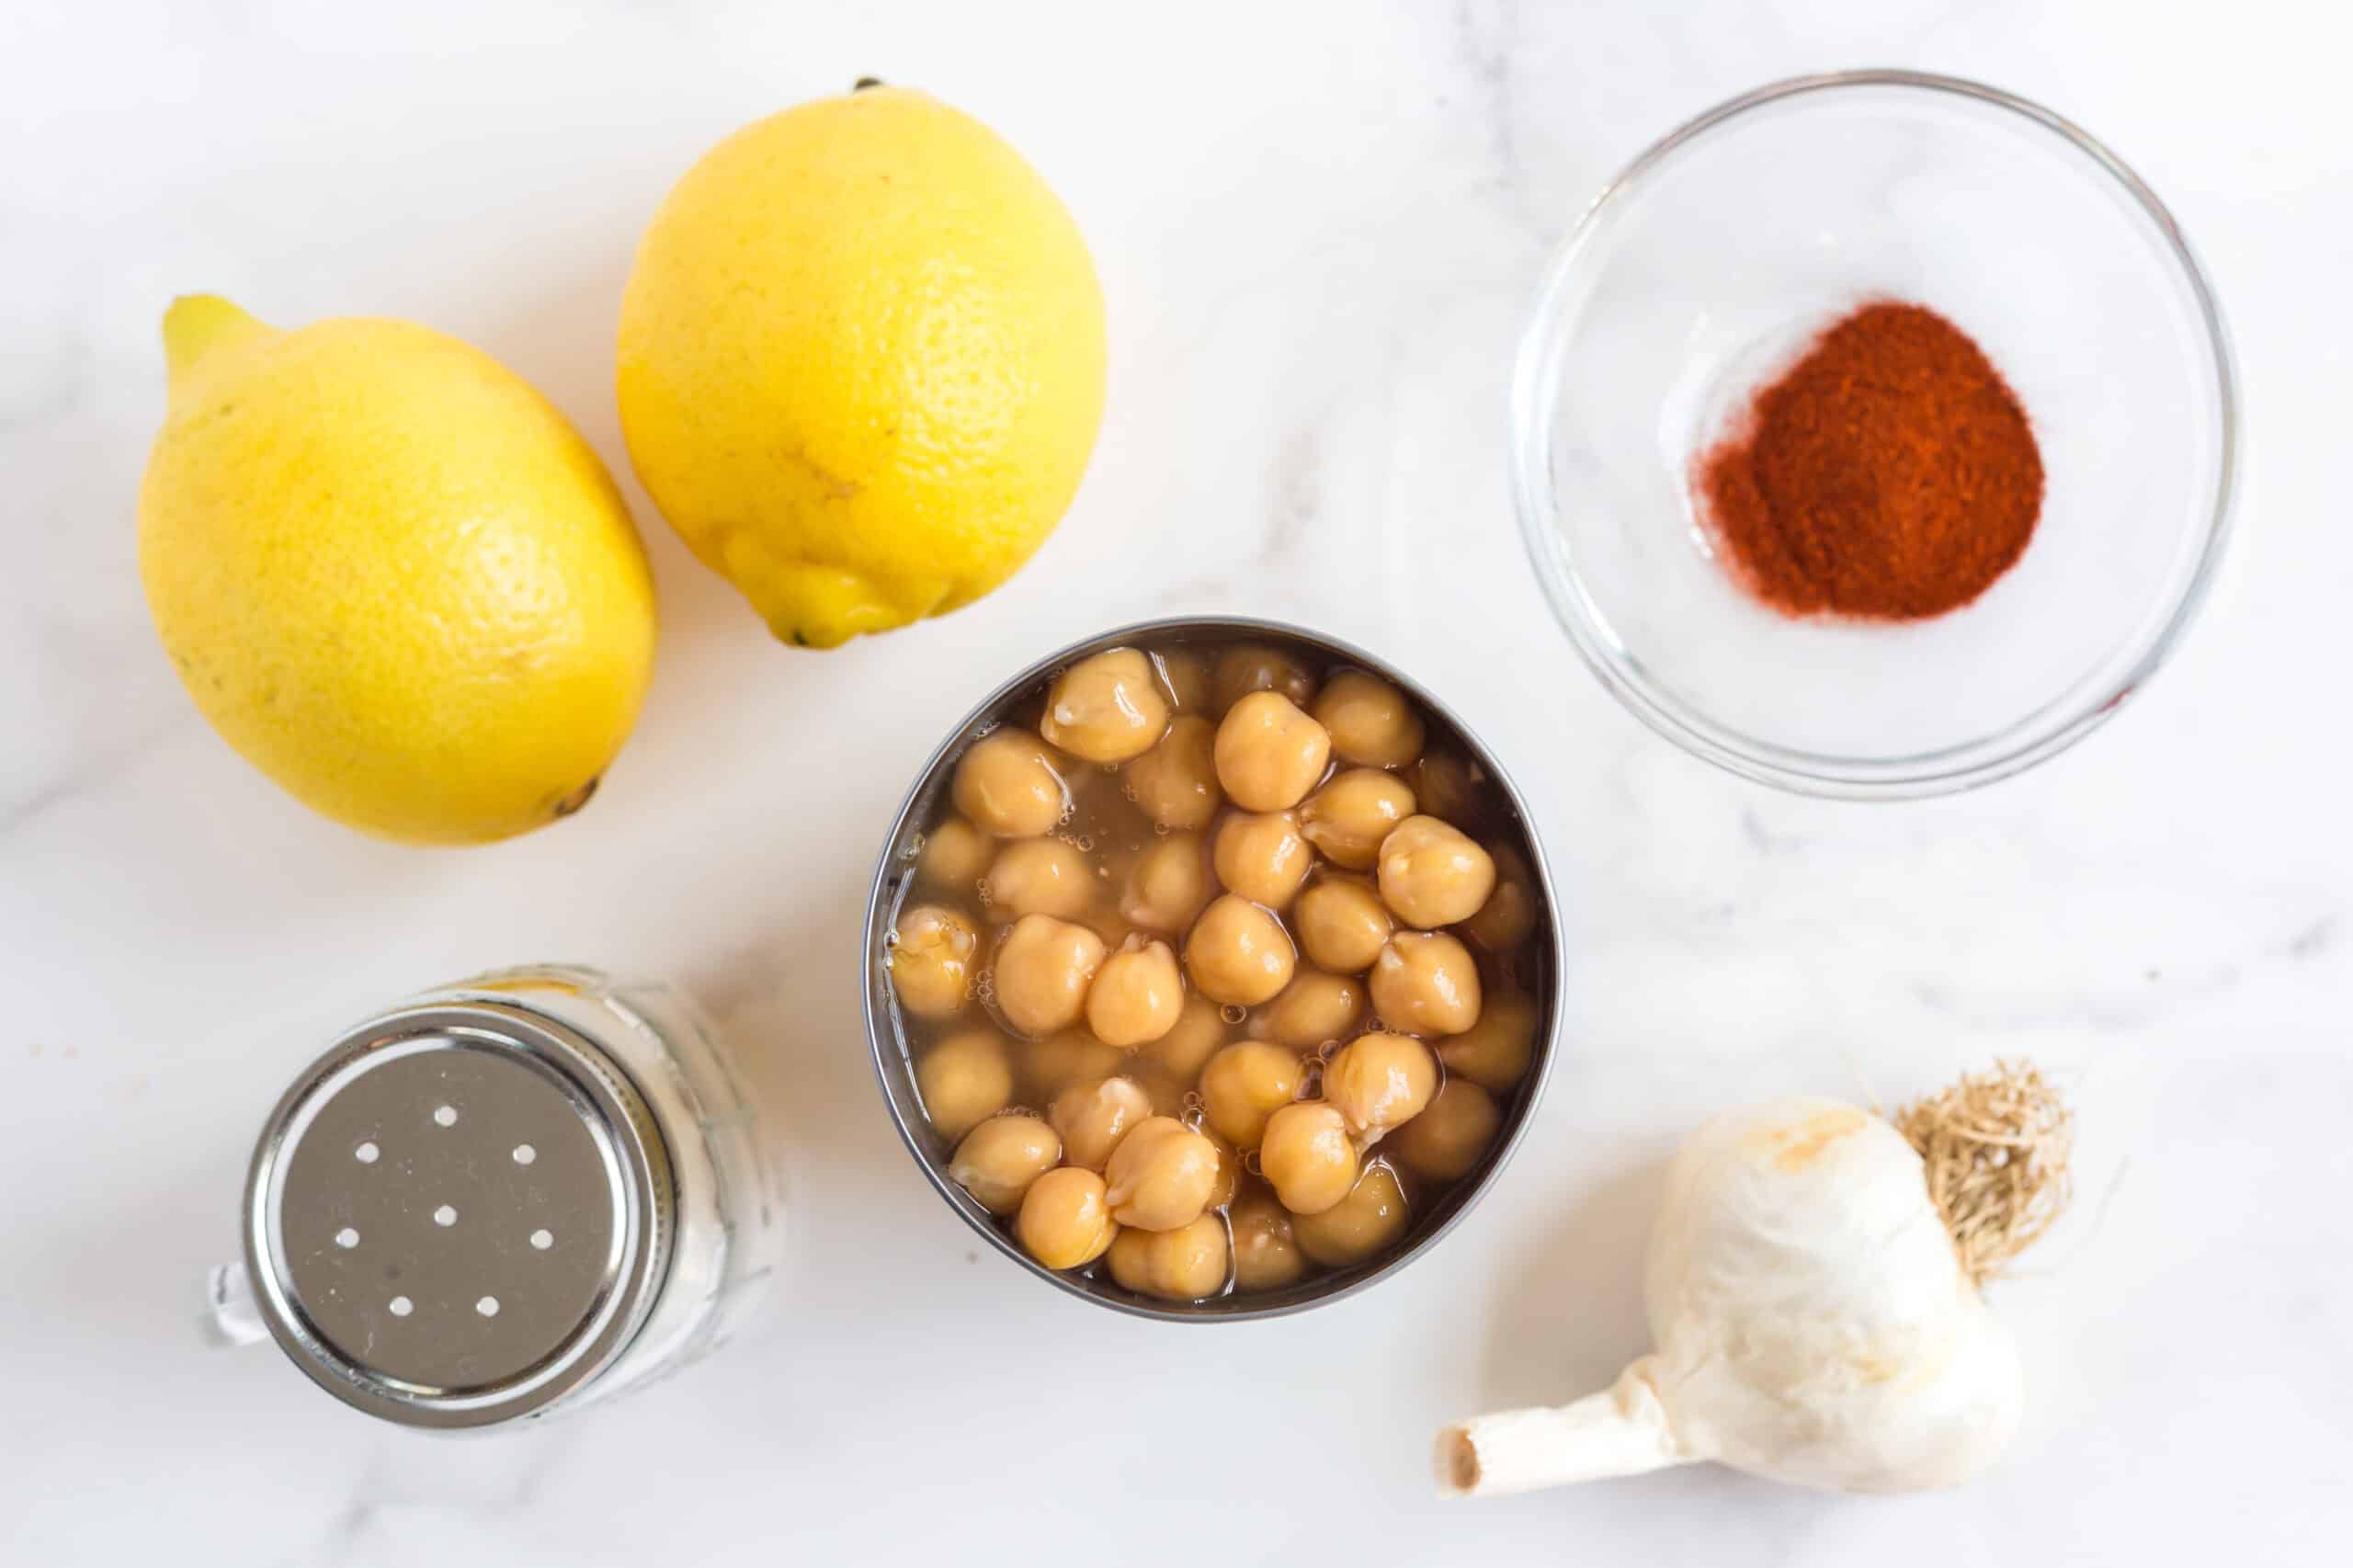
Ingredients

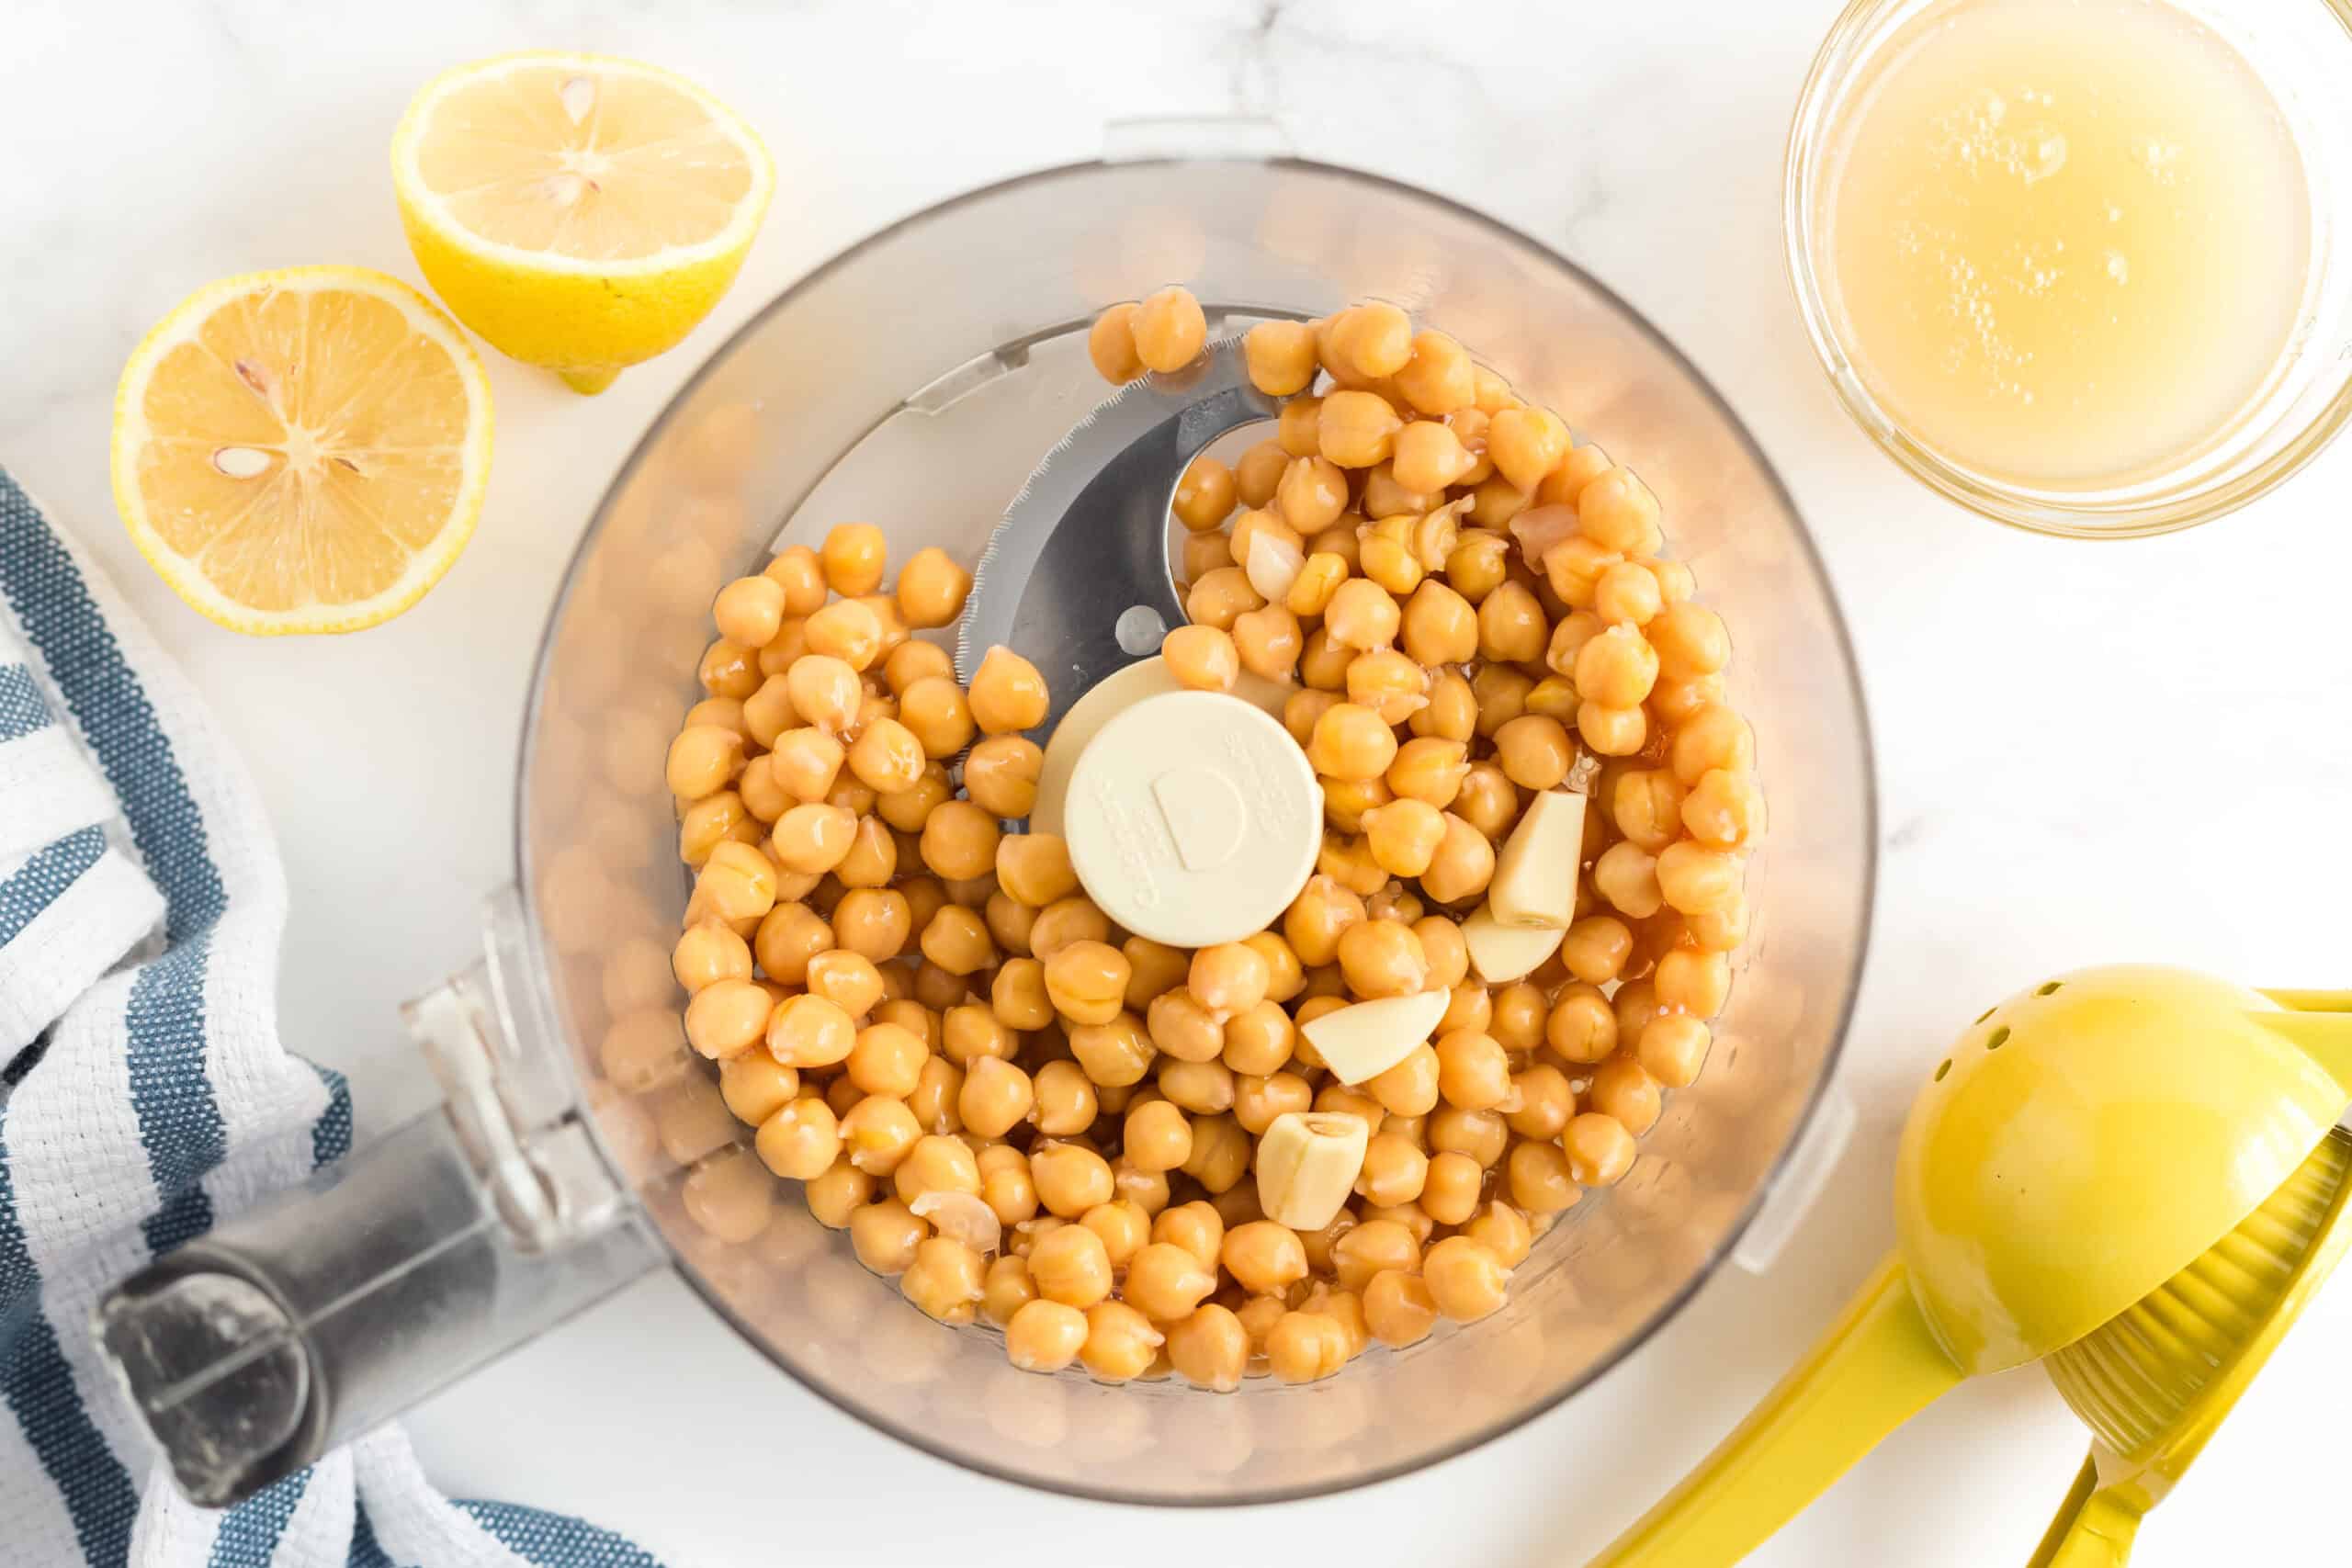
  • 1 15 oz can of chickpeas (or 2 cups of cooked chickpeas), reserve the liquid
  • 4 cloves of garlic
  • 1 lemon, or 1/4 cup lemon juice
  • 1/4 to 1/2 cup of chickpea liquid
  • salt to taste, optional
  • paprika for garnish, optional

Do

Step 1: Add your ingredients to your blender or food processor. Start with 1/4 cup of liquid.
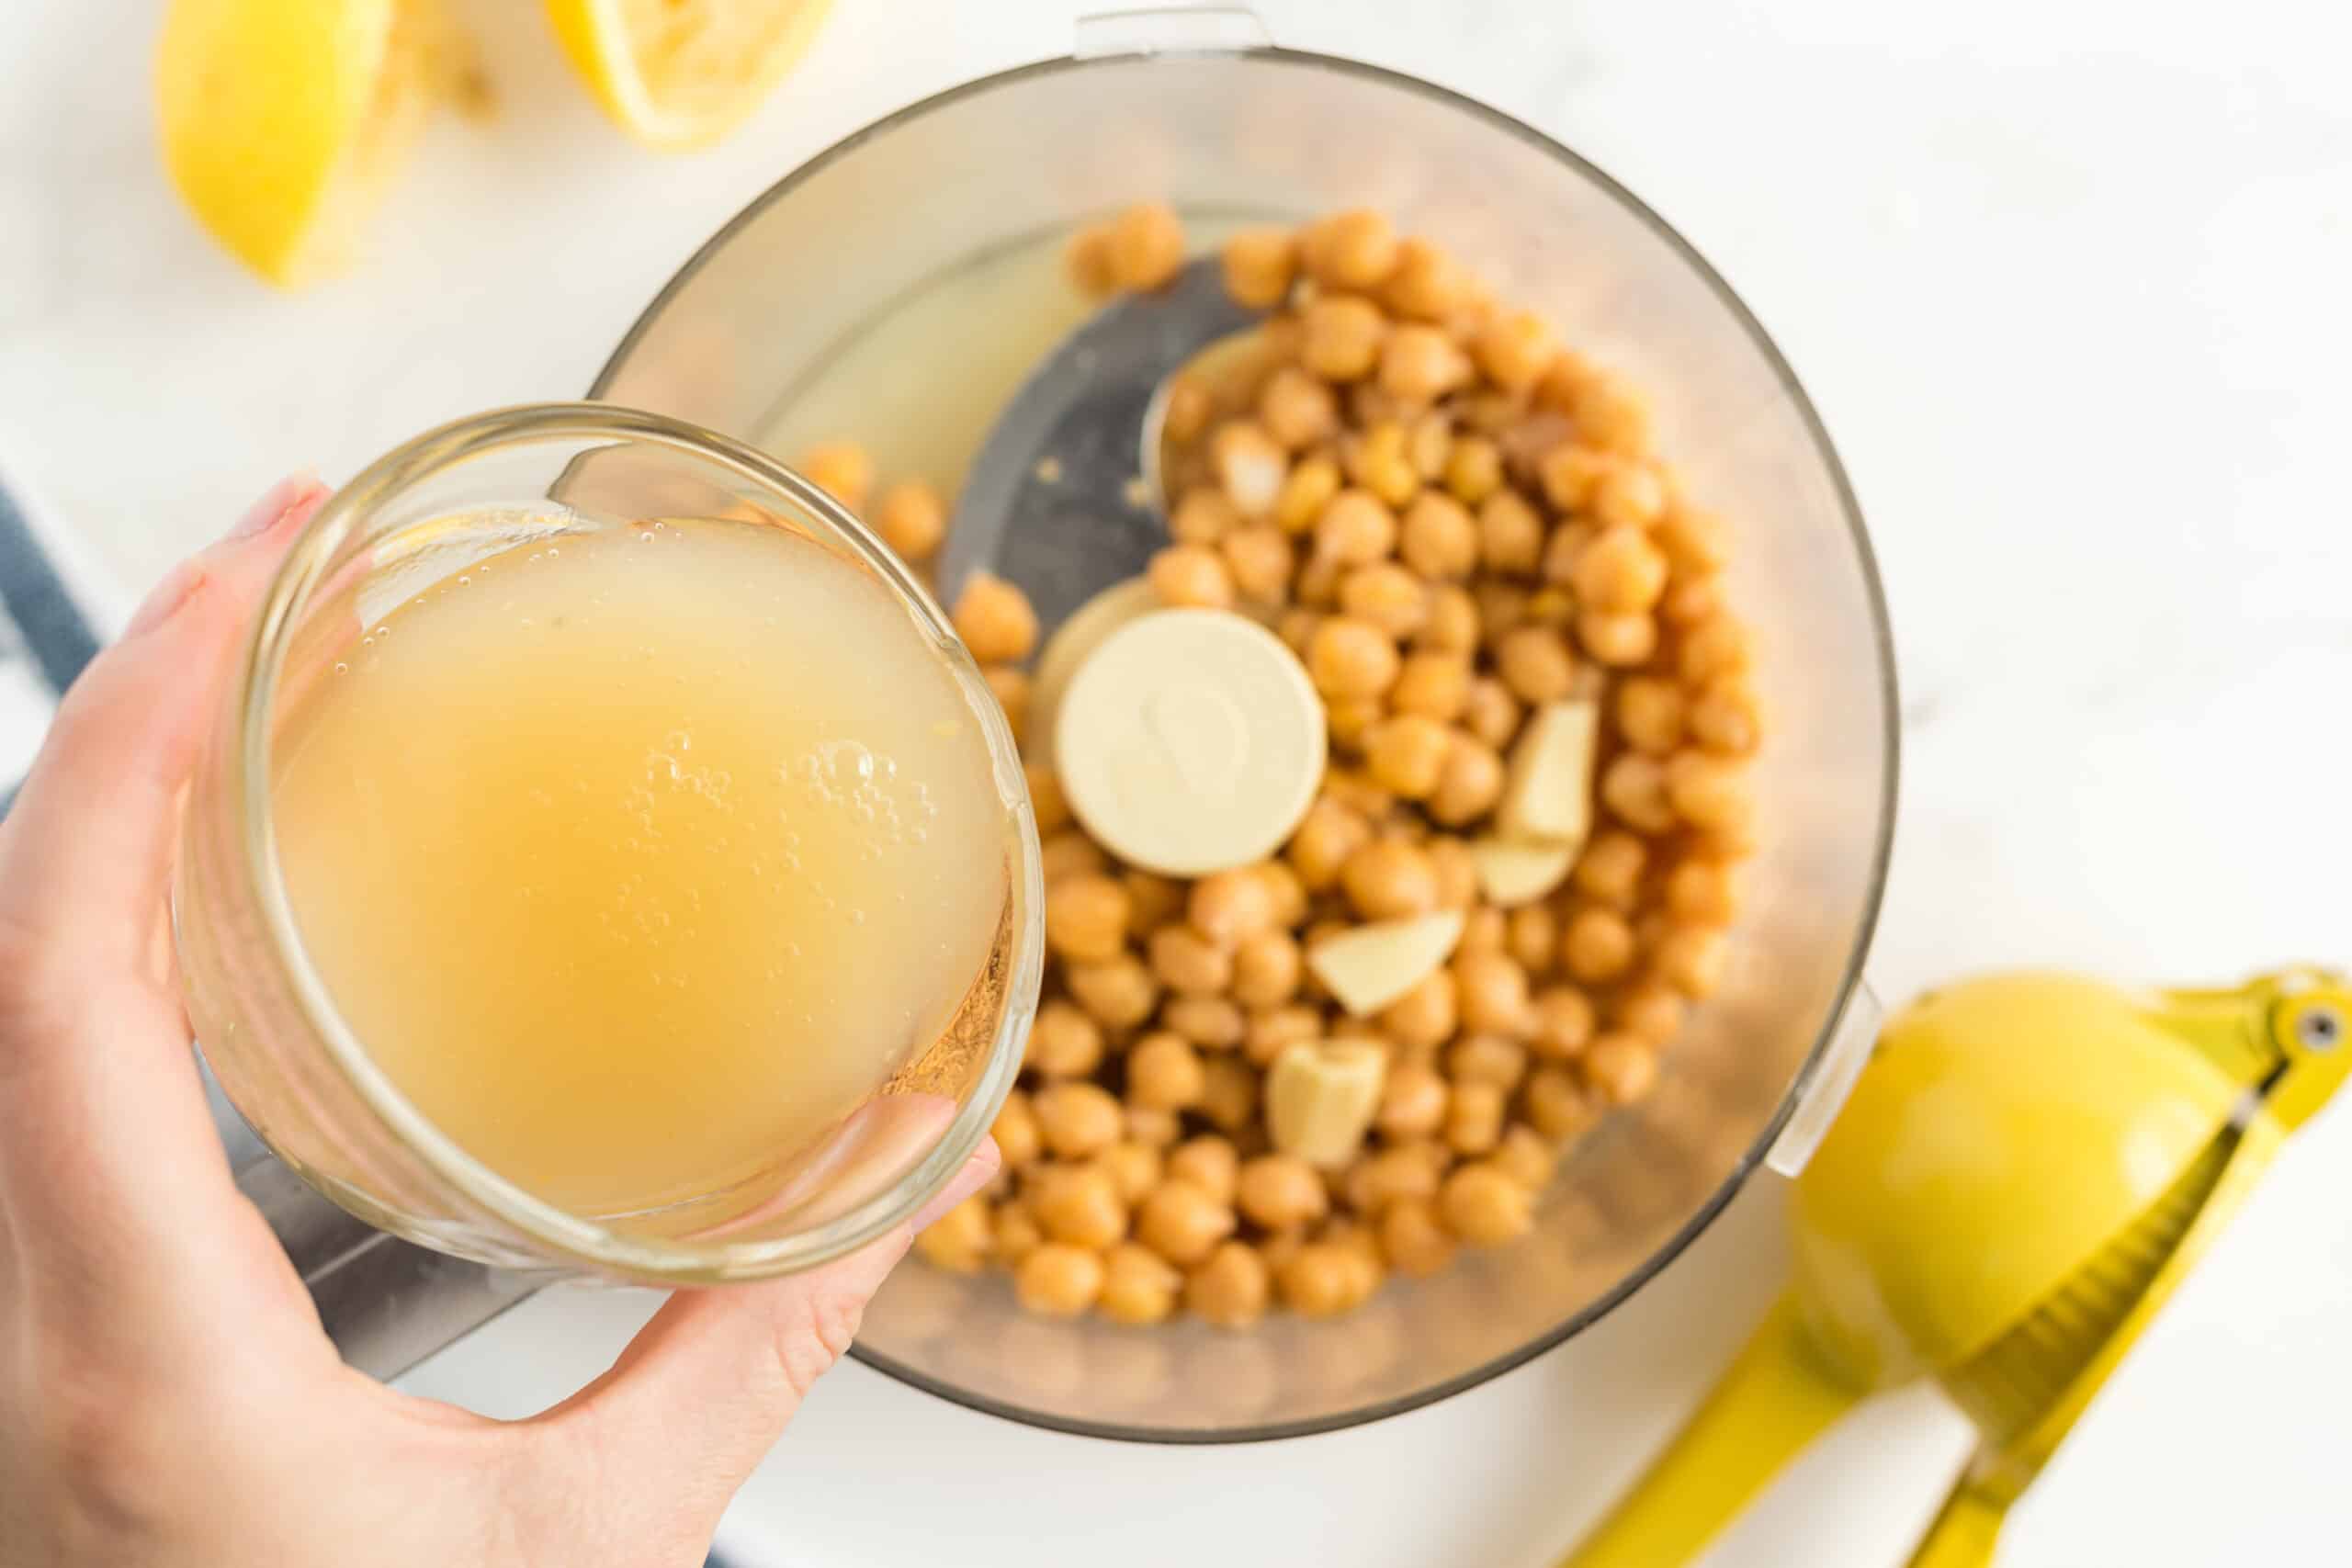
Step 2: Blend until your hummus is creamy and smooth. Add the additional 1/4 cup of liquid if needed to make it creamier.

Oil-Free Hummus

Step 3: Taste the hummus and make adjustments, such as adding more liquid to make it creamier or more garlic and lemon juice for more flavor. Add salt if desired.

How Do You Make Creamy Hummus Without Oil or Tahini?

The key to making your hummus smooth is to use a good blender or food processor. You need the power to pulverize those chickpeas. I’ve found that using warm chickpeas breaks down better and makes the creamiest hummus. Of course, using enough liquid, whether it’s water or aquafaba, is important. Some people may think the added fat in oil or tahini is needed, but I can’t tell you from experience that you don’t need it.
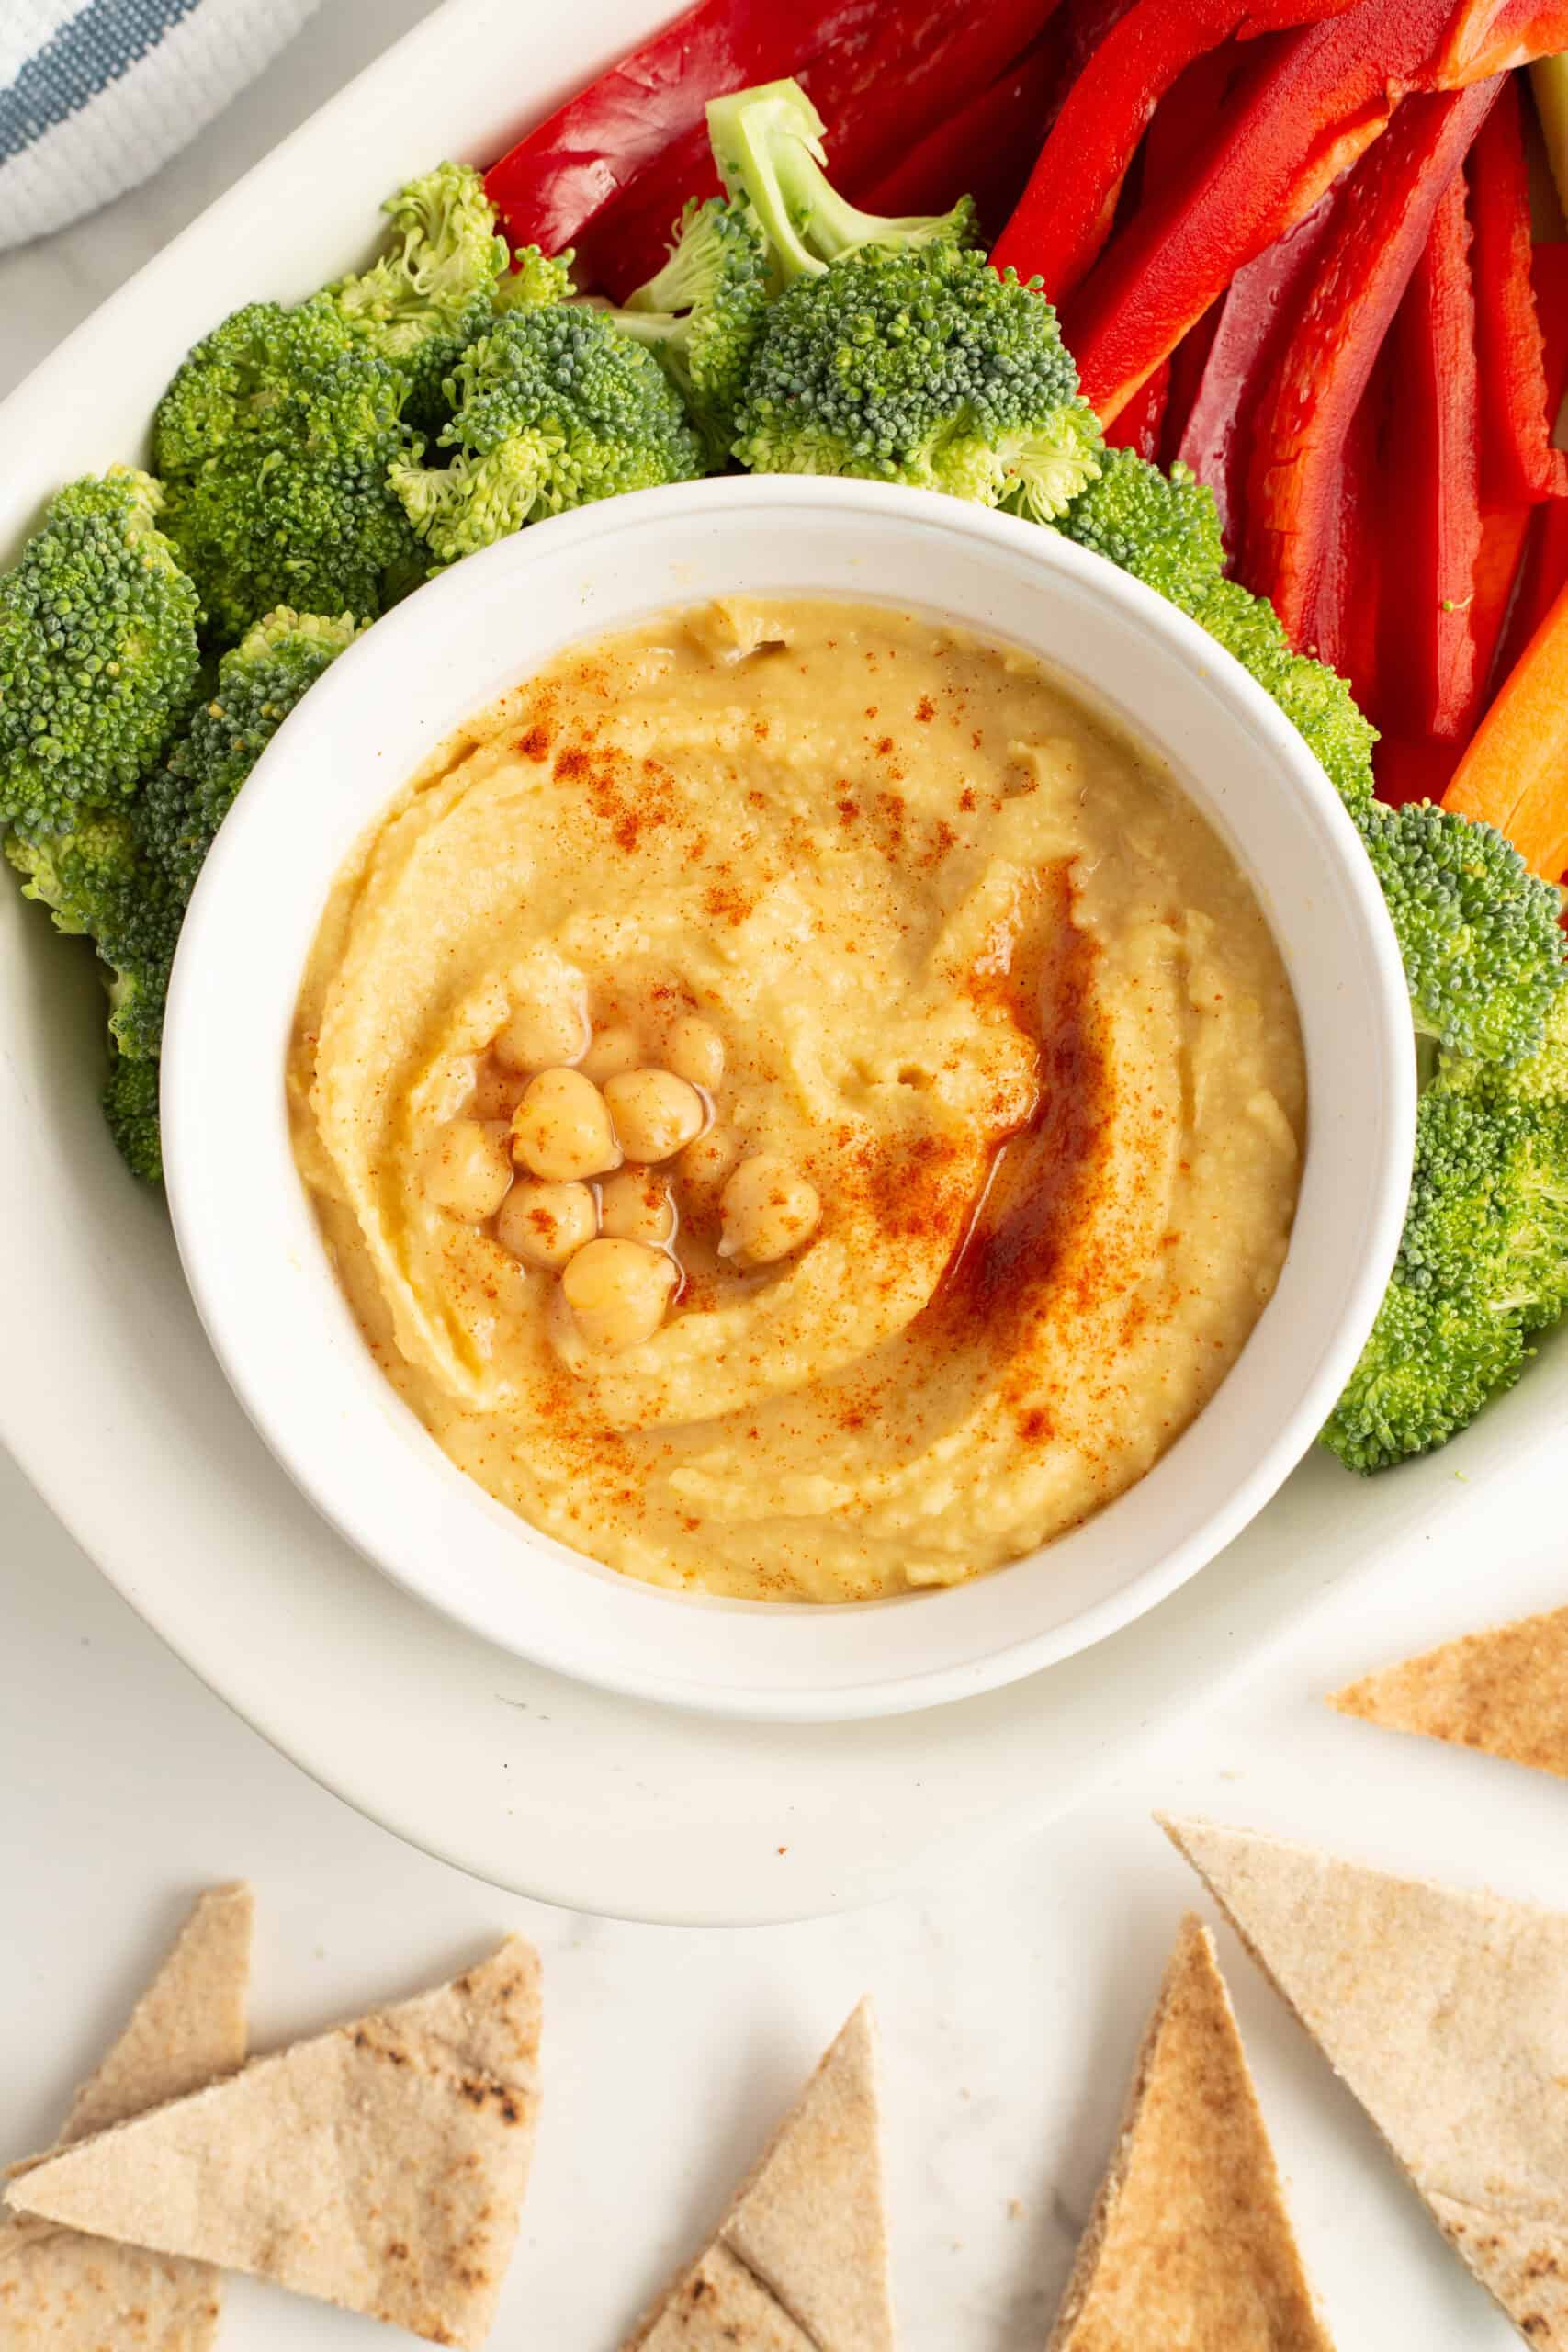
Homemade Hummus is Easy

When it comes to cooking, hummus is one of the easiest things there is. You don’t really need to cook and you only need a few ingredients. This time, I used canned chickpeas but when I’m batch cooking, I’ll make a big batch of chickpeas so I can make hummus, have chickpeas for Chickpea Nuggets and leftovers to add to salads.

You do need a high-speed blender or food processor. I’ve used both with good results. I’ve had this Hamilton Beach 10 cup food processor for 8 years and it still works great. I also have a Blendtec blender that we got many years ago at Costco. I’ve made countless sauces and dips in these two.

Choosing Chickpeas

My favorite chickpeas, a.k.a. garbanzo beans, come from Palouse Brand. They are non-GMO and USA grown. In fact, you are given the field location and harvest date. They are the best chickpeas I’ve ever eaten.

When I’m out of Palouse Brand, or when I don’t have time to cook up a batch in my Instant Pot, I’ll use canned chickpeas. Whichever you choose to use, don’t toss out the liquid that comes with the chickpeas; you’ll use it.
Oil-Free Hummus

Easy Ways to Use Hummus

Hummus is one of my favorite foods to keep ready in the refrigerator because it can become part of a meal or snack without much planning.

Try it:

  • as a dip for carrots, cucumbers, bell peppers or other vegetables
  • spread on sandwiches instead of mayo
  • inside wraps with vegetables
  • with pita or crackers
  • added to a grain or veggie bowl
  • as an easy after-school snack
  • packed in a lunch box with vegetables and crackers

For family meals, I especially like foods like hummus that everyone can use differently. Put out hummus, vegetables, wraps and a few other fillings, and everyone can build their own meal.

If you like this recipe, make sure to try:

  • Cilantro Jalapeno Hummus
  • Spinach Artichoke Dip
  • Red Pepper Dip

Frequently Asked Questions

How Long Does Homemade Hummus Last?

I try to use it within 5 days, but I’ve stretched it to 7 days.

How do I store hummus?

I store homemade hummus in a glass bowl with a lid in the refrigerator.

Can I freeze hummus?

Yes, you can freeze hummus. The texture will change a bit when you defrost it. For best results, thaw it in the refrigerator, warm it slightly and stir well. You can re-blend it if stirring doesn’t fix the texture.

Can I use dried chickpeas?

Yes, but I recommend soaking them and cooking them the day before you make your hummus. Chickpeas have a long cooking time. I cook them in the Instant Pot with great success.

Can I make hummus without garlic?

Yes, you can make hummus without garlic, but I recommend adding more herbs or spices.

Can I use lime instead of lemon?

Yes, you can use lime juice and or zest instead of lemon.

Why isn’t my hummus creamy?

Make sure your chickpeas are cooked completely before making hummus. You probably need to add more liquid and blend them longer. Make sure you scrape the sides of your blender or food processor throughout the process. Warm chickpeas blend better than cold chickpeas. Warm them up first fir best results.

Can I use water instead of aquafaba?

If you forget to save the water you get when cooking chickpeas or the water that comes in the can, you can use regular water.

Can I add roasted peppers to my hummus?

Yes, roasted peppers are great in hummus. They do contain moisture, so you may want to scale back on the other liquid you add to the blender.

Oil-Free Hummus

Oil-Free Hummus
4.3 Stars (107 Reviews)

This easy oil-free hummus is made without tahini using chickpeas and simple pantry ingredients. It's an inexpensive, family-friendly dip or spread that's perfect for snacks, lunches, wraps and quick plant-based meals.

Prep Time 10 minutes
Total Time 10 minutes

Ingredients

  • 1 15 oz can of chickpeas (or 2 cups of cooked chickpeas), reserve the liquid
  • 4 cloves of garlic
  • 1 lemon, or 1/4 cup lemon juice
  • 1/4 to 1/2 cup of chickpea liquid
  • salt to taste, optional
  • paprika for garnish, optional

Instructions

  1. Pour your chickpeas into your blender or food processor. Save the liquid to use soon.
  2. Add your garlic and lemon juice. If your lemon isn’t juicy enough for 1/4 cup of lemon juice, you may want to add another lemon or some lemon zest to give it more flavor.
  3. Add 1/4 cup of the chickpea liquid, this is also known as aqua faba and some people whip it like eggs to make vegan meringues and other interesting dishes.
  4. Add optional salt if using.
  5. Blend or process until your hummus is creamy and smooth. If it’s not smooth enough, add another 1/4 cup of chickpea liquid and blend again.
  6. Pour into a bowl and garnish if desired. Enjoy with veggies, on sandwiches or any other thing you think of.

Notes

Use this hummus as a salad dressing or a sandwich spread. It’s so versatile and filling. Plus, this recipe is lower in fat with no oil or tahini so you don’t have to worry about over eating it.

Recommended Products

As an Amazon Associate and member of other affiliate programs, I earn from qualifying purchases.
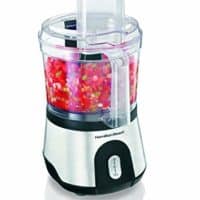
  • Hamilton Beach 10-Cup Food Processor 
    Hamilton Beach 10-Cup Food Processor 

Did you make this recipe?

We'd love to see it! Tag us and use #MyPlantBasedFamily!

© Holly Yzquierdo
Category: Sauces, Dips, and Salad Dressings

Filed Under: Daniel Fast Recipes, Recipes, Sauces, Dips, and Salad Dressings Tagged With: Plant Based Diet, Recipes

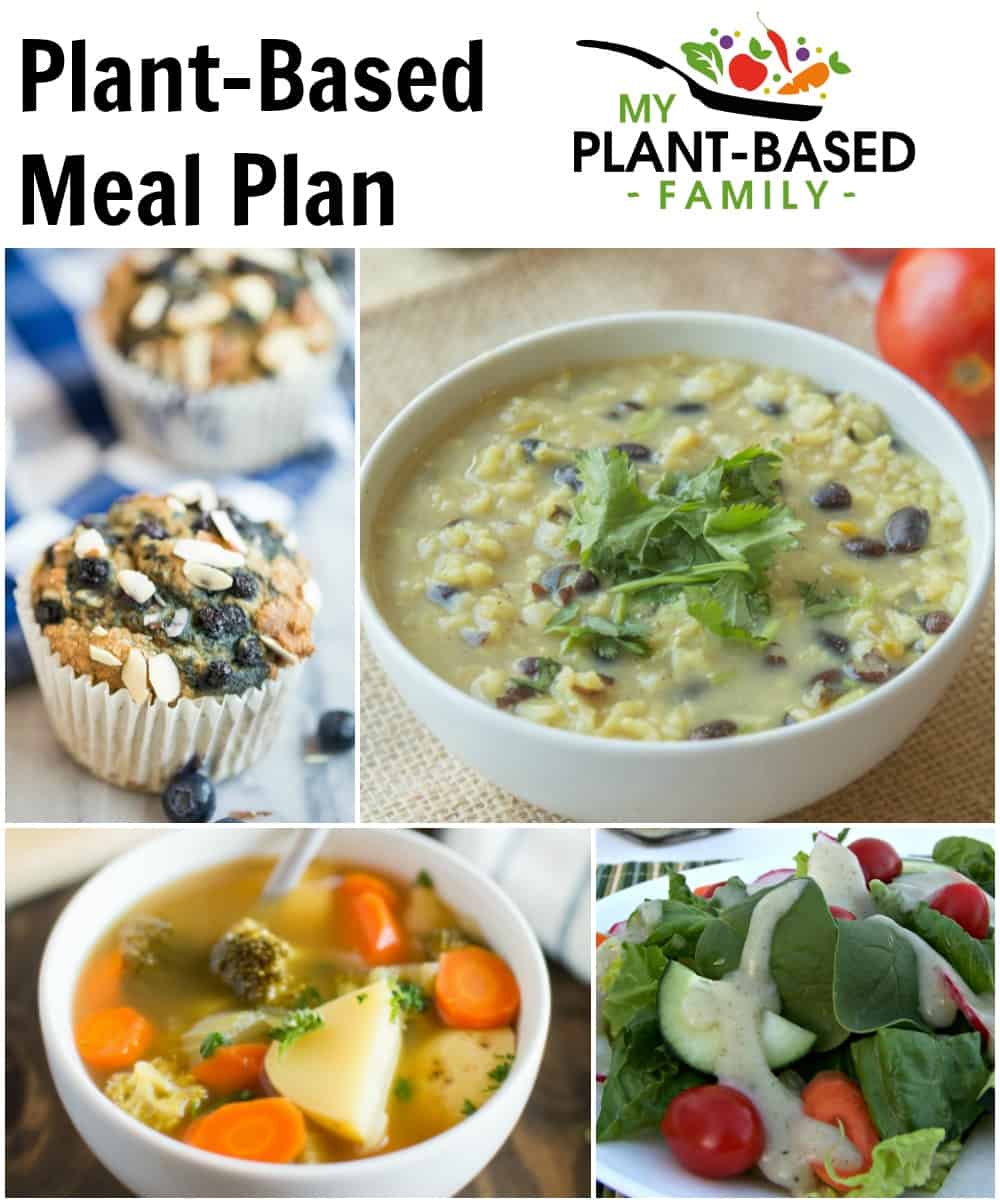
Plant-Based Meal Plan

April 8, 2019 by Holly Yzquierdo 2 Comments

Plant-Based Meal Plan

Another week, another plant-based meal plan! Following a meal plan decreases meal time stress because I know that I’m going to eat and have all the ingredients!

Plant-Based Meal Plan

This page contains affiliate links.

If you get my weekly plant-based tips email, you know I started sending them again last weekend. I have received so many responses! I want to thank all of you for your love and support! I’ve still got some emails left to respond to but I’m working on it! If you didn’t get the email, you can sign up and you will start getting them next Saturday.

Yesterday I went to a local farmers market and bought a bunch of organic spinach and lettuce! I’m determined to enjoy every leaf and not let any go to waste. I’ll incorporate plenty of salads in the meal plan this week. Soup and Salad meals are a great way to do it!

I’m also working on eating through my pantry storage. I have so many beans, grains, pasta, etc. that I really need to use.

Plant-Based Meal Plan

Monday

Breakfast: Overnight Oats

Lunch: Big Salad

Dinner: Green Chili Cilantro and Lime Soup

Tuesday

Breakfast: Instant Pot Oatmeal

Lunch: Leftover Soup and Salad

Dinner: Instant Pot Mexican Casserole

Wednesday

Breakfast: Blueberry Muffins

Lunch: Burritos with leftover Mexican Casserole inside

Dinner: One Pot Broccoli and Rice (My husband requests this every week!)

Thursday

Breakfast: Smoothies and leftover muffins

Lunch: Veggie Sandwich

Dinner: Pizza Pasta with salad and Sweet and Tangy Salad Dressing

Friday

Breakfast: Toast with peanut butter and fruit

Lunch: Leftovers

Dinner: Broccoli Potato Soup in the Instant Pot and side salad

Plant-Based Snacks

A reader requested plant-based snacks too. We typically stick to easy stuff for snacks like fresh fruit, veggies and hummus and popcorn.

  • Freshly cut melon
  • Apple slices with peanut butter (add a piece of toast if you are really hungry)
  • Popcorn (I make it in this)
  • Carrots and hummus
  • Muffins or Banana Bread
  • Smoothies

What are you eating this week?

Filed Under: Meal Plan Monday, Meal Plans 2019 Tagged With: Meal Plan Monday, Menu Plan, Plant Based Diet, Vegan

Plant-Based Meal Plan and More!

April 1, 2019 by Holly Yzquierdo 1 Comment

Plant-Based Meal Plan

Are you ready for the week? I’m not mentally prepared yet, but I’ve already created my plant-based meal plan for the week.

Plant-Based Meal Plan

Over the weekend I did some meal prep for a birthday party and thankfully we have leftovers and a well stocked fridge and pantry. I made my Instant Pot Refried Beans and a quicker version of my Mexican Rice. I’ll either share a new recipe or update the old recipe with the changes soon. Having beans and rice in the fridge makes meals come together quickly!

When I started blogging again once my son was a year into treatment, I asked what type of recipes everyone wanted and overwhelmingly it was quick and easy recipes. I’ve been working on creating new recipes and remaking old ones so they are easier for busy families.

Quick and Easy Plant-Based Recipes

In fact, I made you a little gift for those of you who subscribe to my weekly emails! You can download my favorite quick and easy recipes if you are a subscriber. I’ve taken some time off from these emails but they are starting back up THIS WEEK! Don’t worry, you can still sign up and get my favorite quick and easy recipes and a weekly email from me with easy, actionable plant-based tips!

Sign up to get Quick and Easy Plant-Based Recipes plus free weekly tips! https://pages.convertkit.com/24e92386c0/c521864834Click to Tweet

These days, my favorite meals are ready in less than 30 minutes. If it’s going to be longer than that, it needs to be “hands off” time, like in the Instant Pot or oven.

For breakfast, I prefer super quick. We normally have oatmeal, cereal or toast. I usually skip breakfast with the kids and have a mid-morning smoothie after they are in school.

My husband and I both eat leftovers for lunch. We like warm meals. He has already requested my One Pot Broccoli Rice recipe that I shared last week! I’m happy with beans and rice, but big salads or sandwiches are good too.

Our dinners are mostly quick and easy. Once or twice a week I might make something that takes longer, especially when I’m testing new recipes or tweaking recipes to get it just right.

Plant-Based Meal Plan

Monday

Breakfast: Instant Pot Oatmeal and Smoothies

Lunch: Taco Salad

Dinner: One Pot Broccoli and Rice

Tuesday

Breakfast: Banana Nut Oatmeal

Lunch: Leftover Broccoli Rice

Dinner: Busy Night Pasta and side salad and Creamy Italian Salad Dressing (oil-free)

Wednesday

Breakfast: Overnight Oats or Smoothies

Lunch: Leftover pasta

Dinner: Oil-Free Fried Rice and Pineapple and Tofu Kabobs

Thursday

Breakfast: Instant Pot Oatmeal

Lunch: leftovers

Dinner: Breakfast for Dinner! Breakfast Hash, Tofu Scramble and fresh fruit

Friday

Breakfast: Leftover Breakfast Hash

Lunch: Beans and Rice

Dinner: Pizza Pasta

Do you know what you will be eating this week?

If not, don’t forget to claim your gift and download my Quick and Easy Recipes that are ready in 30 minutes or less!

Filed Under: Meal Plan Monday, Meal Plans 2019 Tagged With: Meal Plan Monday, Meal Plans, Plant Based Diet

Vegan Broccoli and Rice Skillet

March 29, 2019 by Holly Yzquierdo 42 Comments

One Pot Broccoli and Rice

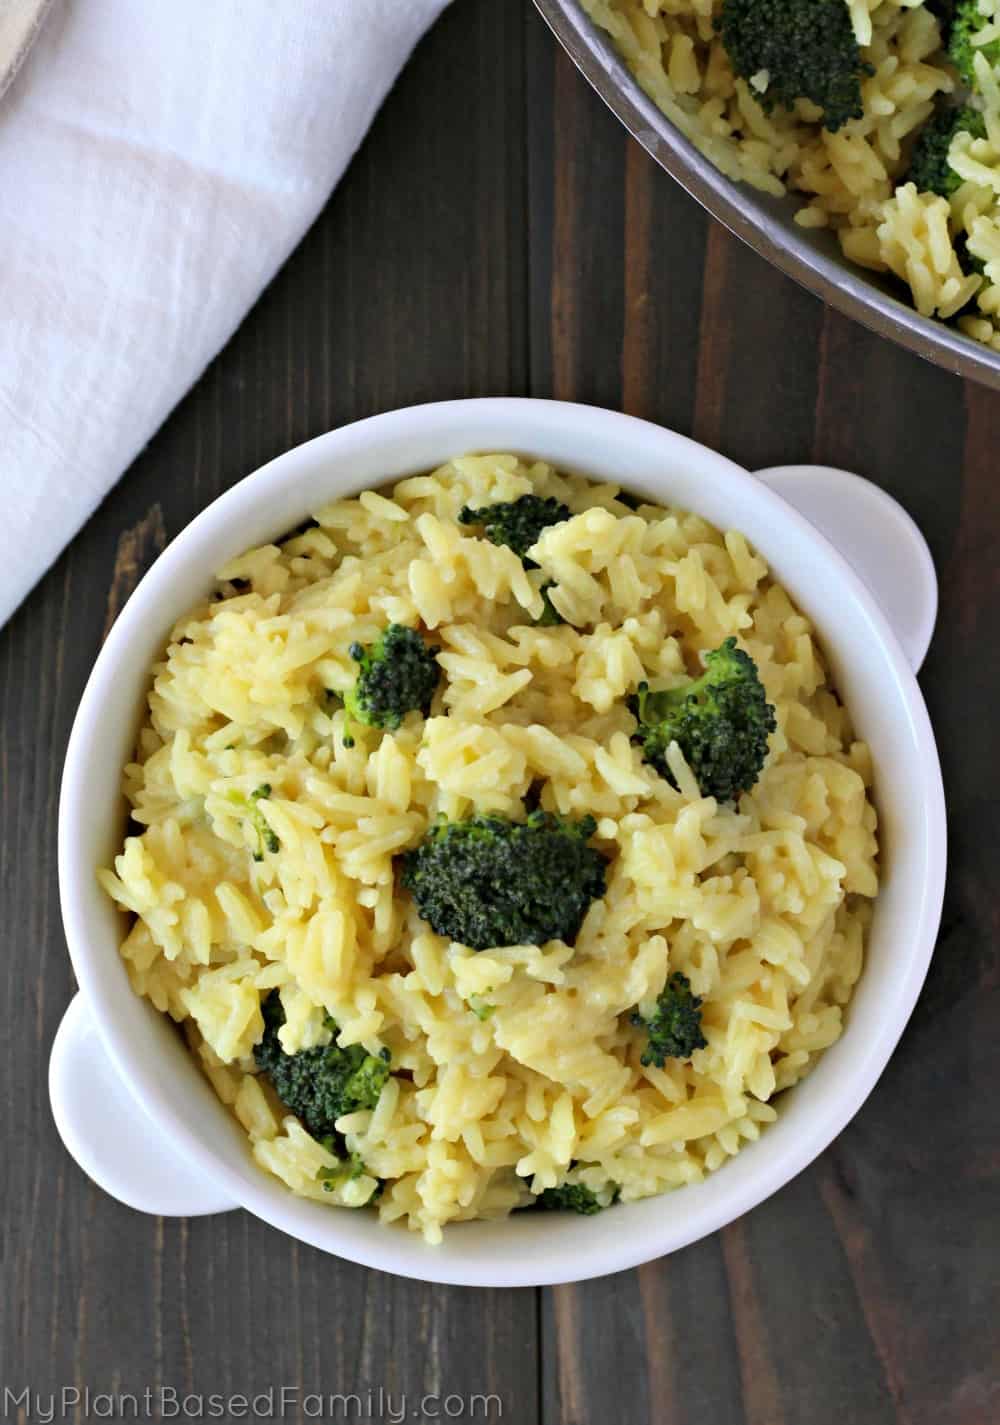
This Vegan Broccoli and Rice Skillet is an easy one-pan dinner made with simple, budget-friendly ingredients. Everything cooks together in one skillet, making it a great plant-based meal for busy weeknights.

Broccoli and rice has been a longtime favorite in our house. In fact, I’ve made several versions over the years, including a Crock Pot version. This one-pot version is the one to make when you need dinner on the table quickly.

My husband also likes taking leftovers to work, so this is one of those meals that can cover dinner and the next day’s lunch at the same time.

One Pot Broccoli and Rice

Why You’ll Love This Broccoli and Rice Recipe

This Vegan Broccoli and Rice Skillet is made for busy nights. It cooks in one skillet in less than 30 minutes, uses simple ingredients, and doesn’t leave you with a sink full of dishes. The creamy rice and tender broccoli make it a comforting family dinner that’s easy to get on the table.

This is actually the third version of Broccoli and Rice I’ve shared! In my original Broccoli and Rice Casserole, the rice, sauce, and broccoli are cooked separately and then combined. It’s not difficult—and I still love the flavor—but it makes a lot of dishes.

My second version is a Crock Pot Cheesy Broccoli and Rice Casserole. It’s really easy and mostly hands-off, but it takes several hours to cook. I also make Broccoli and Rice in the Instant Pot, although I haven’t shared that version yet.

For this skillet version, I wanted something I could make fast. The biggest change was switching from brown rice to jasmine rice. Brown rice can take about 45 minutes to cook on the stove, while jasmine rice cooks much faster. That simple change helped turn one of our favorite broccoli and rice combinations into a weeknight meal I can have ready in less than half an hour.

Ingredients You’ll Need

Rice: We use jasmine rice for this recipe because it cooks quickly and pairs well with the other ingredients.

Broccoli: We use fresh broccoli. One head of broccoli is usually close to the three cups we need.

Plant-based milk: We use unsweetened almond milk but any unflavored and unsweet plant-based milk should work.

Nutritional yeast: This gives the dish its cheesy/savory flavor.

Spices: Salt, onion powder and garlic powder are pantry staples I use in almost every savory dish.

This recipe makes 4 servings when eaten as a main dish. It reheats well, my husband always takes the leftovers to work for lunch and heats it up in the microwave.

How to Make Broccoli and Rice

Ingredients

  • 3 1/2 cups water
  • 2 cups Jasmine rice
  • 1/2 cup nutritional yeast
  • 1 teaspoon onion powder
  • 1/2 teaspoon salt
  • 1/2 teaspoon garlic powder
  • 1 cup plant-based milk, I used unsweetened rice milk
  • 3 cups chopped broccoli

Instructions

Step 1 – Boil Water

In a skillet with a lid, bring your water to a boil.

Step 2 – Simmer Rice and Seasonings

Add rice and seasoning and stir well. Turn the heat down to a low simmer and cover with a lid.

Step 3 – Cook

Cook for 10 minutes.

Step 4 – Add Plant Milk

Stir well, and add 1 cup of plant-milk and all your broccoli. Cover with the lid. If you feel like it’s too dry, you can add 1/2 a cup of water.

Step 5 – Cook Again

Cook for 5-10 minutes or until broccoli is tender. I cooked for 5 and needed a couple more minutes, it will depend on your heat and the size of your broccoli.

Tips for Making Broccoli and Rice

  • Adjusting Consistency: If you prefer a creamier dish, you can add an extra splash of plant milk at the end. This can give the dish a more risotto-like texture.
  • Adding Other Vegetables: This recipe is very versatile, so feel free to toss in other quick-cooking vegetables like peas, spinach, or diced bell peppers.
  • Using Brown Rice: If you prefer brown rice, note that it will require a longer cooking time and additional water. Brown rice takes roughly 30-40 minutes to cook, so you may need to adjust the timing and check periodically.
  • Amping Up Protein: To increase the protein content, consider adding some chickpeas or tofu cubes to the dish during the final cooking stage. Both would soak up the flavors nicely and make the dish even heartier.

Serving Suggestions

This one-pot Broccoli and Rice recipe is great as a main dish, but it can also serve as a versatile side. Here are a few ideas for serving:

  1. Main Course: Serve it in a bowl with a sprinkle of extra nutritional yeast or a dash of hot sauce for a little kick.
  2. Side Dish: Pair it with a vegan protein source, such as grilled tempeh, roasted tofu, or a chickpea patty, to make a complete meal.
  3. Meal Prep Option: Portion it out into containers for easy, grab-and-go lunches. This dish stores well in the fridge for 3-4 days, so it’s ideal for meal prepping.

Storing and Reheating

  • Refrigerate: Store leftovers in an airtight container in the fridge for up to 4 days. The flavors deepen as it sits, so it can taste even better the next day.
  • Reheat: To reheat, simply add a splash of plant milk or water to prevent it from drying out, then warm in the microwave or on the stovetop over low heat.

More Plant Based Meal Ideas

If you like this quick and easy recipe, try these plant based dinner ideas too:

  • Easy Ramen Stir Fry
  • Grilled Portobello Mushroom Burger
  • Vegan Pad Thai in Less Than 30 Minutes
  • Easy Vegan Sweet Potato Curry
  • Instant Pot Mexican Quinoa

Frequently Asked Questions

Can I use frozen broccoli instead of fresh broccoli?

Yes, you can substitute frozen broccoli for the fresh broccoli. It may take a little extra time since it will have to defrost and then be cooked. I recommend adding it earlier in the process. It will also generate more liquid, and the final texture will not be as firm as using fresh broccoli.

Can I use brown rice instead of jasmine rice?

Yes, but brown rice takes 45 minutes took cook. You will need to make adjustments to the recipe.
If using brown rice, I recommend using 2 cups of brown rice and 2 cups of water. Add the spices as the recipe recommends, and cook for 40 minutes. Then stir in the remaining broccoli and plant-based milk and cook for another 5-10 minutes.

Should I wash my rice first?

If you prefer washed rice, go ahead and wash it first. We usually skip that step when making rice.

Can I freeze leftovers?

I don’t recommend freezing this dish.

What plant-based milks can I use?

I recommend you use your favorite unsweetened plant-based milk. We use unsweetened almond milk, but we used rice milk for years.

Can I make this without nutritional yeast?

You can make this without nutritional yeast, but that is where the bulk of the flavor comes from. If you choose not to use the yeast, I recommend using a strong vegetable stock as well as more veggies like onions, carrots, garlic, etc. It will be very bland without the nutritional yeast.

My rice isn’t cooked, but the liquid is gone. What do I do?

If everything was measured correctly, then you are losing a lot of liquid to evaporation. Turn the heat down to a low simmer and cover the skillet with a lid. If the temperature is low enough, you shouldn’t have to worry about boiling over.
To save the recipe, add more water and watch the skillet closely.

This recipe is done cooking but it seems too wet. What should I do?

If the rice is soft, and completely cooked, you’ll want to give it a good stir and let it rest uncovered. After 5-10 minutes stir it again and your problem is probably solved.

My rice is mushy? Can I fix it?

Once rice is mushy, it’s going to stay that way. Next time, you can pre-wash your rice to remove excess starch, use a little less liquid, and cook it at a lower simmer. Be careful not to overcook it.

My rice is stuck to the bottom of my pan. Is it ruined?

You can probably still save your dinner. If the rice is stuck but not burned, let it rest on the stove uncovered for 5-10 minutes. After the resting period, you may be able to stir it or at least use a spatula to serve it. Some pans are “stickier” than others. It’s trial and error to get it just right. I normally use an aluminum skillet for this recipe. When the rice sticks, I can always unstick it after it rests.

Yield: 4 servings

One-Pot Vegan Broccoli and Rice

One Pot Broccoli and Rice
4.6 Stars (20 Reviews)

This easy one-pot vegan broccoli and rice is an oil-free family dinner made with simple, budget-friendly ingredients and minimal cleanup.

Prep Time 5 minutes
Cook Time 20 minutes
Total Time 25 minutes

Ingredients

  • 3 1/2 cups water
  • 2 cups Jasmine rice
  • 1/2 cup nutritional yeast
  • 1 teaspoon onion powder
  • 1/2 teaspoon salt
  • 1/2 teaspoon garlic powder
  • 1 cup plant-based milk, I used unsweetened rice milk
  • 3 cups chopped broccoli

Instructions

  1. In a skillet with a lid, bring your water to a boil.
  2. Add rice and seasoning and stir well. Turn the heat down to a low simmer and cover with a lid.
  3. Cook for 10 minutes.
  4. Stir well, and add 1 cup of plant-milk and all your broccoli. Cover with the lid. If you feel like it’s too dry, you can add 1/2 a cup of water.
  5. Cook for 5-10 minutes or until broccoli is tender. I cooked for 5 and needed a couple more minutes, it will depend on your heat and the size of your broccoli.

Did you make this recipe?

We'd love to see it! Tag us and use #MyPlantBasedFamily!

© Holly Yzquierdo
Category: Recipes

Filed Under: Main Dish Recipes, Recipes, Side Dishes Tagged With: Plant Based Diet, Recipes, Vegan

New Plant-Based Meal Plan

March 25, 2019 by Holly Yzquierdo Leave a Comment

Plant-Based Meal Plan

Do you need plant-based meal plan inspiration? You aren’t alone! That’s why I created these plant-based meal plans each week!

Plant-Based Meal Plan

This week, we will have a mix of make-ahead meals and others that will serve as lunch time leftovers.

Also this week, I’ve revived the My Plant-Based Family Facebook Group! I stopped accepting new members when my son was sick but we are open again! Feel free to join! We will have some free group challenges soon!

I’ve been creating new recipes and spending more time sharing on Instagram! If you make any of my recipes, share on Instagram and tag me and use #MyPlantBasedFamily! I’d love to see what you are making.

Our breakfasts are usually quick and easy, I might cook something more complicated one day a week or so. Lunches are usually leftovers from the previous night’s dinner or something that was meal prepped. Dinners usually take a bit more time. At least half of the week, I make something quick and easy, if a recipe takes about an hour or more, I expect to have plenty of leftovers.

NEW Plant-Based Meal Plan

Monday

Breakfast: Overnight Oats

Lunch: Mediterranean Bowl (Can you tell it’s my favorite lately?)

Dinner: Lentil Tacos, Mexican Rice, Refried Beans

Tuesday

Breakfast: Breakfast Hash

Lunch: Taco Salad using dinner leftovers

Dinner: Spaghetti, steamed veggies, and salad


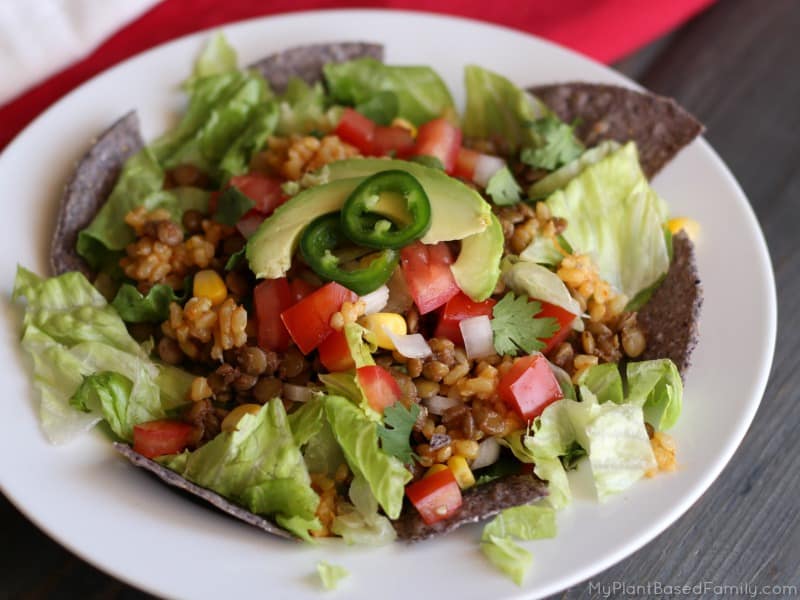
This Plant-Based Taco Salad is a family favorite. Choose your favorite ingredients and customize your taco salad to your tastes.

Wednesday

Breakfast: Smoothie Bowl or Smoothie

Lunch: Burritos using leftover Refried Beans

Dinner: New Lentil Veggie Soup Recipe Coming Soon

Thursday

Breakfast: Banana Nut Oatmeal (Instant Pot and Stove top directions)

Lunch: Soup and Salad or Sandwich

Dinner: New version of my Broccoli and Rice Casserole! This one is ready in 20 minutes!

Stove Top Broccoli and Rice

Friday

Breakfast: Overnight Oats

Lunch: Leftover Broccoli and Rice

Dinner: Chickpea Nuggets, Mashed Potatoes and Brown Gravy

There it is, our meal plan for the week. I hope it will provide you with inspiration as you create your own meal plan!

By the way, did you know I create Custom Meal Plans? If you have dietary restrictions or just don’t know what to eat, I can create a meal plan designed just for you.

What are you eating this week? Any new recipes?

Filed Under: Meal Plan Monday, Meal Plans 2019 Tagged With: Meal Plan Monday, Plant Based Diet

Keep Produce Fresh

March 22, 2019 by Holly Yzquierdo 5 Comments

Keep Produce Fresh

Do you ever buy a lot of produce and have it go bad before you can eat it? This used to happen all the time to me! Through research, trial and error, I found some tips to keep produce fresh longer!

Keep Produce Fresh

This page contains affiliate links.

We’ve adopted a new habit of washing our produce as soon as we get home from the store. It’s a little bit of work upfront but I save that time later when I’m cooking and every time my kids want an apple.

We used to be a little more lax about washing produce. I would usually do it but the rest of our family wasn’t as consistent. Then our son was diagnosed with cancer and it became a real concern. It should have been already.

Every year we hear about produce that is contaminated with e.coli, listeria, and other nasty things. It’s important to wash your produce every time!

Interesting fact, people with compromised immune systems (pregnant women, people with cancer, etc.) are discouraged from eating processed fruits, veggies, salads, etc. because there is such a high risk of contamination in those products.

There are other things on produce we want to clean off as well like pesticides and waxes.

Now, we wash all our produce before use, most of it is washed as soon as we get in the door.

Does your produce go bad before you can eat it? These tips will help keep your produce fresh.

Washing Fresh Produce

For most of our produce like apples, peaches, plums, broccoli, cucumbers, tomatoes, citrus, melons,  etc. I give them a sink bath.

I thoroughly clean my sink, fill one side with cold water and sprinkle baking soda in the water and mix it with my hand. I don’t measure but I probably use 2-3 tablespoons of baking soda. When I use more water, I use more baking soda, less water…less baking soda.

Then I add my produce, all mixed together, into the sink bath. I set a timer, because I always forget, and let them soak for 15 minutes. Then I rinse them off with cold water and stick them in my dish drainer.

If something is especially dirty, I use my veggie brush to give them a good scrub.

Washing Berries

Berries require a different method of cleaning. My son could eat his weight in berries! When we have them, he will easily eat pounds of them every day! When possible we buy in bulk. If you buy in bulk, or even just small amounts that may sit in the fridge for a few days, I recommend you inspect them closely. One moldy berry will ruin the whole bunch quickly.

Washing berries is one way to inspect all our berries. The moisture can make them spoil faster so if you will not be eating them quickly, you may want to wait until just before eating to wash.

Rinsing berries under cold water will clean them. My friend Sarah at Never Free Farm gave me a great tip for berries. She fills a small basin with cold and 1/4 cup of apple cider vinegar. Then soaks up to two pounds of berries for 5 to 10 minutes. If you don’t know Sarah, follow her, you’ll be impressed!

Washing Mushrooms

There are different schools of thought on washing mushrooms. Some people just wipe them with a damp cloth. Others use a special mushroom brush. I usually rinse them just before using and carefully dry them off.

Produce Storage Containers

While foods that are stored whole like melons and apples don’t need special containers. I’ve found a few inexpensive containers that have done wonders for keeping cut food fresh longer.

Containers like these Rubbermaid Freshworks keep produce from spoiling for much longer. I have the older model but the old ones don’t have as many size options. Read the reviews and you’ll see why I love them! Containers like this make it easier to keep cut veggies ready for quick meals like this Plant-Based Mediterranean Bowl.

I use these for cut cucumbers, bell peppers, carrots and sometimes fruit, like freshly cut pineapple. Many of the reviews mention people putting whole fruits in them, including berries. Berries never last long enough at my house. Most get eaten while they are drying on the counter.

I don’t have a special container that is big enough for my lettuce. When washing my romaine, I give them a sink bath, pull all the leaves off and dry them individually. Then I store the whole leaves in a large container with paper towels on the bottom, a few layers of romaine leaves, another layer of paper towels, and so on. I’ve had romaine last for 2 weeks this way! 2 WEEKS!

A salad spinner works well too. If you want to avoid the waste of paper towels, you can store your washed lettuce in a salad spinner.

Where you live plays a big part in how you store produce too. Since I live in Arizona, it is hot most of the year. Some foods that are typically stored on the counter top have to be stored in the fridge when the temperatures get high. If you live somewhere colder, you may be able to keep most of your whole produce on your counters for a long time. Check out this seasonal produce chart specifically for Arizona!

What are your tips to keeping produce fresh? Do you have a special tool that you love?

Filed Under: How to, Tips for Plant-Based Living Tagged With: Plant Based Diet, Produce

« Previous Page
Next Page »

Primary Sidebar

Footer

Find it here!

Amazon Affiliate Disclosure

Holly Yzquierdo of My Plant-Based Family is a participant in the Amazon Services LLC Associates Program, an affiliate advertising program designed to provide a means for sites to earn advertising fees by advertising and linking to amazon.com.

Disclosures

Unauthorized use and/or duplication of any part of this website or content without express and written permission from Holly Yzquierdo is prohibited. Excerpts and links may be used, provided that full credit is given to Holly Yzquierdo and MyPlantBasedFamily.com with links to the original content.

More information on our Privacy Policy and other Disclosures are available.

Copyright © 2026 · Wellness Pro on Genesis Framework · WordPress · Log in